

Build Log: Wall-Desk Mk II
It’s been four years since I built my original Wall-Desk allowing me to ‘convert’ some pieces of tech into a kind of ‘furniture’. In the interim years, we have since moved into our own place with a much more dedicated office space. The wall-desk has held up really well but having used it all these years, there are some improvements I’d like to
Quick Links
Starting Point
The original Wall-Desk is still one of my most ambitious projects ever, encompassing a few different hobby sectors and by far and large, the desk is still, very effective. As such, I don’t really want to reinvent the desk so to speak.
The first catalyst for revisiting the wall-desk was actually when I built a pre-levelled platform to compensate for the severe sloping in my office: the unforeseen five-inch platform raised the altitude of my left/right cubbies and by proxy, raised the desk. While I got lucky with the connections at the floor (none of those were blocked by the platform), the new altitude of the desk sides meant that the desk top would now interfere with the wall-mounted keystones and speaker mounts that were attached to the wall (since the wall was not included in the five-inch platform).
The second catalyst came in the form of a new monitor purchase or rather the power brick that the monitor uses — there was no way I was going to be able to neatly mount that behind the monitors, so I needed to find a way to put that somewhere.
As a bare minimum, I probably could have gotten away with rebuilding the side cabinets to lower the altitude of the desk, but this was a good opportunity to revisit some enhancements.


Something cool to see is how my cheap RGB strip fared over the years; with some minor exceptions, I ran the RGB strip at 100% brightness on a single color (blue) for five years. That’s over 40,000 hours if you’re counting. The fact that my strip still turns on and provides something is kind of impressive; but it’s definitely earned it’s well-deserved retirement (or at least to be deployed with a different color). The strip is the Govee H6163 which I’m pretty sure if all kinds of discontinued now.


Goals and Objectives
I booked vacation time to work on this, so everything needed to be back up and running ‘enough’ by the time my vacation ran out. I had roughly two weeks to tackle this; I also didn’t want to ‘reinvent the desk’ so to speak: I wanted to reuse as much as I could from the existing desk.
As for the more specific considerations:
I wanted to be able to level my triple monitors more easily: when you look at the back side of a monitor to see where the VESA mounts are, some (most?) monitors have the mounting point in the dead center of the monitor. With a lot of cheaper monitors (like my side displays at the time), the mounting point sometimes shifts towards the bottom. This shift makes aligning monitors trickier (if you’re using fixed wall mounts). You can use a VESA slider to give yourself some vertical wiggle room, but this is tedious and annoying
The original wall supported 4x USB-A and 1x USB-C port integrated into it; I wanted to add a whole bunch more USB ports into my wall (without resorting to using hubs); this would allow my to support future PC upgrades
Based on how I used the wall over the last few years, I wanted to move where some of the connection points were on the desk. In particular
I wanted to run the networking down through the top of the faux wall; this would allow me to run the cables from my network rack up into the drop ceiling
I wanted to move the rear-speaker connections to the side of the wall, and higher up (to reduce the chaos in the corners)
The XLR connection for my microphone could be moved out of sight and routed to the side of the wall (where the boom arm is mounted)
I wanted to revisit how I was mounting the speakers to the wall as well
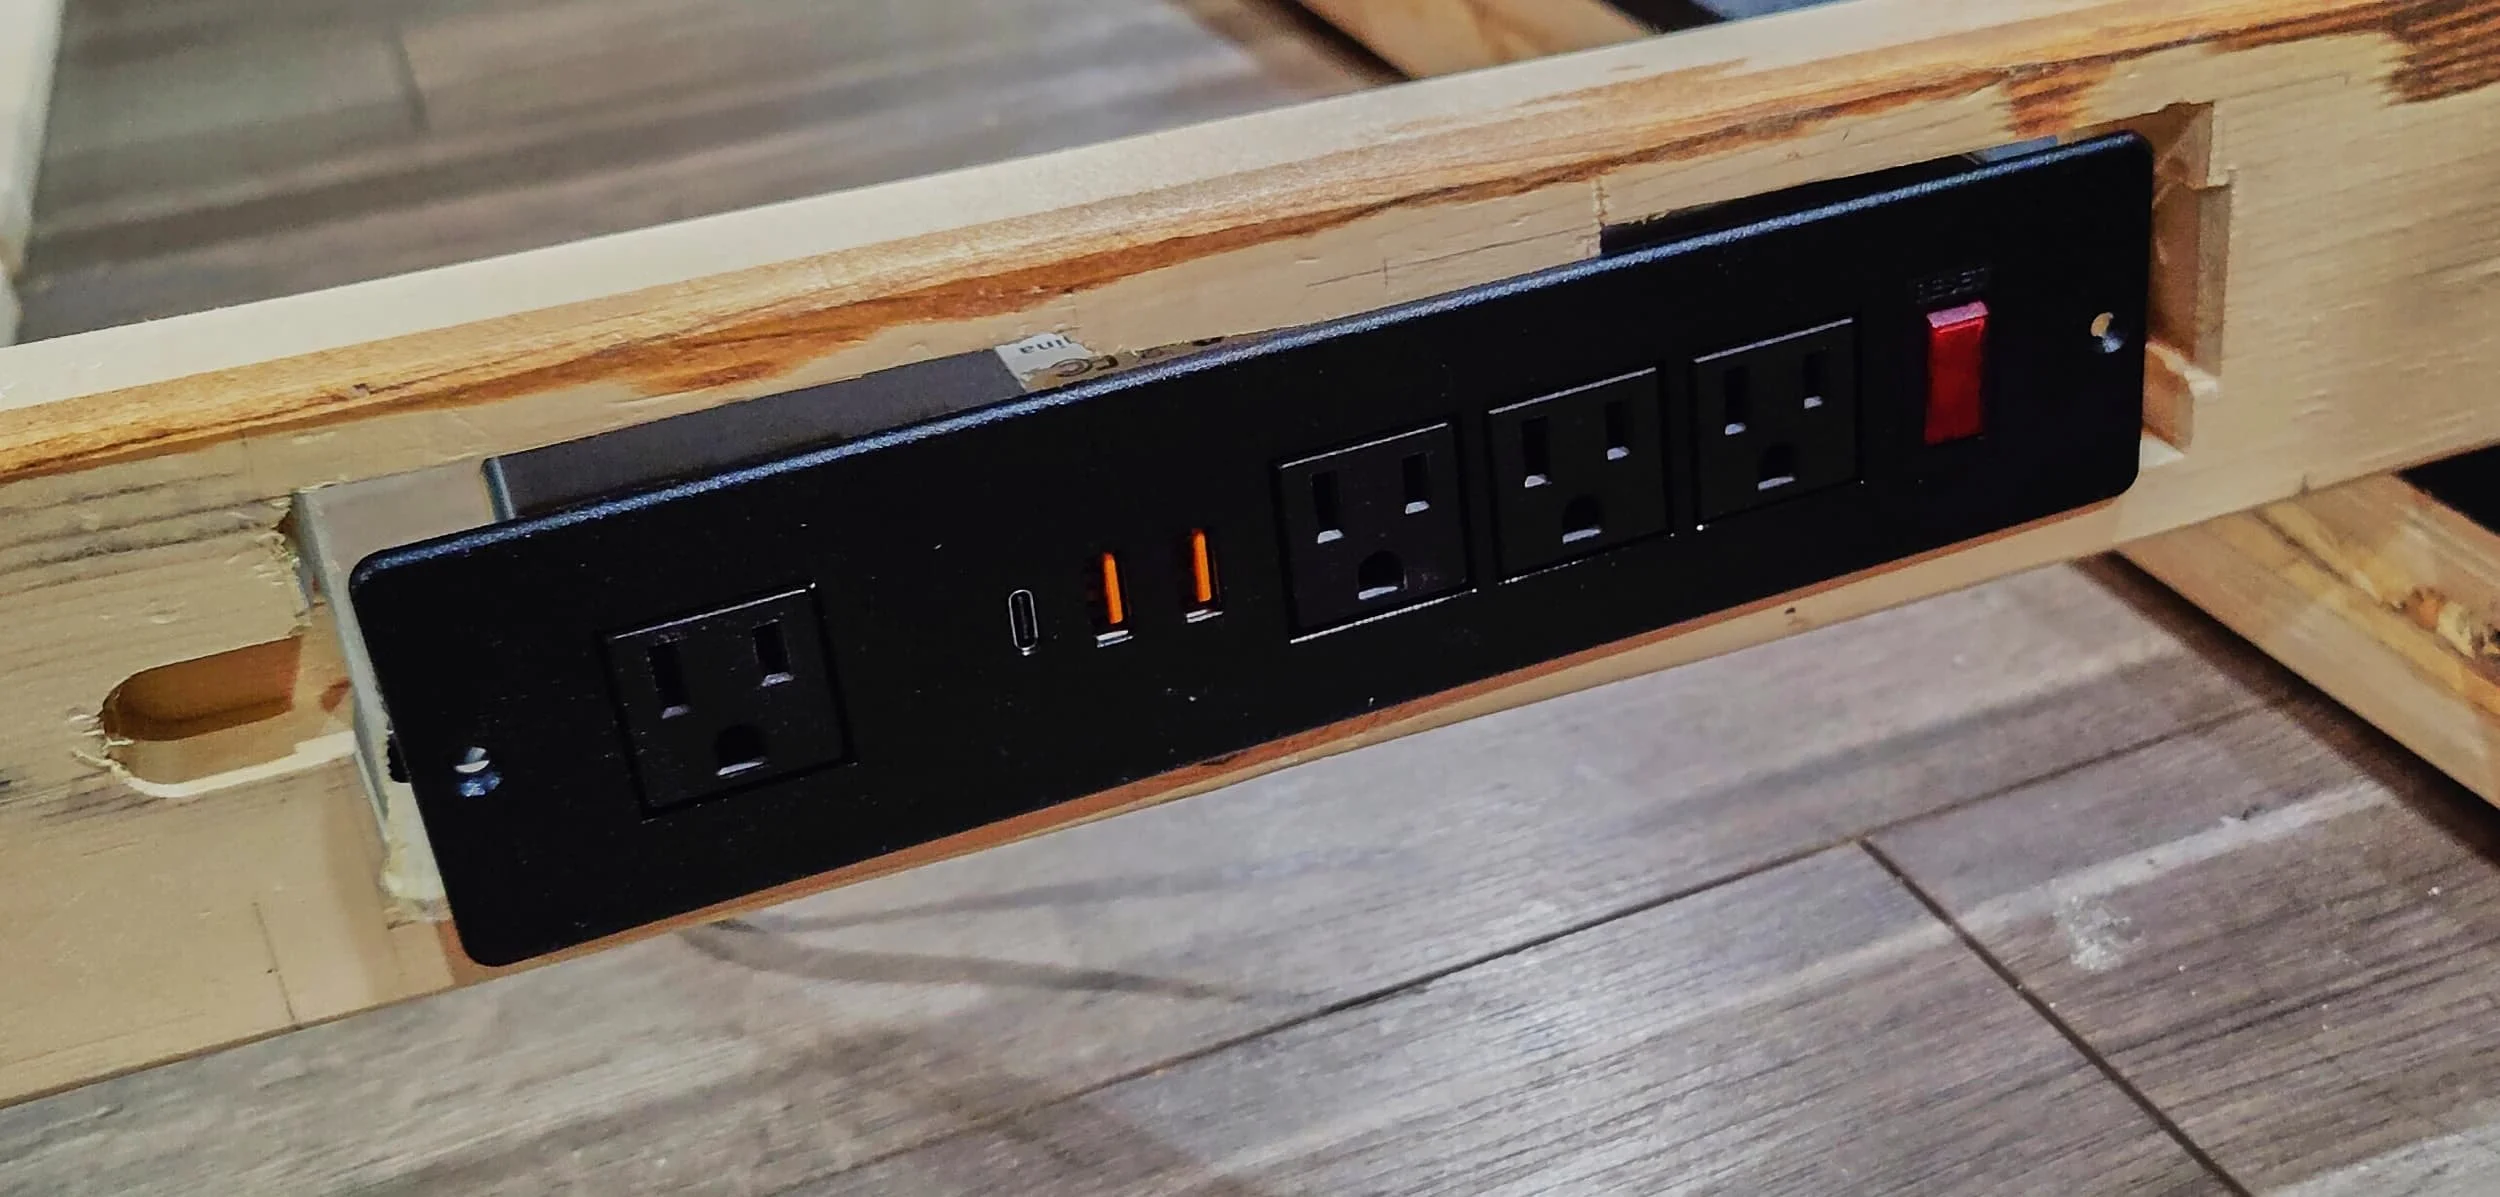
I wanted more outlets, both on the face and the right-side of the desk. This would also allow me to connect everything to the wall, and then connect the wall to the UPS with a single cord
On a related note, I wanted to reduce the amount of crap on the desk. I accept that I probably can’t get away from having to account for keyboard, mouse and mousepad but I wanted to find a way to reduce some desk clutter:
Capture card
SATA dock for backups
Google Nest Mini, Amazon Echo Show 5
Clock
Speaker control pod
A label printer
I wanted to replace the RGB strips with something that I could have local control with (and I wanted to take repair, replacement and upgrading into consideration)
And a big one: I wanted to support an additional PC on this wall (a real computer, not an anemic work laptop). In short, I wanted to add a whole bunch of connectivity to the wall, including supporting a whole new computer and simultaneously reducing the amount of stuff that will live on the desk.
A note about ‘minimalist’ trends
“Reducing desktop clutter” and “minimalism” are trendy buzzwords that influencers like to push around. My drive to reduce the amount of [tech] stuff on the desk has nothing to do with minimalism - I want to reduce the number of devices I need to unplug/relocate if I need to take the entire desk apart for whatever reason.
Rough Design
At a high level, I was going to do three things:
Change two of the three monitor arms from fixed monitor mounts to gas-shock arms. In theory, I can leave the center monitor on a fixed mount and having adjust-ability on the left-right monitors would allow me to get everything aligned
Add a bunch more outlets to the wall
Add a boatload more keystone connections
This allows me to keep most of the faux-wall elements — I would mostly be changing out the cutouts on the ‘face’ and the sides of the wall. This should keep the cost of materials down.
It was quite chaotic to look at all of this on a single diagram, so I broke things out by category.


Step 1 - Revisitng the wall component
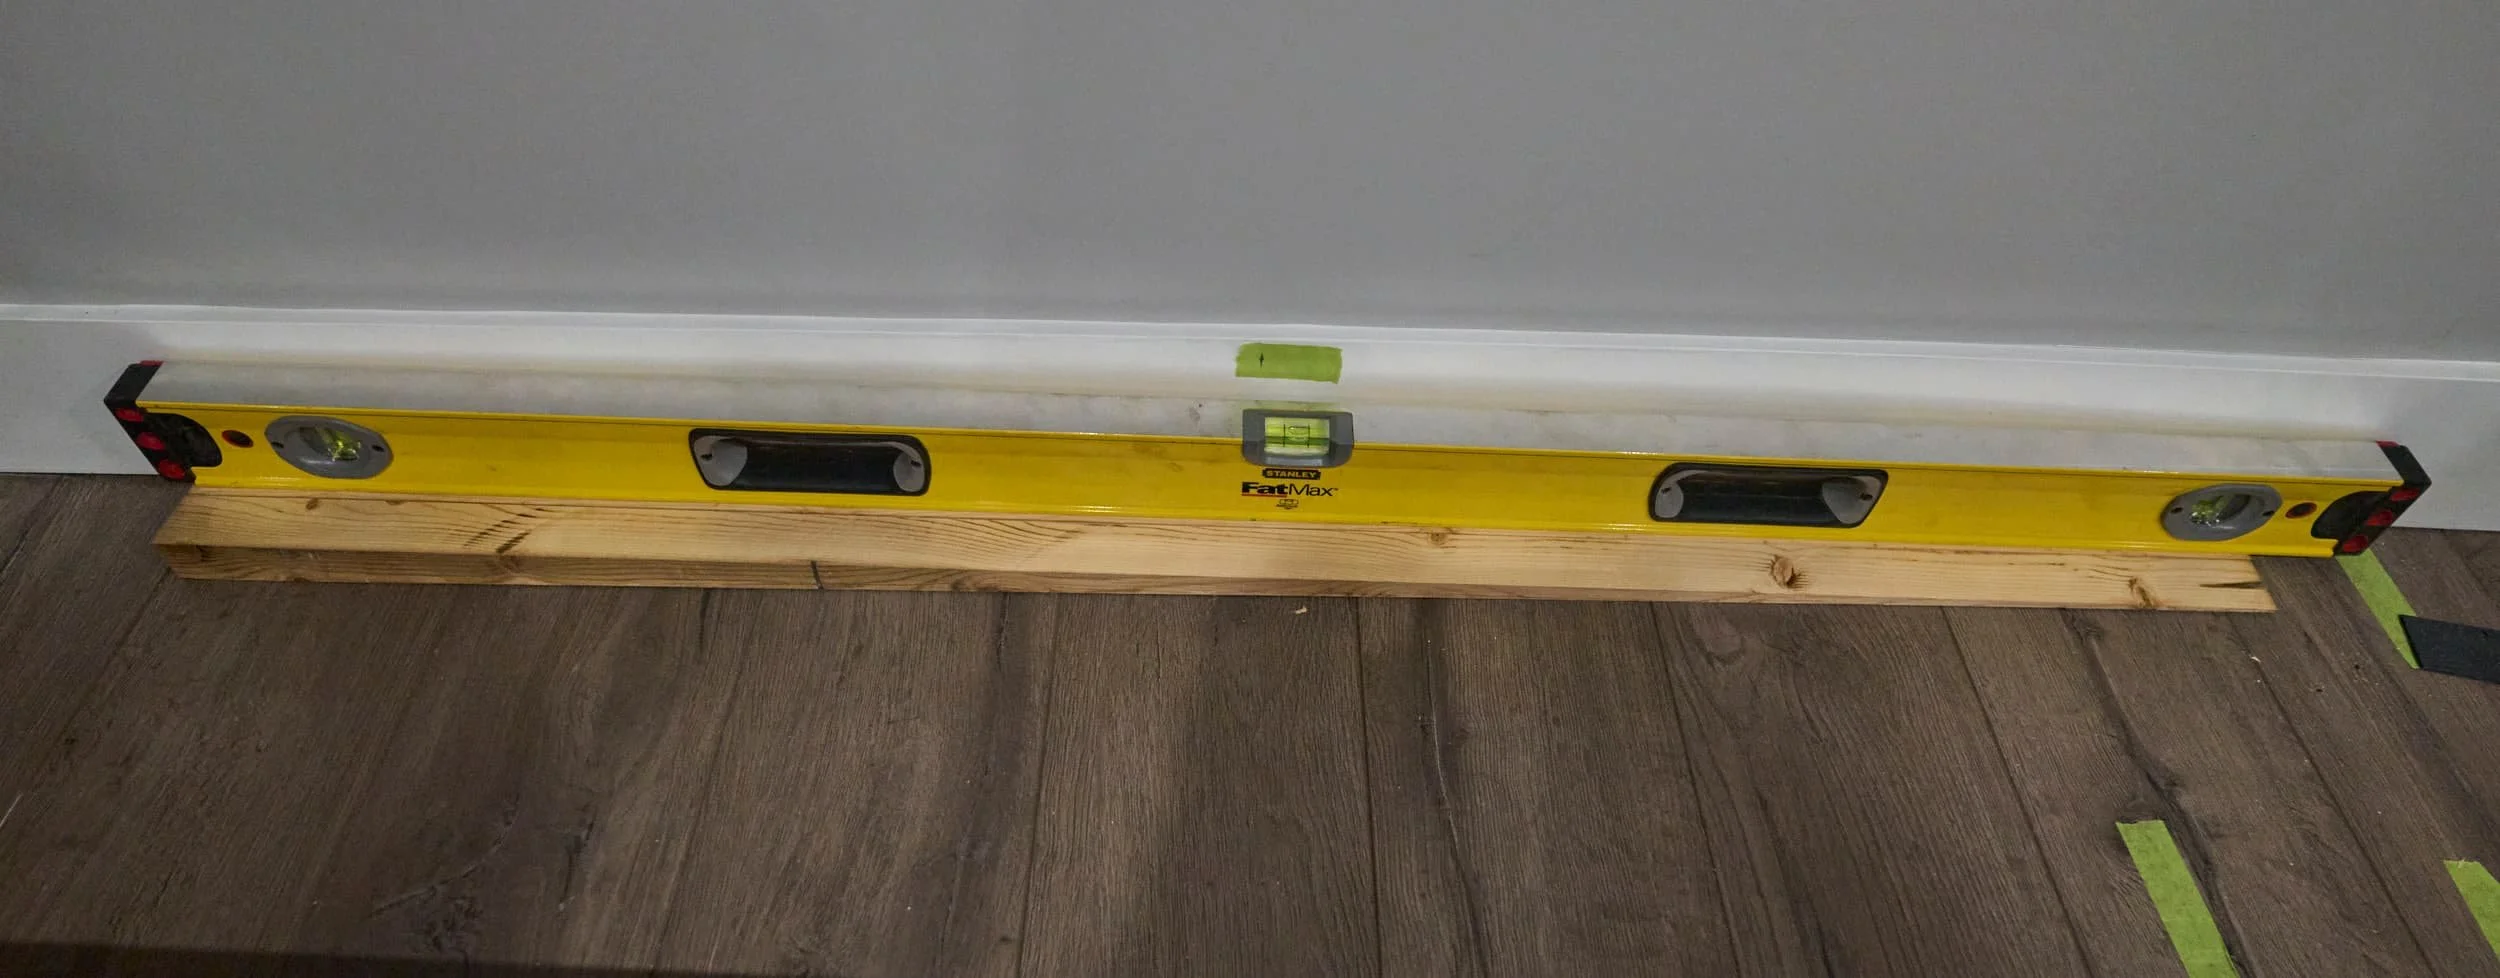
When we initially got the office setup, we knew the floor was sloped but we were in a crunch so we shimmed the faux-wall up as best we could and screwed it to the actual wall. When I recently levelled out the floor in my sitting area, I swapped out the shim for a more ‘proper’ leveling foot. Now that I’m going through the effort of rebuilding the wall, this is a good time to just fix it more properly by pre-levelling out the base.


This was a good time to cut/drill all the access through-holes for wires I specifically cut everything (in the 2x4s) oversized so I wouldn’t have to think about alignment — when I cut the openings in the plywood ‘skin’, I’ll need to be much more careful.


Regarding the screws that we used to initially attach the faux-wall to the actual wall, I didn’t want to make new holes and I didn’t want to wear out the screw holes so I needed to find a way to make this faux-wall (and any additional unit) “compatible” with the existing screw holes as well.


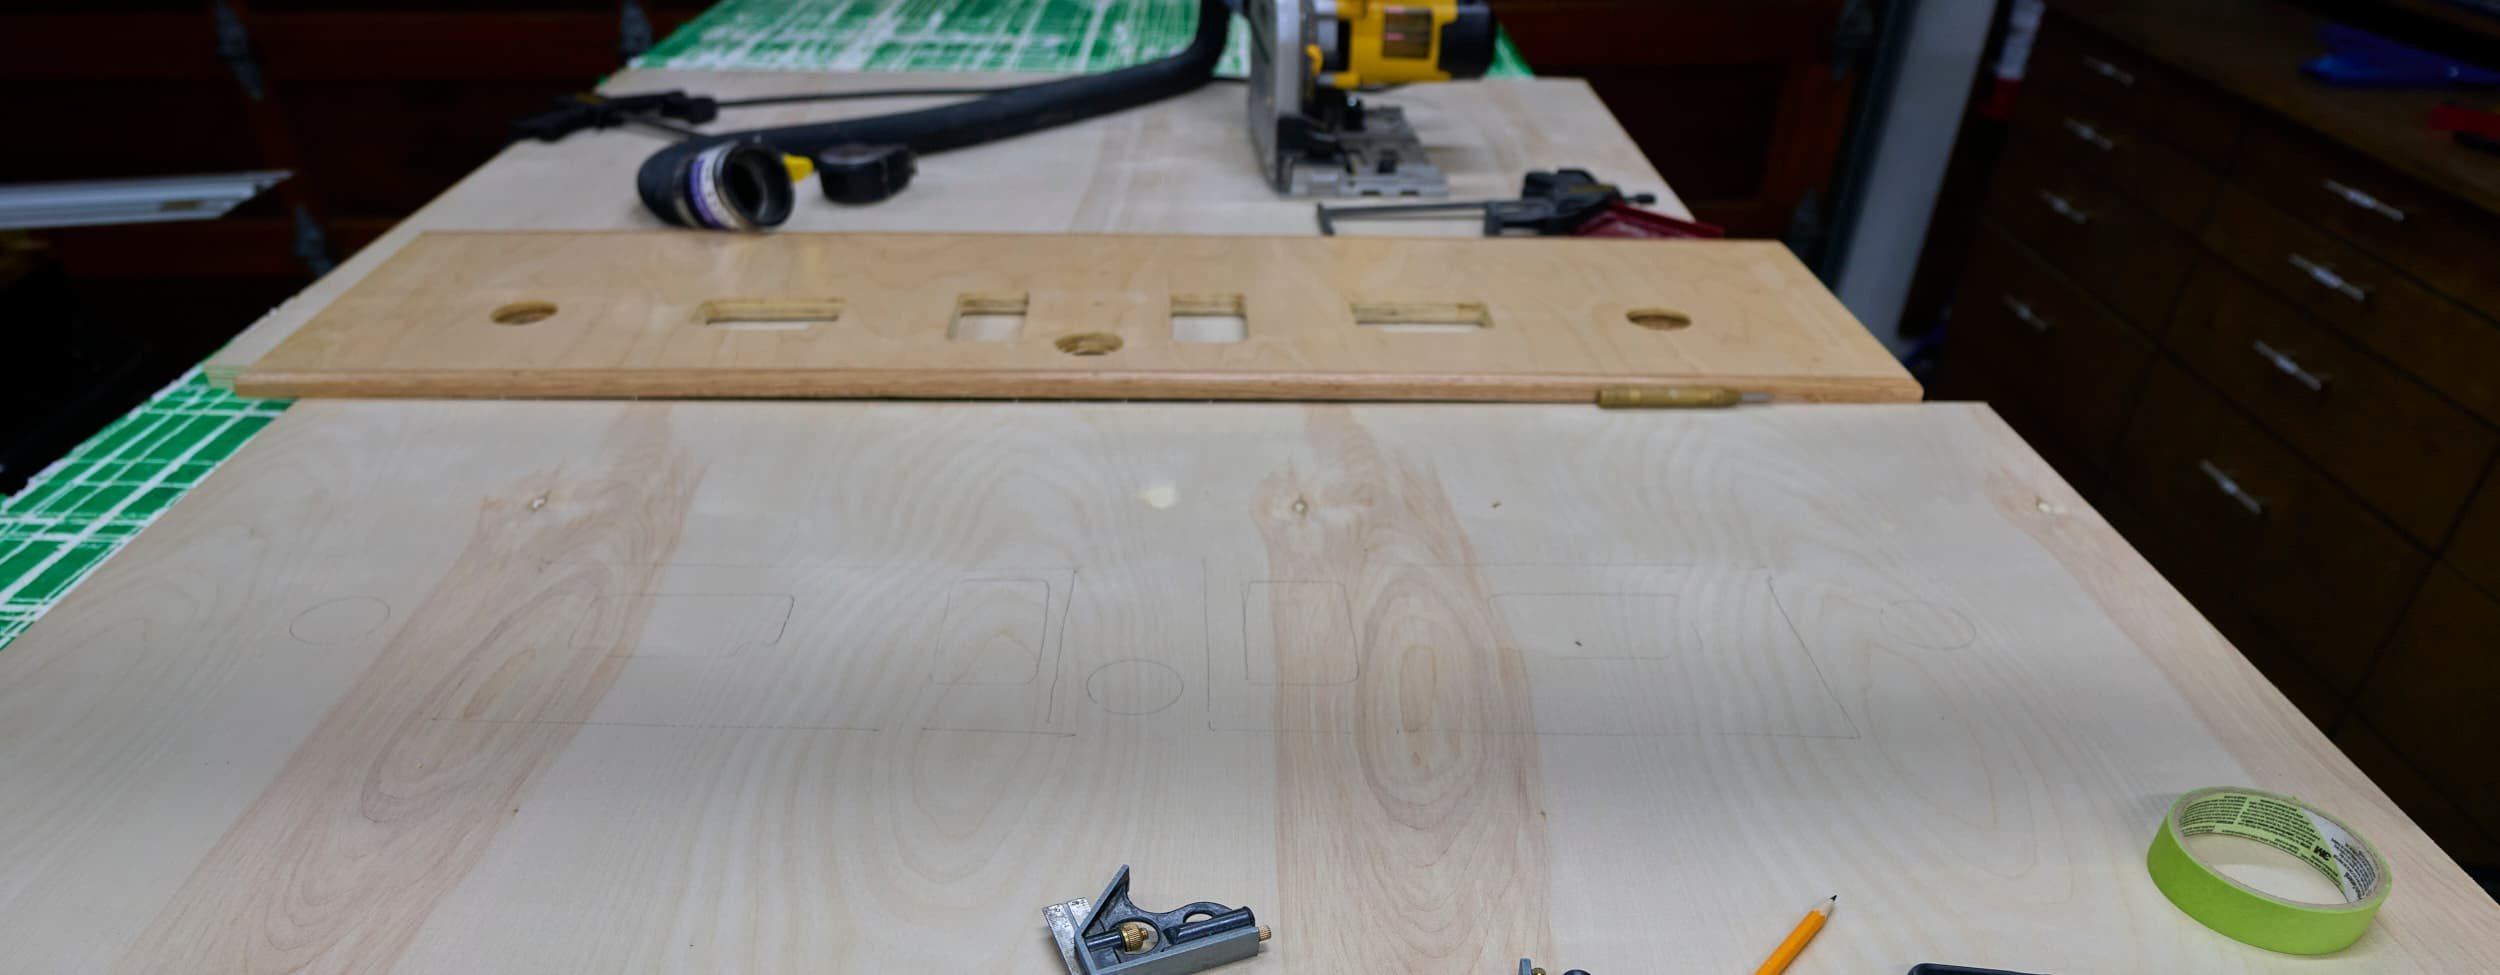
Step 2 - Remaking the bottom panel
The bottom panel definitely needs to be re-cut as there were substantial changes to the number and placement of keystone panels. I ended up doing it a super hard way by cutting everything out using an oscillating multi-tool; I know you can drill four holes and connect them using a jigsaw, but I simply didn’t trust (myself, the tools, nor the process) to be able to make the cuts super precisely (since this is a finish surface). The overlap of the trim panels I had on hand was something tiny (3/8? 1/4? I’m not sure) and I’ve seen drill bits skate more than that...


Spoiler: in my original plan, I was going to run the speaker connections on the right hand side of the wall but at some point, I decided I didn’t want to do that and I would come out the face of the wall as I did previously. So I’m missing two keystone panel cutouts that I would have to make later.
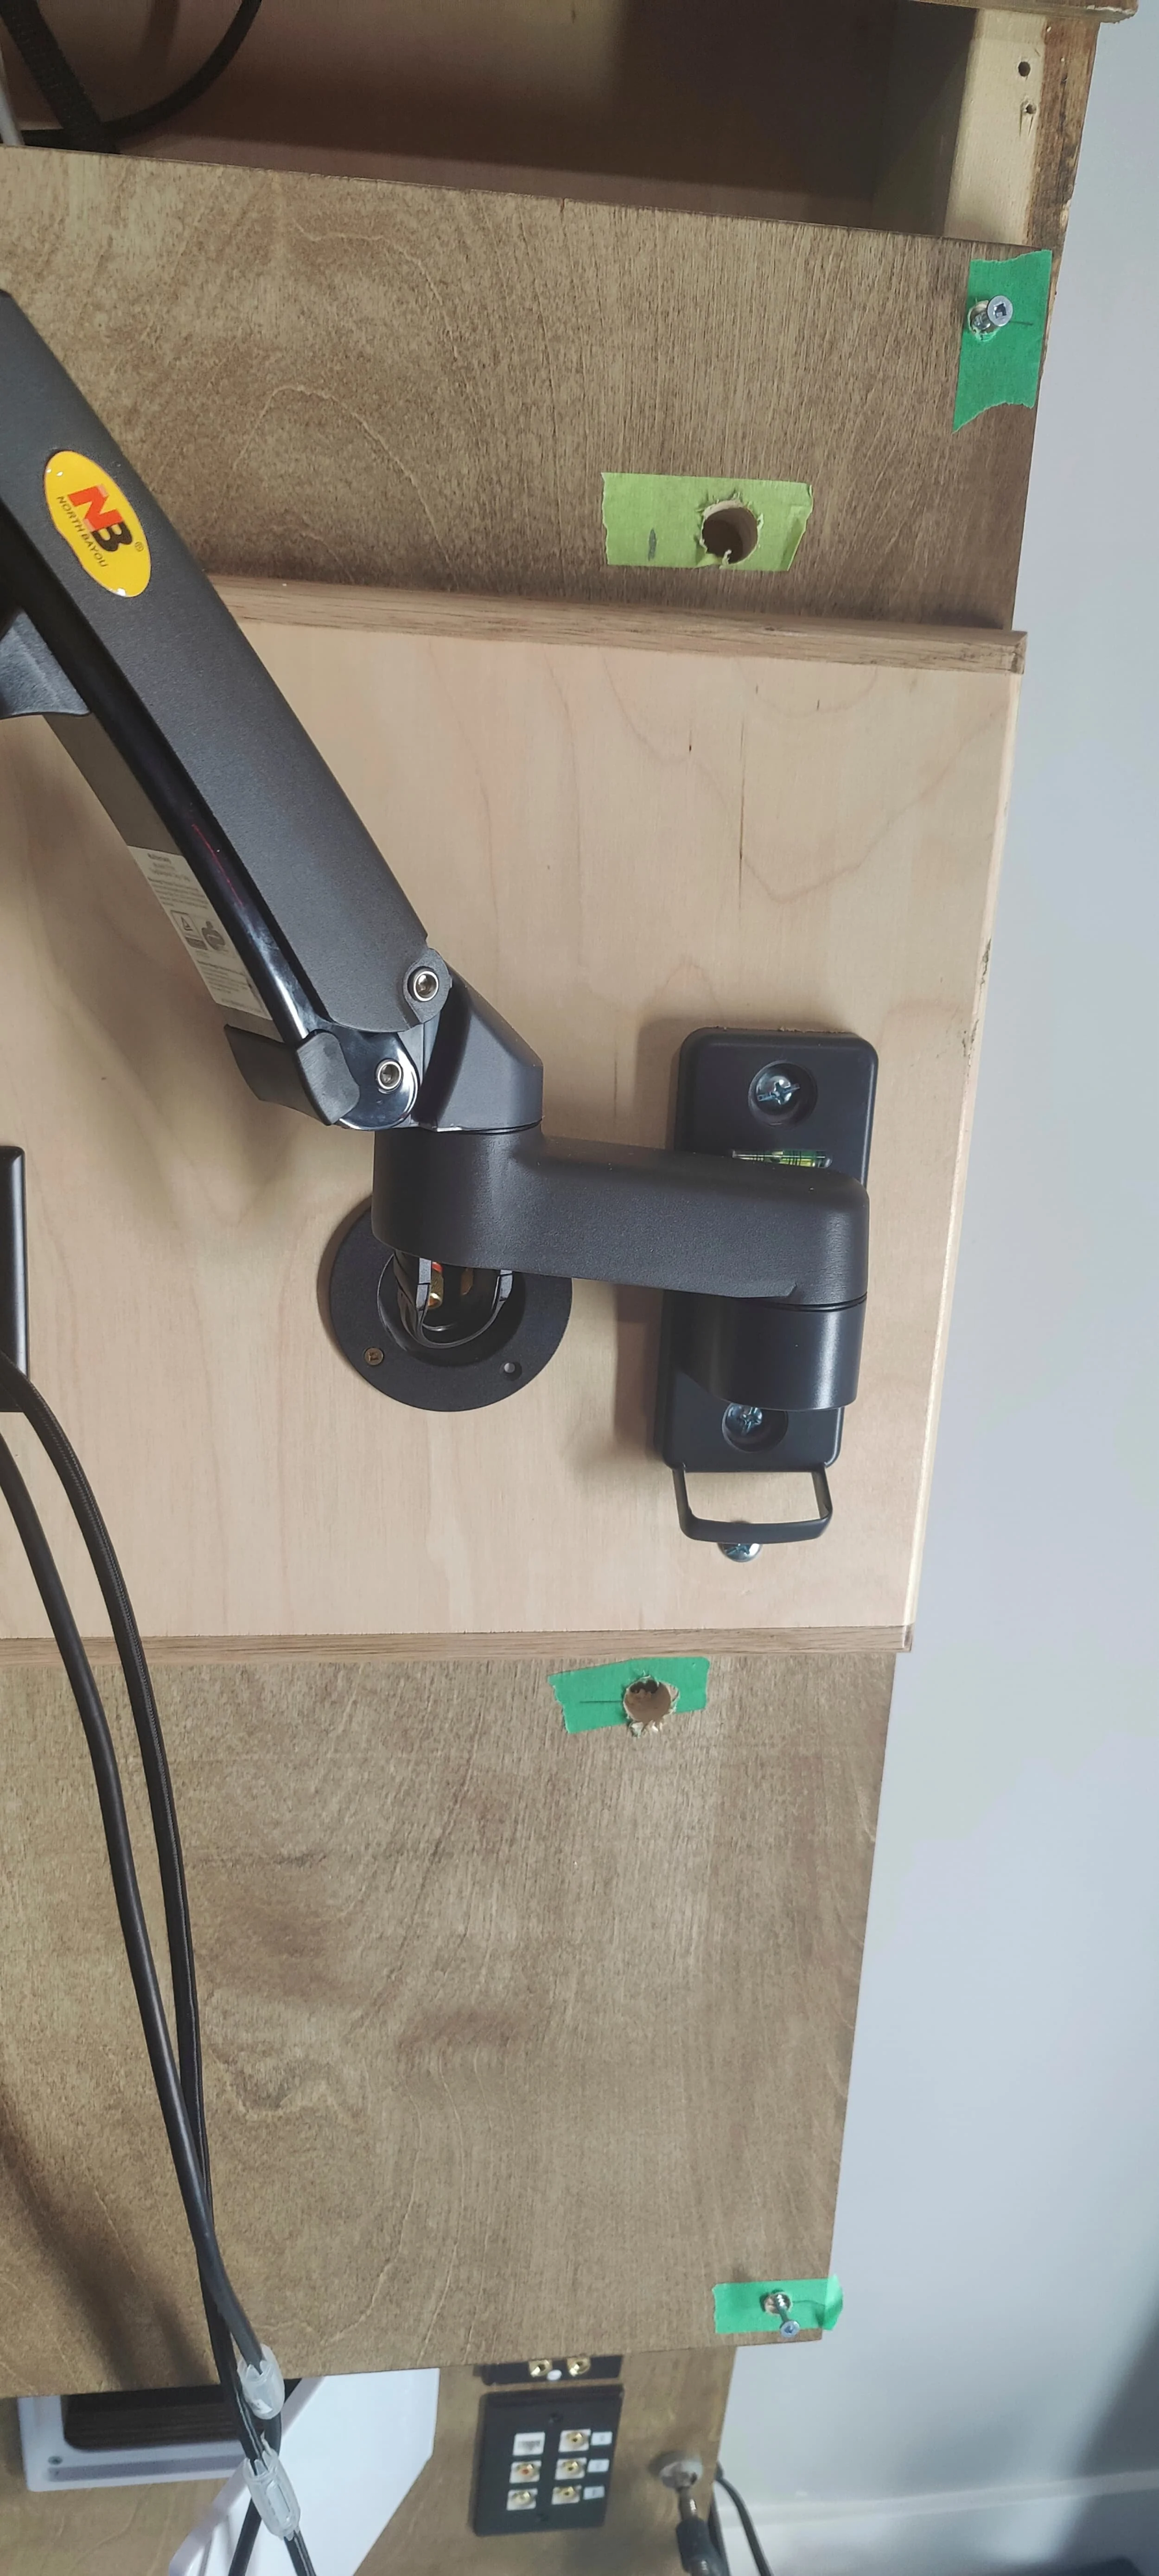
Step 3 - Remaking the middle panel
Although most of the middle panel would be ‘hidden’ due to having another panel on top of it, the placement of the keystones required me to make the panel anew. I probably could have figured a way to reuse the existing panel, but I wasn’t going to expend the brainpower to deal with it at the time. Same as previously, I cut everything much more generously because there’s no reason to fight for stupid-exact tolerances on cutouts that won’t be seen in any way.
One change I did have to consider was switching two of the fixed monitor mounts for gas-spring mounts which had a different bolt pattern.


Once the woodworking phase was complete, I continued with the wiring phase — the middle plate is the most complicated since there’s a ton of stuff coming in/through it (from below and now, from above too). Thankfully, a Rubbermaid bin was a good height to bring it to a close enough that I could work on it.


Step 4 - Tweaking the top panel
I was able to reuse the top panel and just make some cutouts to it which saves me a bit of material and time. For some reason (it made sense in my head), I opted not to fully secure the middle (nor top) panels down and just leaned/propped them up. It’s a bit complicated to explain, but I did have to go back and forth with taking the middle and top panel off to fish wires around. As I got closer to the finish line, I did run some temporary screws to hold the middle and top plates in place.


Although I could have used the cubby as it was, I opted to knock out the divider and have a large compartment up top. This would afford me plenty of space to put all the tech stuff I wanted to have up top. While I had the cubby on the worktable, I reinforced the microphone mount area as I noticed it sometimes had a bit of flex.


Step 5 - RGB
Coming off the LED Slat Wall project, I knew I was so totally done with chopping up strips of RGB up; the size of the faux-wall (roughly 48” across) was a perfect use case for using two 1m RGB strips. Since I was buying individual strips anyways, I opted for a 144 led/m strip. The only gotcha with these strips is whether they will fit inside the aluminum channel I use. Thankfully they do — you do have to carefully push them in there though, there’s probably 0.5mm wiggle room.


Step 6 - Side panels
The side panels are the last bit of the desk that needed to be done to finish the ‘woodworking’ component. Due to the way I made things with the Mk I, the 48” span of the panels does not run flush with the frame. In the Mk I design, I just screwed it down regardless, but I like to think I’m a bit more refined now. With the Mk II, I routed out a gap at the front so that if there is a bit of overhang on the panels, they wont interfere with the side panels and I can still screw the side panels flat to the frame.


Step 7 - First power up
The downside about this wall project is that you can’t really test connectivity until everything is already in place; or at least, you can’t do so easily. This initial power up is just to verify the core bits work before I look at rebuilding vs modifying the desk portion.
I ended up getting really close with the placement of the keystone panels on the middle plate. With the cabinets the way they were now, there was maybe 1/4” interference between the plate and the desk — totally serviceable, but I was planning on redoing the cabinets anyways (or at the least, revisiting them).


Step 8 - Revisiting the drawers
I debated rebuilding the drawers from scratch, but truthfully, I didn’t feel like it yet — I wanted to use the setup for a bit (especially get through a PC upgrade) before revisiting a total rebuild. I opted to take the cabinet apart, shorten it a bunch and put it back together. How hard could it be?


The drawer aspect was extra difficult because I was cramming the same amount of drawers into (substantially) less space. I was able to get things to fit but just barely.
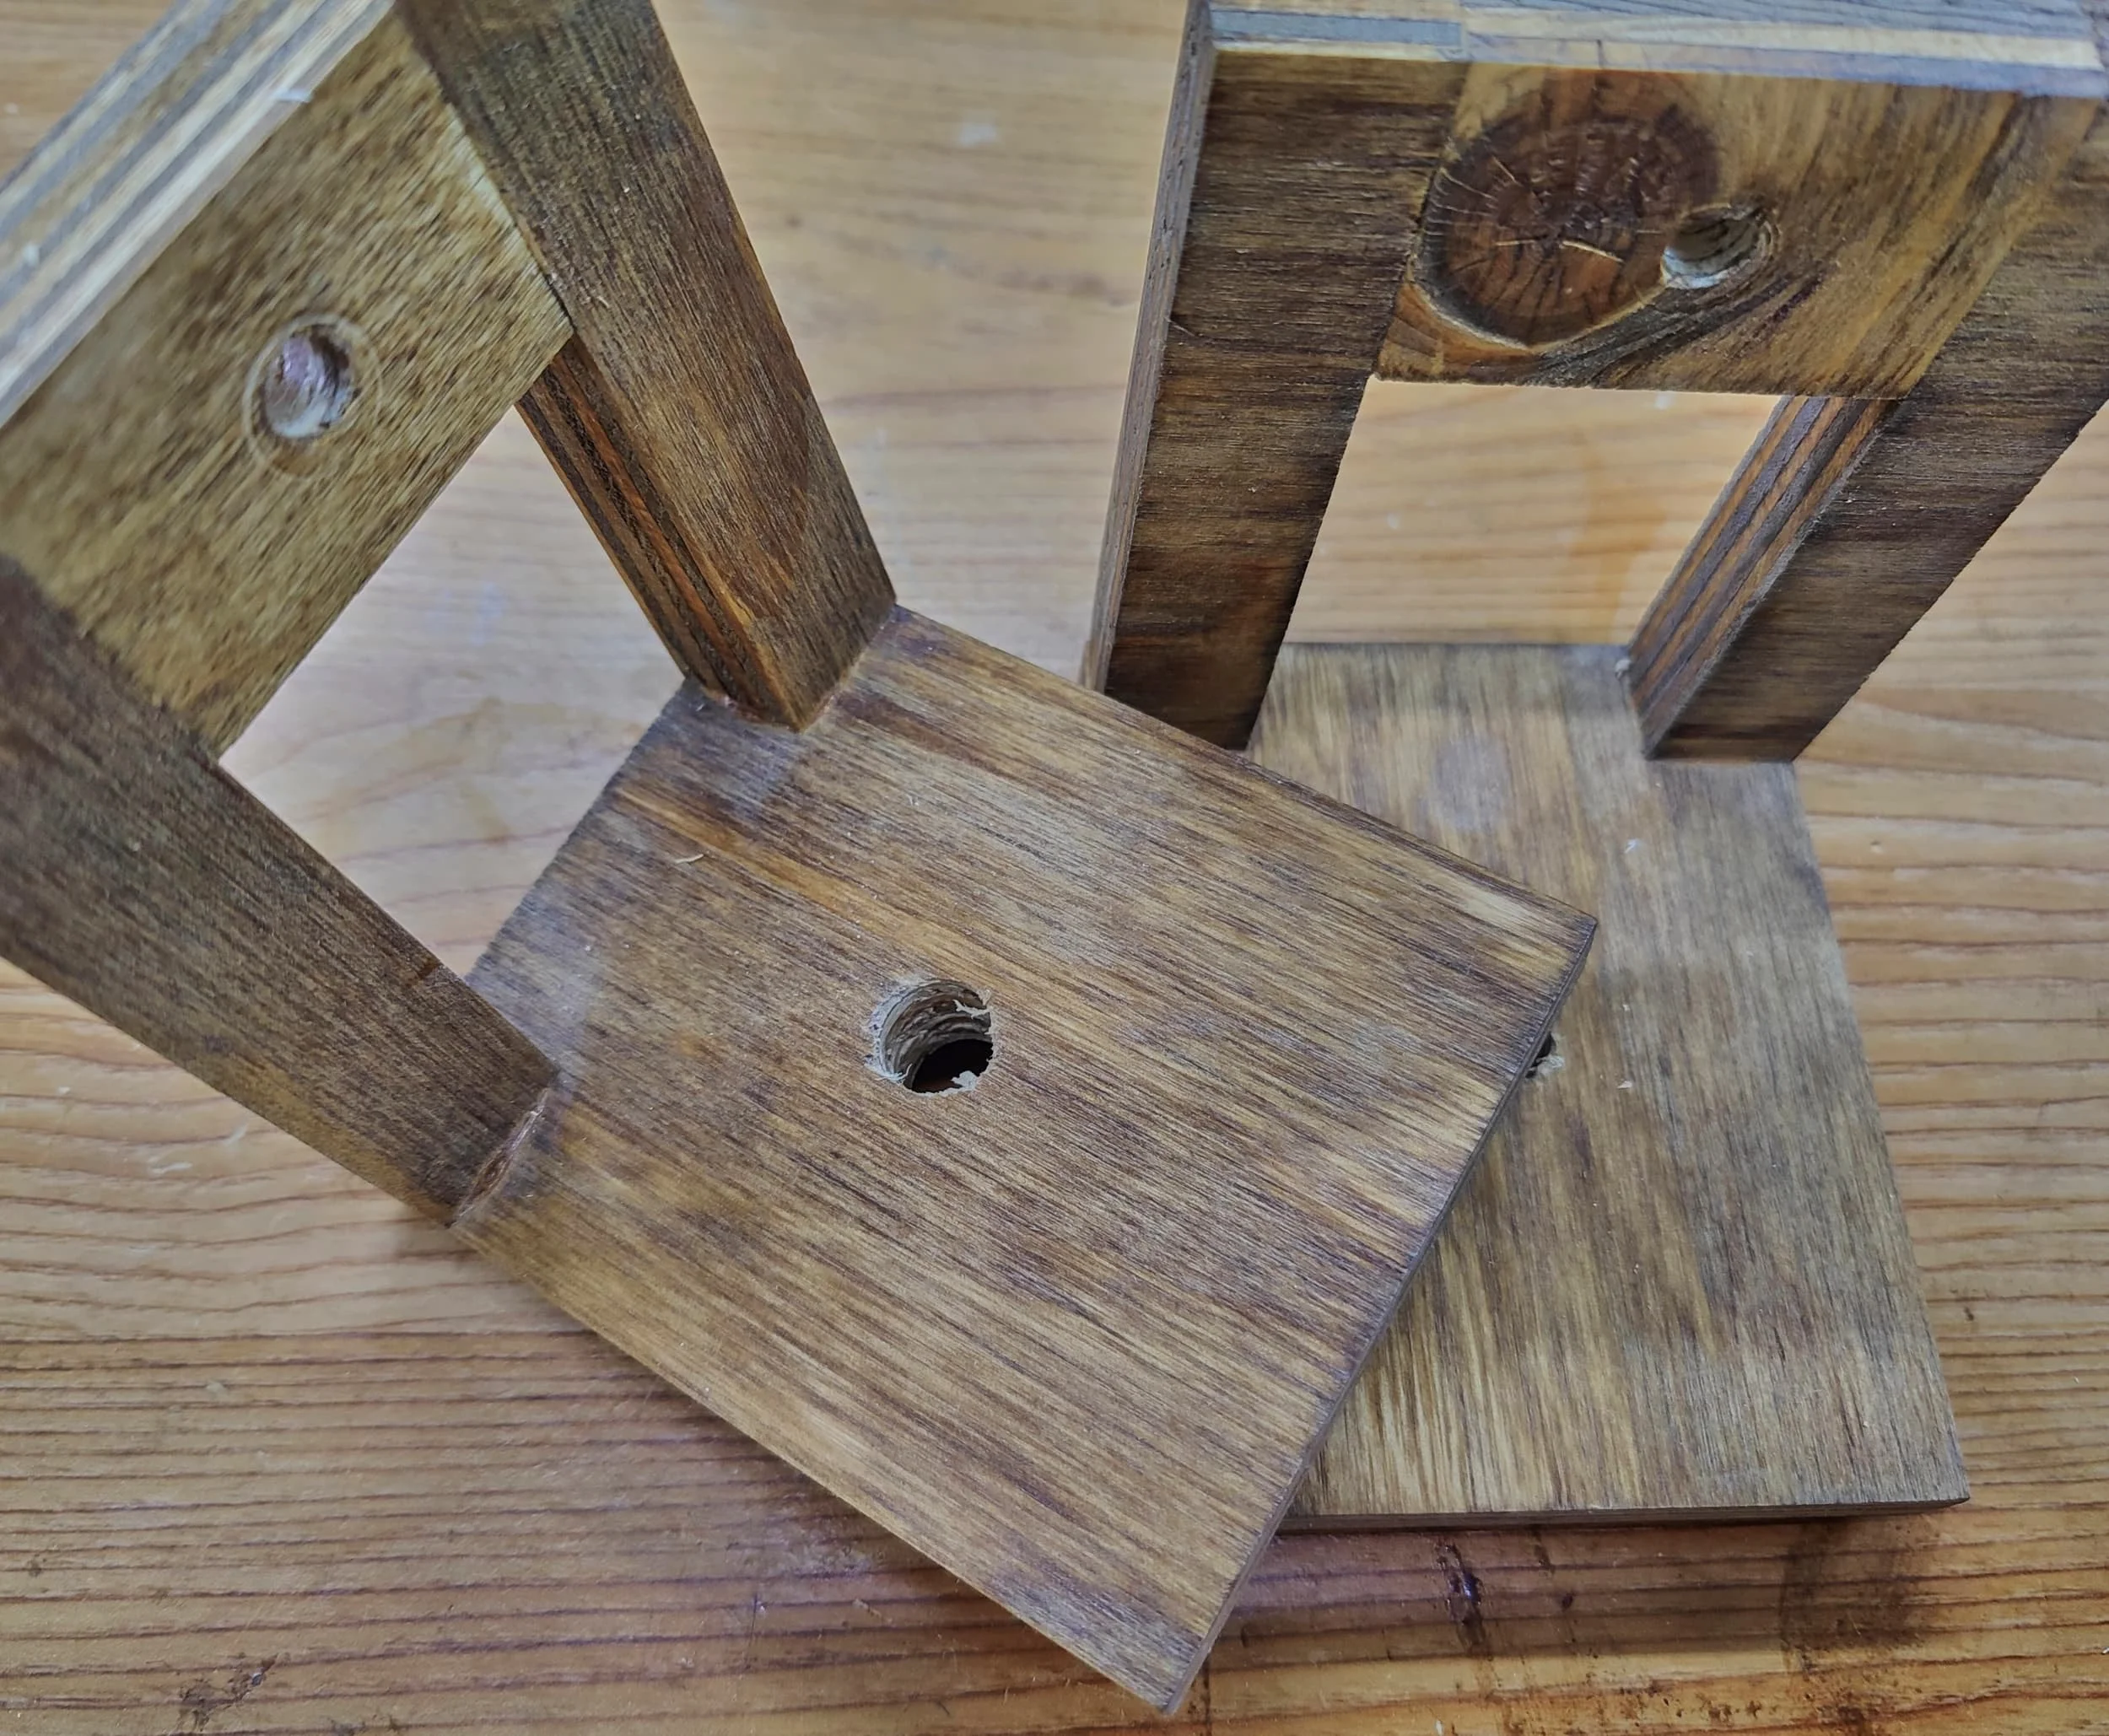
Step 9 - Speaker mounts
My previous DIY speaker mounts were okay but they had a few problems with them
They weren’t beefy enough so they were splitting at the connection to the wall (this could have very well been low quality plywood I was using at the time)
While I was able to adjust left-right, it was a bit cumbersome
I wasn’t able to adjust up-down at all
I ended up just buying a few cheap speaker mounts and I also had a similar set on hand that I picked up from a surplus store. For this phase, I only needed to mount the Front Left, Center and Front Right speakers to the wall.


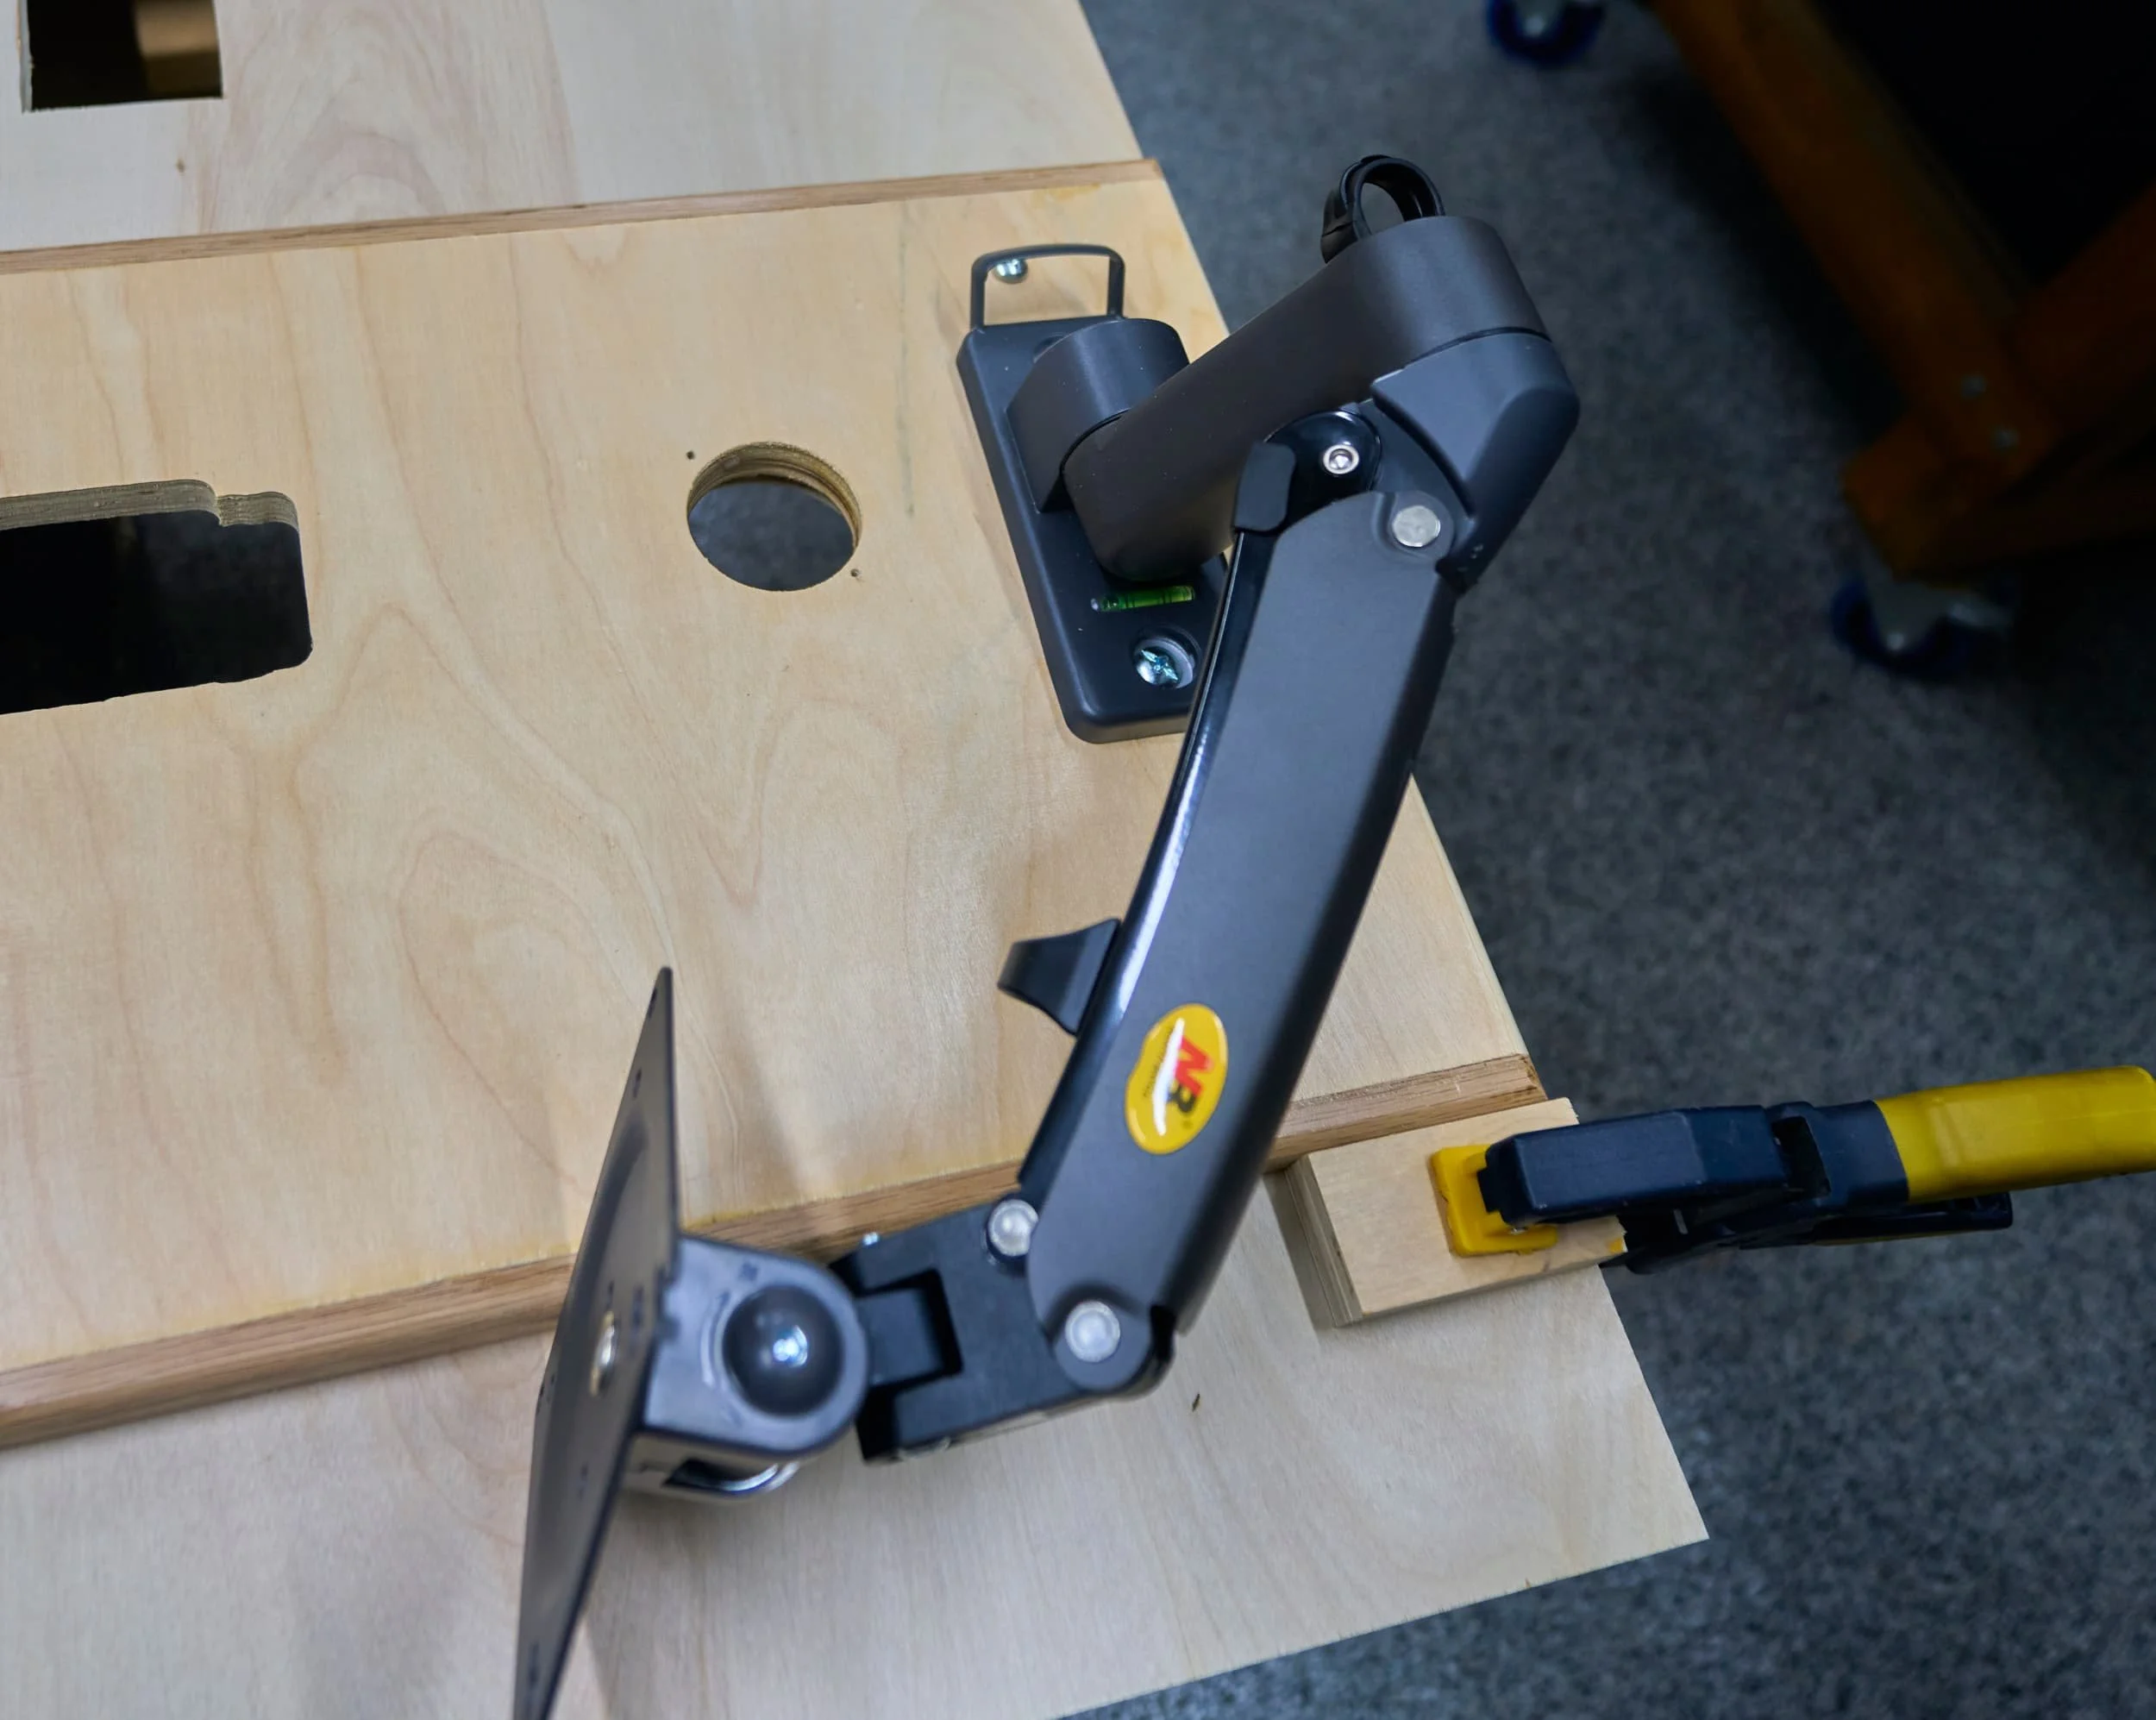
For the rear speakers, I specifically didn’t want to have speaker stands that I would inevitably knock over or bump into; previously I used a drawer slide to have a way to retract the rear speakers but I wanted to try something different this time around. I tried using a pair of low-profile microphone boom arms: these boom arms came with a 3/8 stud on them — luckily I happened to have some 3/8 T-nuts so I was able to adapt my previous speaker mounts to them. The boom arm is rated for 3lbs — my rear speakers are a bit under 2lbs so, on paper, it should hold. Giving it a bit of a ‘push test’, the arms seem to be okay for now, but time will tell.


Step 10 - Magnet all the things
I’ve been using magnetic charging cables for our for a long time now: it’s been wonderful to not have to think about whether something is Micro-USB or USB-C — it’s the same magnetic charging connector for both. A special bonus is that the magnetic cables handle power and data.
I ended up getting a Logitech G915 (linear) - more to try it than anything else - I’m still very much in love with my G510 (but I do recognize that my stockpile of backup G510s will eventually run out one day). I do like having a wireless keyboard — not because I’m opposed to wires, but the wire on my keyboard is so long (and it’s not detachable); the distance between the end of the keyboard and my keystone is 18” so having a 6-ft cord is just an exercise in frustration.
The way I have things setup, I connect the keyboard via wireless and I keep a magnetic adapter plugged into the back. When the battery runs low, I just connect it to a magnetic charge cable I keep around my desk anyways. Since the charge cable is power-only, there’s no transition between wired and wireless — the keyboard continues to work using the wireless dongle while charging.


I also opted to put a magnetic adapter on my charging mouse-pad. Since the mouse-pad itself can act as a mouse receiver, I have the option to either
Connect the mouse-pad to the computer using a data link; the mouse connects to the mouse-pad or
Connect the mouse-pad purely to power; the mouse then connect to the computer using it’s original nano-receiver
For the most part, there’s no functional difference (connectivity wise) between these two options. The change for me is that I have a few more options on how to connect the mouse-pad to power source (and reduce the number of cables draping across the desk). Being a magnetic cable, I can just take the mouse and mouse-pad in one go.


For my Stream Deck, it’s a bit more of nuanced implementation; in my specific case, I wanted to connect the Stream Deck using USB-C (the cable that ships with it has USB-A on the computer-side). I paired a USB-A to USB-C adapter along with the magnetic adapters to make the whole thing quickly detachable. It was a bit of work to stuff the long cord into the included mount, but I got it in there.
Step 11 - Misc touches
One of the goals of this rebuild was to reduce the amount of stuff on the desk that I would have to carefully unplug/move if I ever needed to remove the top to access the bottom/back of the desk. For the time being, I opted to shelve the Amazon Echo Show 5 so that still leaves the Google Nest Hub. From some scrap plywood and some magnets, I just attached this to the network cart, just at the edge of my periphery (I suppose I could also make a magnetic mount for the Show 5 if I ever decided to revisit that).


The desk features a big access panel with an internal shelf, at this time, I keep just a monitor brick, my WLED controller and a USB capture dongle. On one side, the capture dongle connects to the USB feeder ports in the bottom left and up at the desk level, it transitions to an HDMI port. This way I can directly connect a camera to the wall.


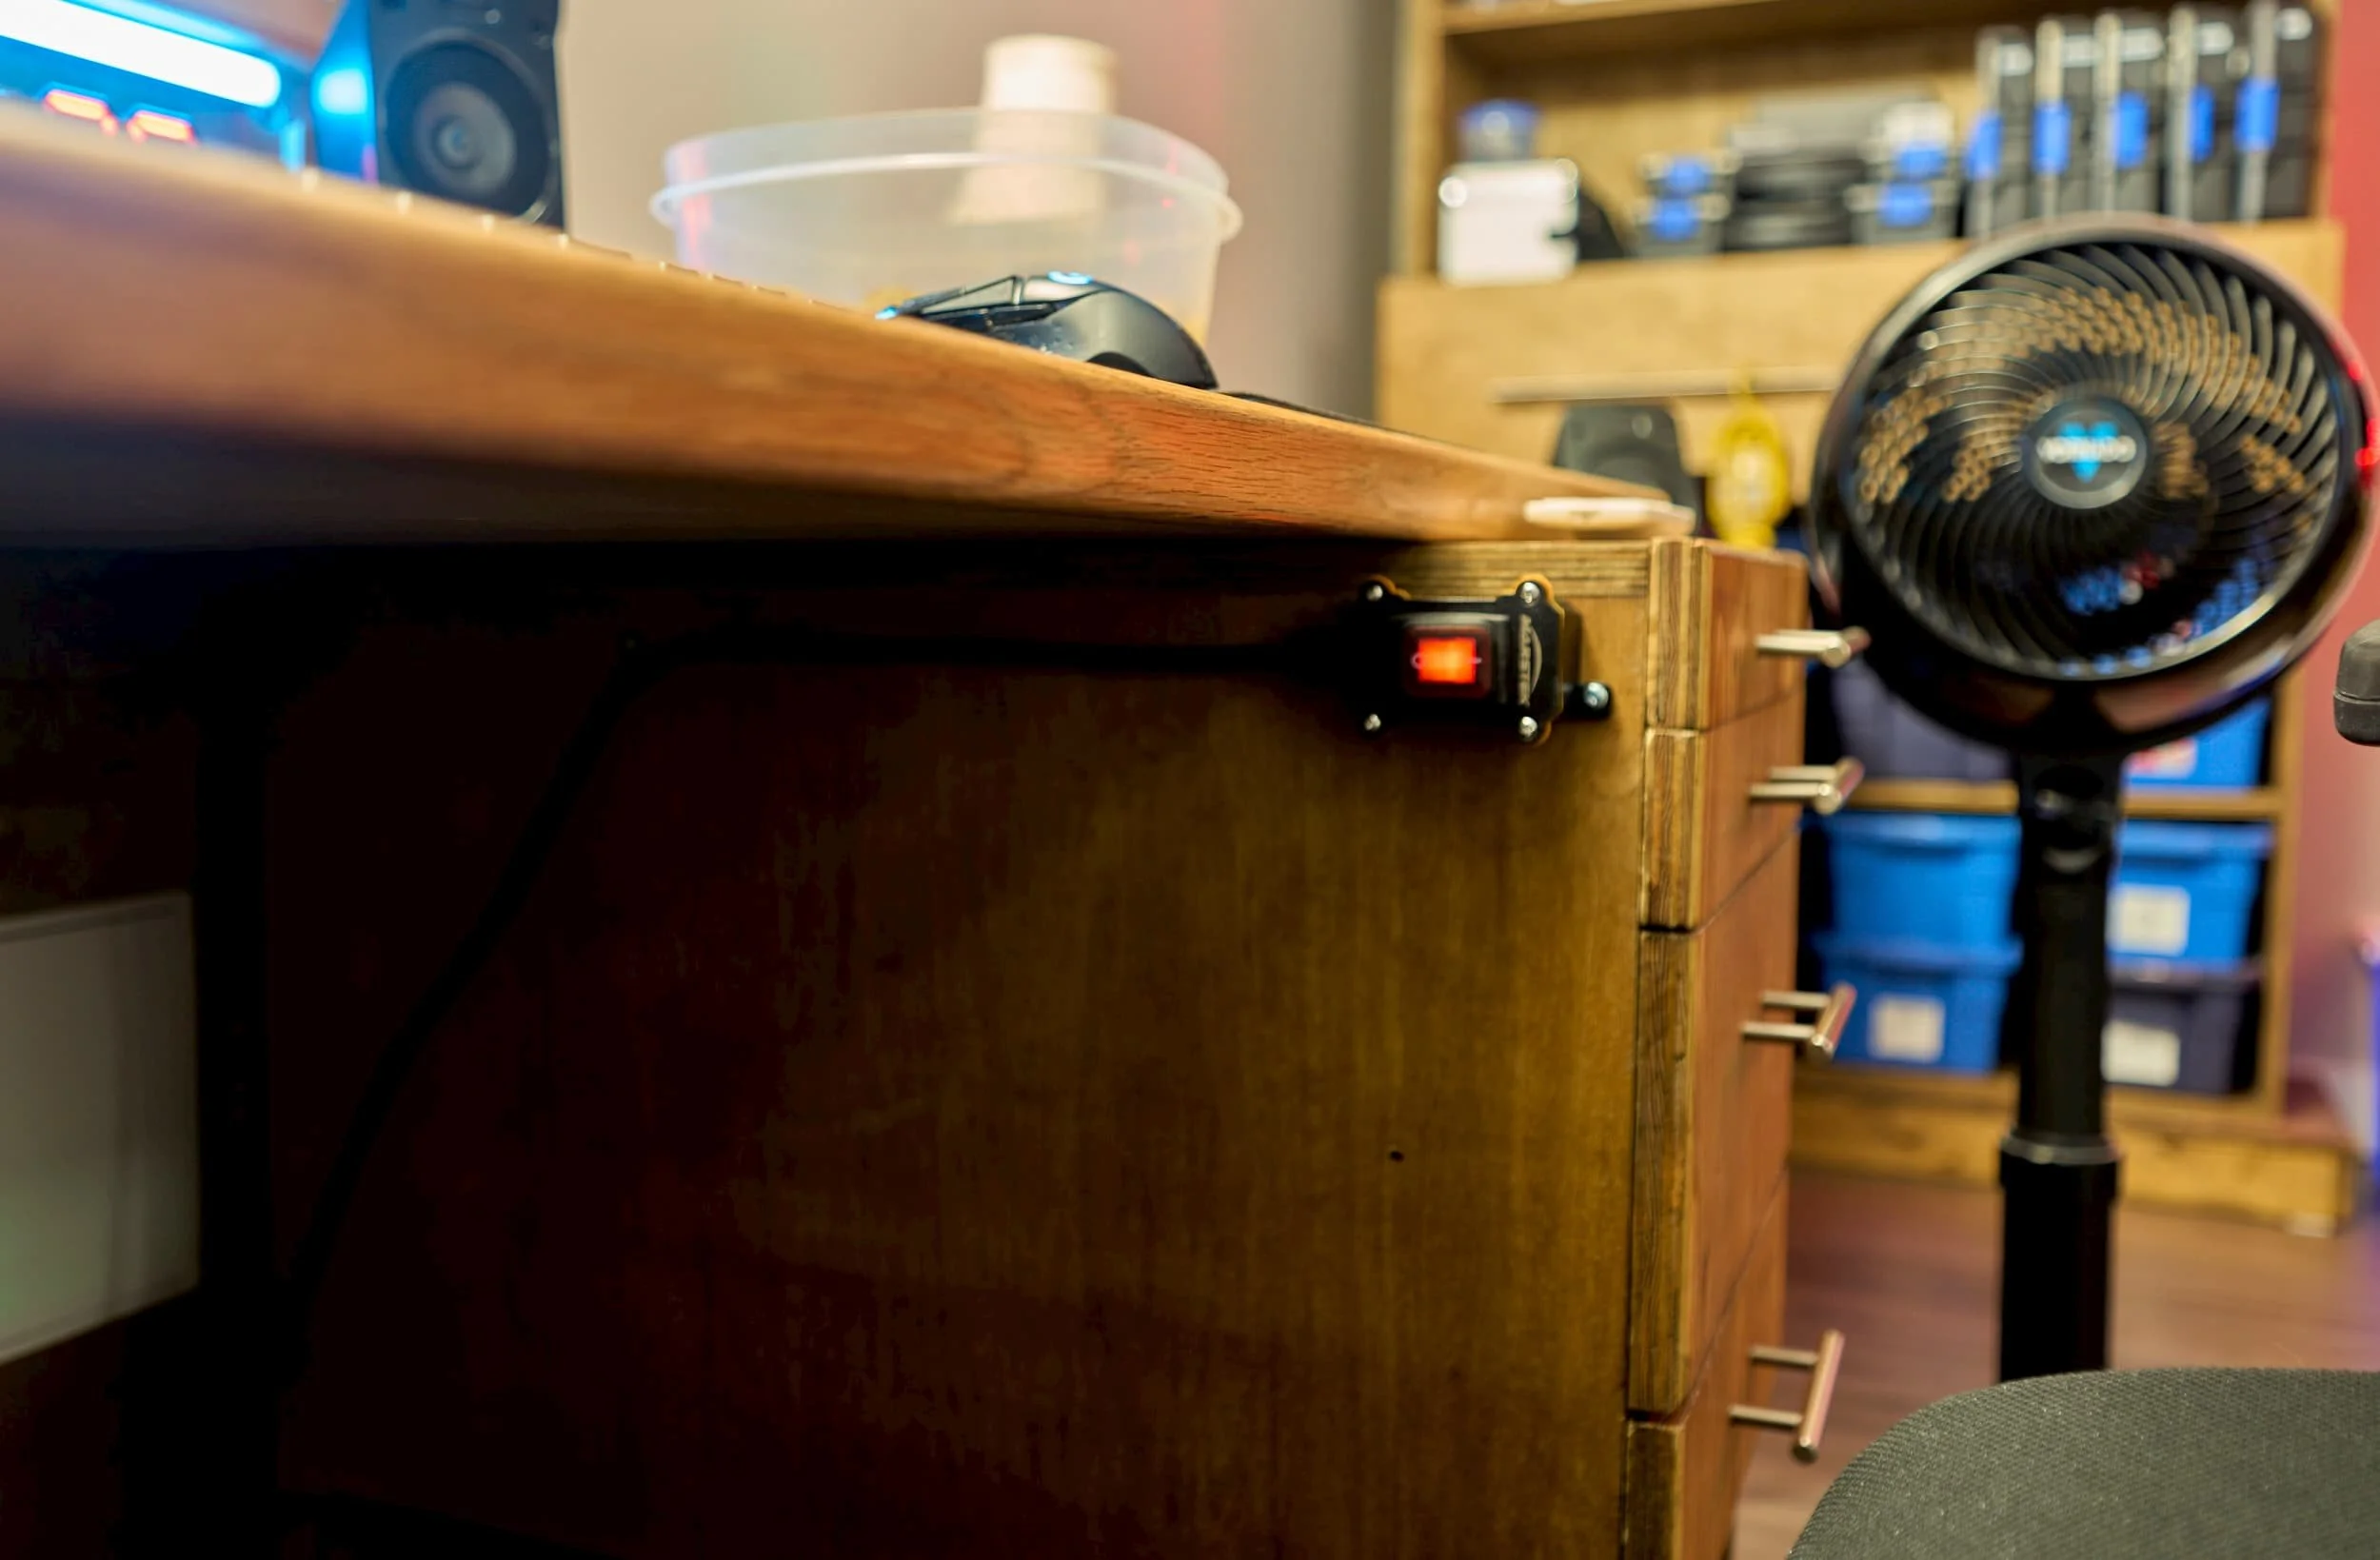
I also added a remote [physical] power switch to my desk; at this time it’s linked to a fan I have pointed at me, but in the future I might consider getting an additional one to remotely trigger a light or something. Depending on how often I may bump into this with my armrest, I may adjust the altitude of the switch, but for now it’s working out great.


I normally keep some kleenex in one of the segments of the upper cubby but since I removed a divider, I lost the allocated space for that. I made a quick tissue box holder from some scraps and mounted it up top.


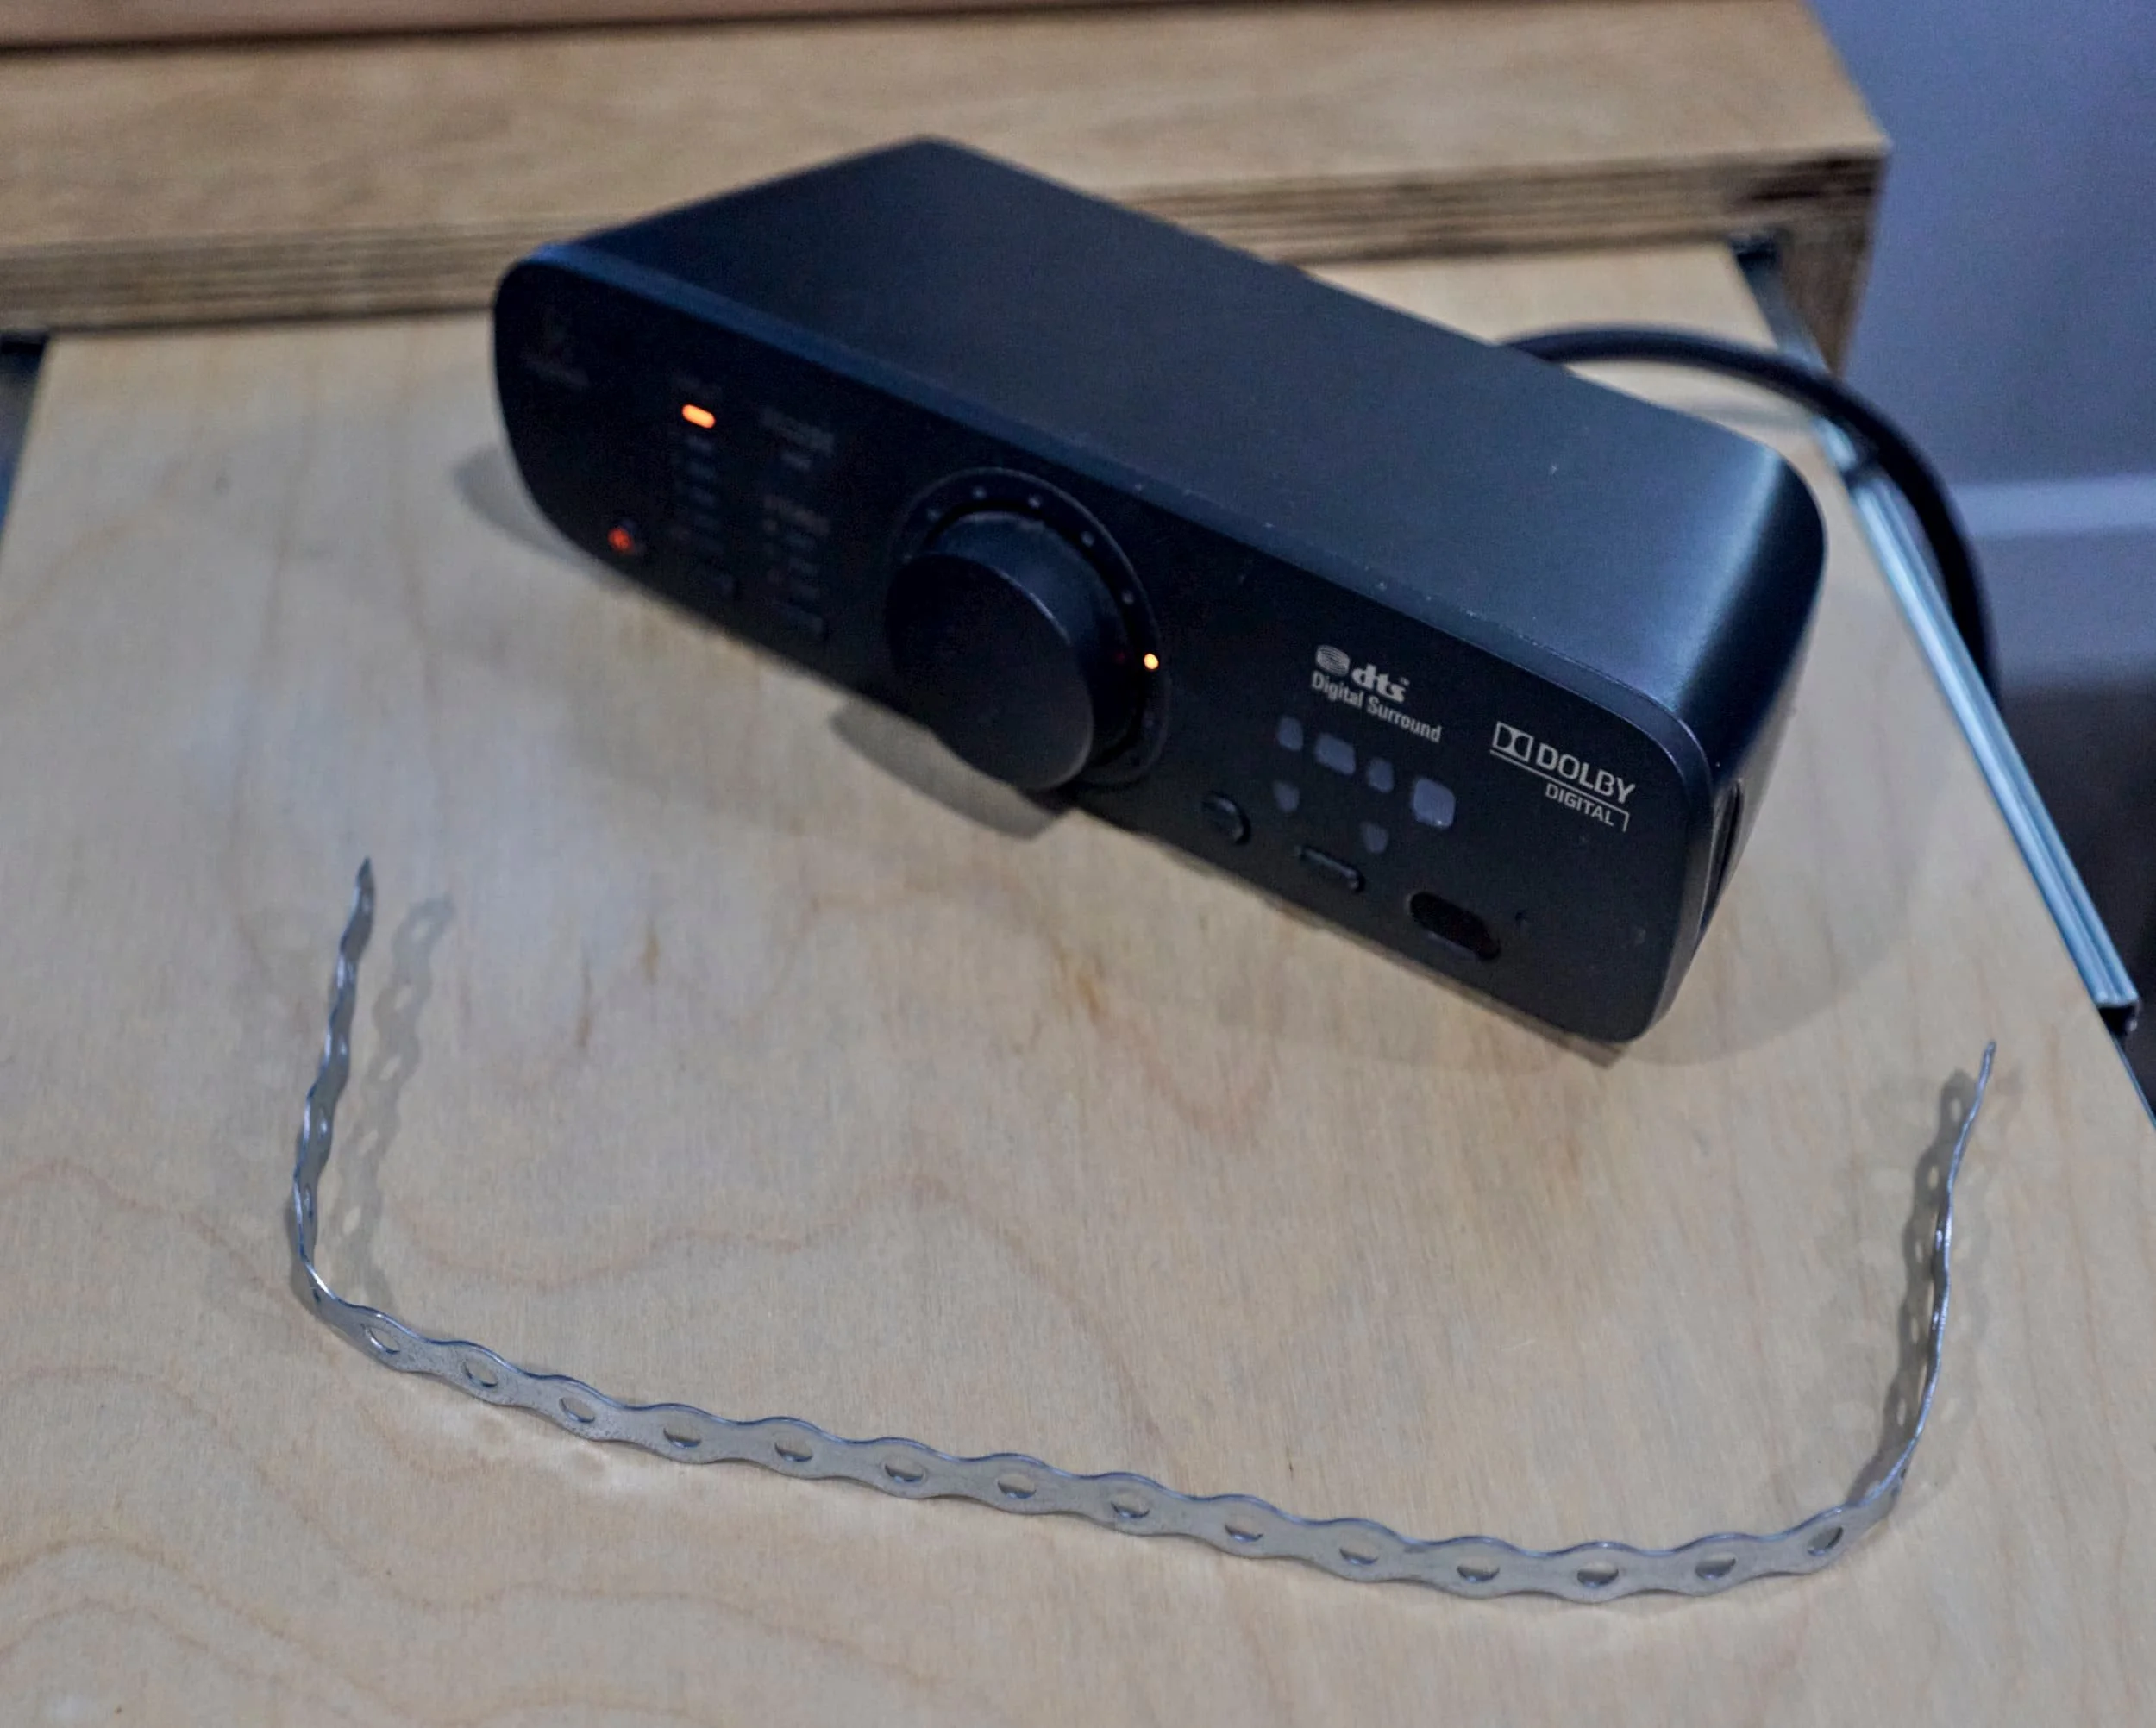
The speaker control pod was the last thing to be mounted up: I debated making a quick shelf for it off to the side, but I do actually need to have reasonable access to it to switch the inputs and possibly to turn it on/off. I ended up using some steel strapping and some VHB tape to keep it secured right overhead.


Milestone
All in all, I think this desk rebuild turned out well and has breathed new life into my office. I do have to give credit to my wife though, for putting up with the absolute disaster zone that was the office for a week while this was under construction. In the next month or two, I’ll be revisiting her wall-desk and levelling her floor area in one go. Thankfully her wall-desk is a bit less involved cable-wise, so it should go by much easier.
No KVM or USB switcher
I specifically did not want to include any kind of KVM or USB switcher to toggle between the three machines. From PC-A to PC-B, I only need to migrate the two nano-recievers for my mouse and keyboard and the work laptop can connect via Bluetooth (keyboard) and VNC. Remoting is also an option to pass keyboard/mouse through as well. For PC-A and PC-B, the monitors are directly connected.
Reducing Clutter
Reducing the number of ‘permanent residents’ on my desk was one of the motivators for this rebuild: I started out with nine or so devices that were parked on my desk regularly:
Keyboard
Mouse
Mouse pad
Stream Deck
Google Nest
Amazon Echo Show 5
Label printer
SATA/USB Dock
Speaker control pod
After the Mk II rebuild, I’ve got this number down to to just four: keyboard, mouse, mouse pad and Stream Deck. Of these four devices, only mouse pad and Stream Deck require ‘unplugging’ before moving them from the desk but given that they are connected by magnetic cables, it hardly registers.
What’s in store for the Mk III?
Looking ahead, I will almost certainly be rebuilding the side drawers once I settle on the next system build. I will certainly be swapping out the stupid soft-close drawers for traditional, undampened drawer slides.
Expanding on the idea of connecting the keyboard and mouse pad with power-only connection, I’d like to explore alternative ways of getting USB-power to these devices without having cables strewn across the desk (perhaps a strategically placed USB grommet).
I would also like to have more ‘hidden USB keystones’; by hidden I mean, that they can be in the upper cubby, be placed behind the monitors or even below the desk — dongles for my keyboard, mouse and wireless headset don’t actually need to be visible
You might have noticed that the monitors aren’t fully aligned with each other — this is because the VESA mount on the right monitor is located near the bottom of the monitor. This seems to be a fairly common thing with ultra-cheap monitors. In comparison, the VESA mount location for my two other monitors is located dead-center. I thought that the gas strut monitor mount would allow me to compensate for this — and it does — but I’ve maxed out the declination and it’s still out of alignment. I’ve been low-key planning another monitor upgrade this year so maybe that problem will sort itself out.
Mk II desk, complete for now.
Mixups, surprises and lessons learned
This was a surprisingly uneventful project with only a few minor setbacks. The first was having a WLED control brick itself during an update (thankfully, I hadn’t gone down the rabbit hole of configuring things yet - this was just during initial setup).
The second was a bit more annoying: ultimately, I discovered that a fairly new network cable had a short in it. In hindsight, I definitely noticed something was off months ago, just never thought to check the cable itself (since it was relatively new and not abused). Thankfully, the network cable in question was outside of the wall (it was one of the feeder lines providing connectivity to the wall) so it was an easy thing to replace.
This brings up an interesting point: it is really challenging to ‘test as you go’ with a build like this. For a lot of it, I have to be nearly completed before I can really do any testing. I suppose I could bust out a laptop to do some spot checking of keystones as I go but really, a keystones generally ‘just work’.
Testing some connections, like the capture dongle require testing multiple jumps too and given the chaotic nature of the build, it’s not entirely viable.
Thankfully, I actually had no issues with any of the connections within the wall.
This definitely explains why that specific connection dropped a few months ago…
Appendix - Parts list
To make things even more complicated, the cables noted below are self-contained within the wall-desk — each keystone endpoint will require an additional cable in order to connect that port to the corresponding port on a computer to ‘feed’ it. Think of the wall as a docking station for the computer.
Networking
8x CAT6 keystones — I happened to buy a few pre-loaded wall-plates that came with them
4x runs of CAT6 inside the wall
Audio
8x 3.5mm stereo keystones (6x for both ends of 5.1 signal, 2x for both ends of a stereo signal)
1x 5-speaker binding post plate (to connect the surround speakers)
2x RCA keystones (you don’t need different colors, but it helps)
1x Female Stereo to 2-RCA + 1x 3.5mm stereo cable with one right-angle (this allows us to connect the stereo signal to the second input on the Z906)
3x 3.5mm stereo cable with two right-angle (this allows us to connect a 5.1 signal to the primary input on the Z906)
2x XLR wall plates (one male, one female) — you can get something like this and separate them
1x XLR cable with one right-angle on the male or female end (the specifics depend on what gear you’re trying to connect together
1x cheapo microphone boom arm
20x Banana plugs (need them for each speaker as well as for the connection to the wall)
10x Banana plugs for spring loaded inputs (used on the speaker end)
USB
An ungodly number of keystones, 30x USB-A and 10x USB-C if I‘m counting correctly
1x USB C-to-C 20Gbs/DisplayPort-AltMode (this is used as a video cable)
4x USB C-to-C cables (you could get five of the previous but these are cheaper since we don’t need the enhanced video spec)
USB capture card (can go with a cheap unit or something fancier)
Video
VESA vertical adjustment adapter (if needed)
Right angle DisplayPort adapter (if needed)
RGB
18AWG RGB extension wire (if needed)
Power
Misc
Large wall mounted USB clock
Two Special Call Outs
There are two things that definitely made this project so much easier to tackle: the Milwaukee M12 Installation Drill/Driver and CordIDs from Dotz. The former is pretty straightforward: an ultra compact and versatile drill/driver that excels in ‘close quarters’ actions. The latter provides a means of labelling the tires but due to their clip-on/clip-off nature, provides you with three game changing benefits:
You can easily flip the clip so all your labels are oriented the same way, you can also rotate the clip to show either side
You can clip them onto cords after you’ve already wired them if needed (so you can focus on one thing at a time)
The smooth plastic surface means that labels both stay on there if you want them to but can be peeled off if you need to update it
I used probably close to a full bulk pack (100) of these CordIDs on this wall; at the very least, each wire in the wall gets two labels (one at each end) with some additional ones getting two more (in the case of video cables, they are labelled on both ends, inside and outside of the wall. It’s so nice to not have to guess what a given wire is — it’s labelled.

Wall Desk Mk I
My original wall-desk which is the basis for this retrofit.
Product links may be affiliate links: MinMaxGeek may earn a commission on any purchases made via said links without any additional cost to you.