

Build Log: DIY Leveled-floor
We have our main computer office in the basement, where everything is cooler (and the drop ceiling makes it easier to route cables) but one ‘annoyance’ about our specific basement is massive slope — on two axes. The slope is substantial enough that, not only will my chair roll away, the chair will auto-rotate on its own. This has been bugging me since we moved into this space, and I’m finally getting around to seeing if there’s anything that can be done.
Quick Links
Starting point
I’ve never really paid any thought to whether or not a floor was flat or not (other than the garage) because even in places I’ve lived with a slope, it was a nearly unnoticeable slope.
Our office is in the basement, which is a room you would reasonably expect to have a slope (towards a drain). The previous owner, however put down a floating vinyl floor on top of the basement, without leveling it (and in the process, covering the drain as well — assuming there was/is one).
Where I sit, the floor slopes on two different axes which makes it super fun because not only does my chair roll away on me, it tends to auto-rotate on its own.


Until now, I’ve used a piece of 1/2” plywood, shimmied and padded to sorta-kinda-somewhat keep the chair in one spot. Since it’s not really supported across the span, the plywood has formed a bowl-like depression. Which kind of helps to reduce the tendency of rolling but not-quite — and it’s not a long-term serviceable solution (and all kinds of crud accumulates under the platform).
Rough design
There are two major constraints:
Whatever solution I implement needs to be ‘renter-compatible’: I don’t want to make this a permanent change — so no direct-concrete, no cutting up the existing flooring. While I would love to just pay someone to come in and relevel the basement, that would be a massive (and intrusive) change - much more than I am willing to deal with at this time (or possibly ever).
My computer monitors are mounted to a faux-wall, which in turn, is secured to the wall which means that the monitors are effectively, at a fixed height. As such, there is a limited amount that I can ‘raise the floor’ before the monitors are no longer at the ideal height. If absolutely necessary, I could buy something like a vertical VESA slider (I already have one on my center monitor) but would prefer to avoid the additional expense if possible. On a related note, I want to minimize the ‘raise the floor’ amount as much as possible, also to reduce the inevitable ‘stub your toe' factor.

And one more unique constraint:
Additionally, my computer wall has connectors at the bottom — about 4 inches up. Essentially this means that any floor-lift I apply needs to stay under that upper limit.
Since I only have about 2 inches between the top of the faux-wall and the drop ceiling, placing the faux-wall on top of the lifted-floor is even less of an option.
If I had more verticality to work with, this would be a super easy project: I would treat this like my toe-kick cabinet bases and make a tapered 2x3 or 2x4 frame supported by adjustable hockey pucks and sheathe everything in plywood. Something like this:


While cutting tapers on framing lumber versus sheet-goods is nearly the same amount of effort, having the mid-spans supported by hockey pucks is a huge timesaver because you can have much larger spans in between framing members — the height can be hand adjusted by spinning up the puck up and down. The gotcha for me is my limitation on verticality:
2x3 as framing member (2.5” tall)
0-2” for tapered support
0.75” for plywood
All this puts me at 5”+ of verticality which I just don’t have the space for. To save on space, instead of having ‘framing + taper’, I could go with just the taper. The tricky bit here is that it’s much less forgiving, and I would have to cut a lot of them — since the tapers would be supporting the weight.
I loosely considered having a flat base, building up tapered walls on four sides and filling the span with playground sand, or small gravel (or even leveled concrete). I’m sure that, once packed, would handle the weight distribution perfectly fine but it was a lot of what-ifs that I was unsure of.
UIltimately, in an effort to reduce verticality, I went with tapers directly supporting the top layer of plywood. Since it would be a nightmare to try and secure the tapers to the underside of that top-layer-of-plywood, I would need to have a bottom layer of plywood as well. Ultimately, this ends up being a large, tapered, torsion box
Step 1 - Properly support the faux wall
When we set things up originally, I just jammed some random scraps of wood under one edge of the faux-wall to get it to be level (and secured the faux wall to the actual-wall). The bits of wood sticking out were now getting in my way so I wanted to replace it with something tidier. I used an adjustable leveling foot to take the load and also opted to throw in a ‘just in case’ shim (since the load is now sheared across the screws).


Since I built the faux-wall, I know that the entire perimeter is framed with 2x4 and the roughtly-four-foot span can (and obviously has) taken the load this way.
Step 2 - Layout
Once the wall was cleared out, I used a laser to figure out what kind of footprint to make the leveled platform. I did some spot measurements to figure out where and how much to raise the floor in order to get it as level as I could left-right and front-back.
Something to keep in mind is that you need room to roll the chair back in order to get out of it! The amount of front-to-back you need also depends on the depth of your desk as well (my desk is about 24” deep). I originally started with 6-ft (front-to-back) but with some spot testing, I was able to reduce that to about 5-ft.
My left-right span was 6-ft so I ultimately ended up with a 6x5 rectangle-ish (since the damn wall comes out by about 1” on my span there).


Step 3 - Cutting tapers
Now the super tedious task of cutting exact sized tapers. I initially started cutting tapers to be placed front-to-back (starting on the right, with the least amount of taper needed); everything was level (front-to-back) but something didn’t feel right. I cut the left-most taper (running front-to-back) which was the biggest taper and then checked level left-to-right and it was way off. This is sort of expected because I have a much bigger slope running left-right than I do front-back.
To correct this, I switched my tapers to run left-right instead. I cut some scraps of plywood to try and get a loosely even spacing of tapered supports. When I was done with roughly cutting and placing the tapers, I threw my level across it to measure diagonally and thankfully, it was reasonably level.


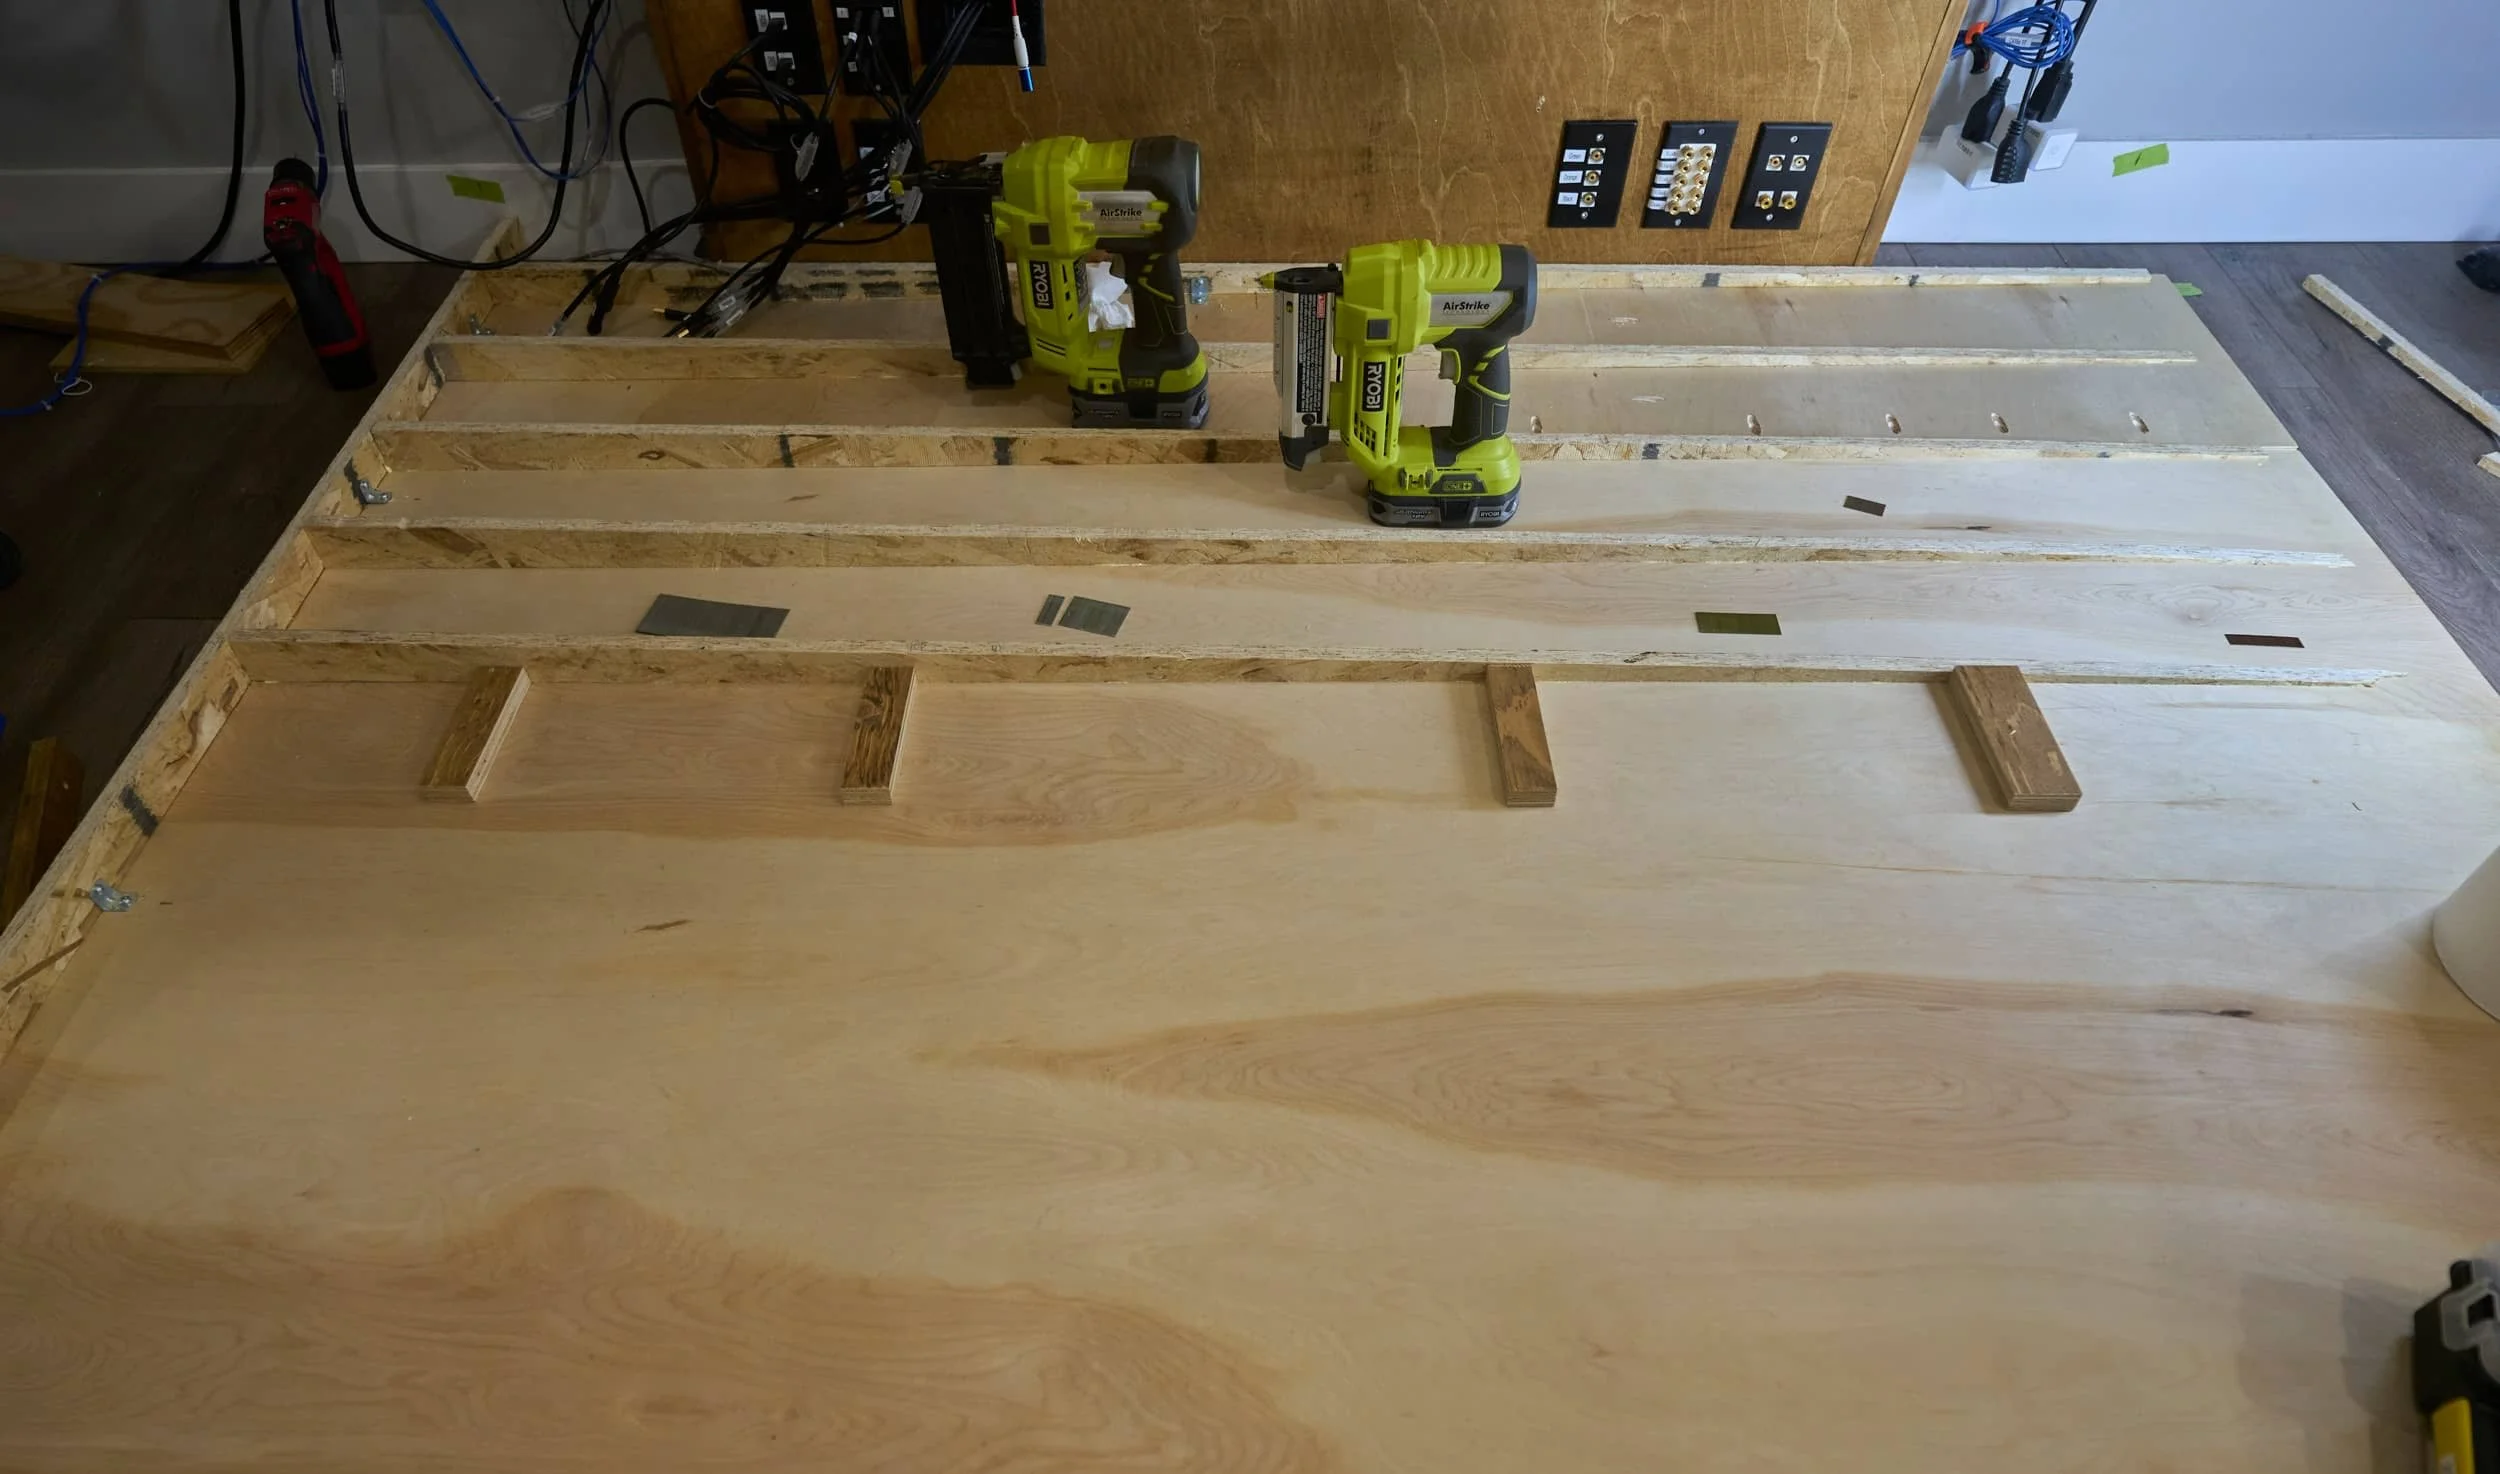
Step 4 - Torsion 'box'
Even with super powers: to be able to see through the plywood and be able to lift the entire sheet to place it perfectly atop the tapers, it would be super challenging to attach the top sheet of plywood to the tapers because as you to go to the right, the tapers get smaller and smaller — so there’s nothing to glue/pin/screw to. Even if I were to somehow pull this off, it means that the entire top-plywood is balanced on some vertically aligned strips — which will shear off over time causing everything to collapse.
This means I need to have a bottom plate: the tapered strips can easily be glued + pinned to the bottom plate and then the top plate can easily be screwed to it. By only screwing the top plate, we can remove it for whatever reason if needed. This was an easy step to do, but fairly tedious as I had to switch between multiple sizes of brads and pins.


Like the bottom plate, the top plate is a 4x6 panel + 1x6 panel. I opted not to secure the top plate down — it’s wedged in there between the bottom plate and the faux wall. I may screw it down at some point but for now, it’s accessible just in case I want in there for whatever reason.
Step 5 - Finishing touches
By sheer luck, I happened to finalize the platform to be 6-ft wide which was a perfect fit (left-right) for a trailer mat. I was stressing about how to 'dress’ the top plate — whether to use some type of floring panel, or to have a sacrificial layer of wood that I might coat in some kind of bedliner or something else.
The trailer mat is great — it’s heavy duty and can handle the point-load of my rolling wheels and actually makes it somewhat ‘difficult’ to roll: I have to make a conscious effort to roll my chair — a very welcome change from the ‘roll whether you want to or not’.
The trailer mat is 5/8” thick and doesn’t cover the full span of the platform, so I did have to find a way to shim the back side, at least temporarily somewow). By sheer luck, I had enough scrap 5/8 plywood matched the height perfectly.


Milestone
For a weekend project, this was great: my chair doesn’t roll anymore and I didn’t have to buy anything (yet). I’m going to get some 5/8” plywood to even out the gap between the trailer mat and the faux wall but that’s not a priority. It’s so nice to be able to just put my feet down without consciously trying to hold the chair still, in one place. When I get the plywood, I’ll probably cut a taper to dress up the front and side edges, just because.
Material wise, this project cost me almost two sheets of plywood for the sandwich and 1/4 to a 1/3 sheet of OSB to cut the tapers. Your mileage may vary depending on how many tapers you cut and how many times you screw up cutting tapers. I did use a whole bunch of Handi-Shims which I can’t recommend enough. There are some gaps still (because of humps and dips in the floor) but I’ll slide some long composite shims to support it.
All done for now.
Product links may be affiliate links: MinMaxGeek may earn a commission on any purchases made via said links without any additional cost to you.