

Small Shop Improvements (2023.2)
After getting the overhead blade-guard mounted dust collection on my saw in the previous update, I was totally blown away by just how much dust could be directly captured at the source — reducing the amount of time and effort spent cleaning up at the end of a project. I’m not a big fan of the blade guard assembly on my saw but the effectiveness of the aftermarket blade-guard mounted dust collection was just so compelling, it was worth using — at least for a few months.
In that time, of course, I wanted to keep an eye out for a different, over the blade mechanism to handle dust collection. Recently, I found a compelling option so it was time to revisit dust collection in the shop.
Quick Links
Table saw dust collection
Starting point: blade-guard dust collection
In my previous update, I got around to installing over-the-blade dust collection I got from Etsy and the results were/are incredible - I can comfortably say that ‘nearly all’ the dust was captured. For most types of cuts, it’s easily 99% — the only dust that has a chance of escaping comes right at the end as the blade comes out of the trailing edge of the board.


While the dust collection performance is phenomenal, having the guard present, can be a nuisance at times:
Whenever I’m performing a non-through cut, I had to take the guard off anyways. Removing and replacing the guard is, a huge pain in the butt, regardless of how “quick and easy” the table saw instructions tell me
For some/many types of cuts, I would really like to use something like the MicroJig Gripper but with the bulky guard in place, it’s difficult/impossible, so again, I end up removing it to do the special cuts
If you’re making very thin (but long) rip cuts, say 1/8th or 1/16th — fragments of your cut can get sucked up into the chute and get ‘stuck’ requiring you to stop what you were doing and dislodge it before continuing
Despite all of these annoyances (none of which were really the fault of the dust-collection adapter), the phenomenal dust collection was totally worth the hassle of working with the guard. I did keep an out for some form of dust collection that ‘come down from the ceiling’ — without wrapping around the right hand side of the saw like nearly every overhead dust arm ever.
Why the odd requirement?
Nearly 100% of the time, when you look for “overarm dust collection” you get a ‘thing’ that
Hangs over the blade but then
Pipes/routes to the right side of the table saw, often down low. Some models will (after going right), snake back left to hook up to the dust port on the saw
In many cases, they will bolt to the right side of the saw in some way as well
My dust collector happens to be on the left side of the saw (and I have hose running across the ceiling and dropping down) so the idea of having piping run right (and then down), only to then ultimately go left (or up) was silly to me. Many of the options also felt like they were saw-specific (I’ve love to one day, upgrade this saw) or at the least, required me to commit to a specific rip-capacity (I would totally consider an increased rip capacity) so I didn’t want something that would hamstring me in the future.
Ultimately, I wanted an overhead guard where the piping goes up then connects left, or even have the piping go left a bit then up (or down). But no, I’m pretty sure every option on the planet has things going right (not to mention, very few options tie to the ceiling).
I did find one really neat option, the PSI TSGuard can be mounted to a ceiling. There is a downside: the dust collection guard is built for 2.5” hose and more importantly, I got Canada’d. I had almost resigned myself to the fate of having to DIY something when I stumbled upon an option by Centurion.
Canada’d
A condition that happens when a product is either unavailable or delayed in Canada, or costs three times more, or comes with a ridiculous shipping cost.
Or more than one of the above.
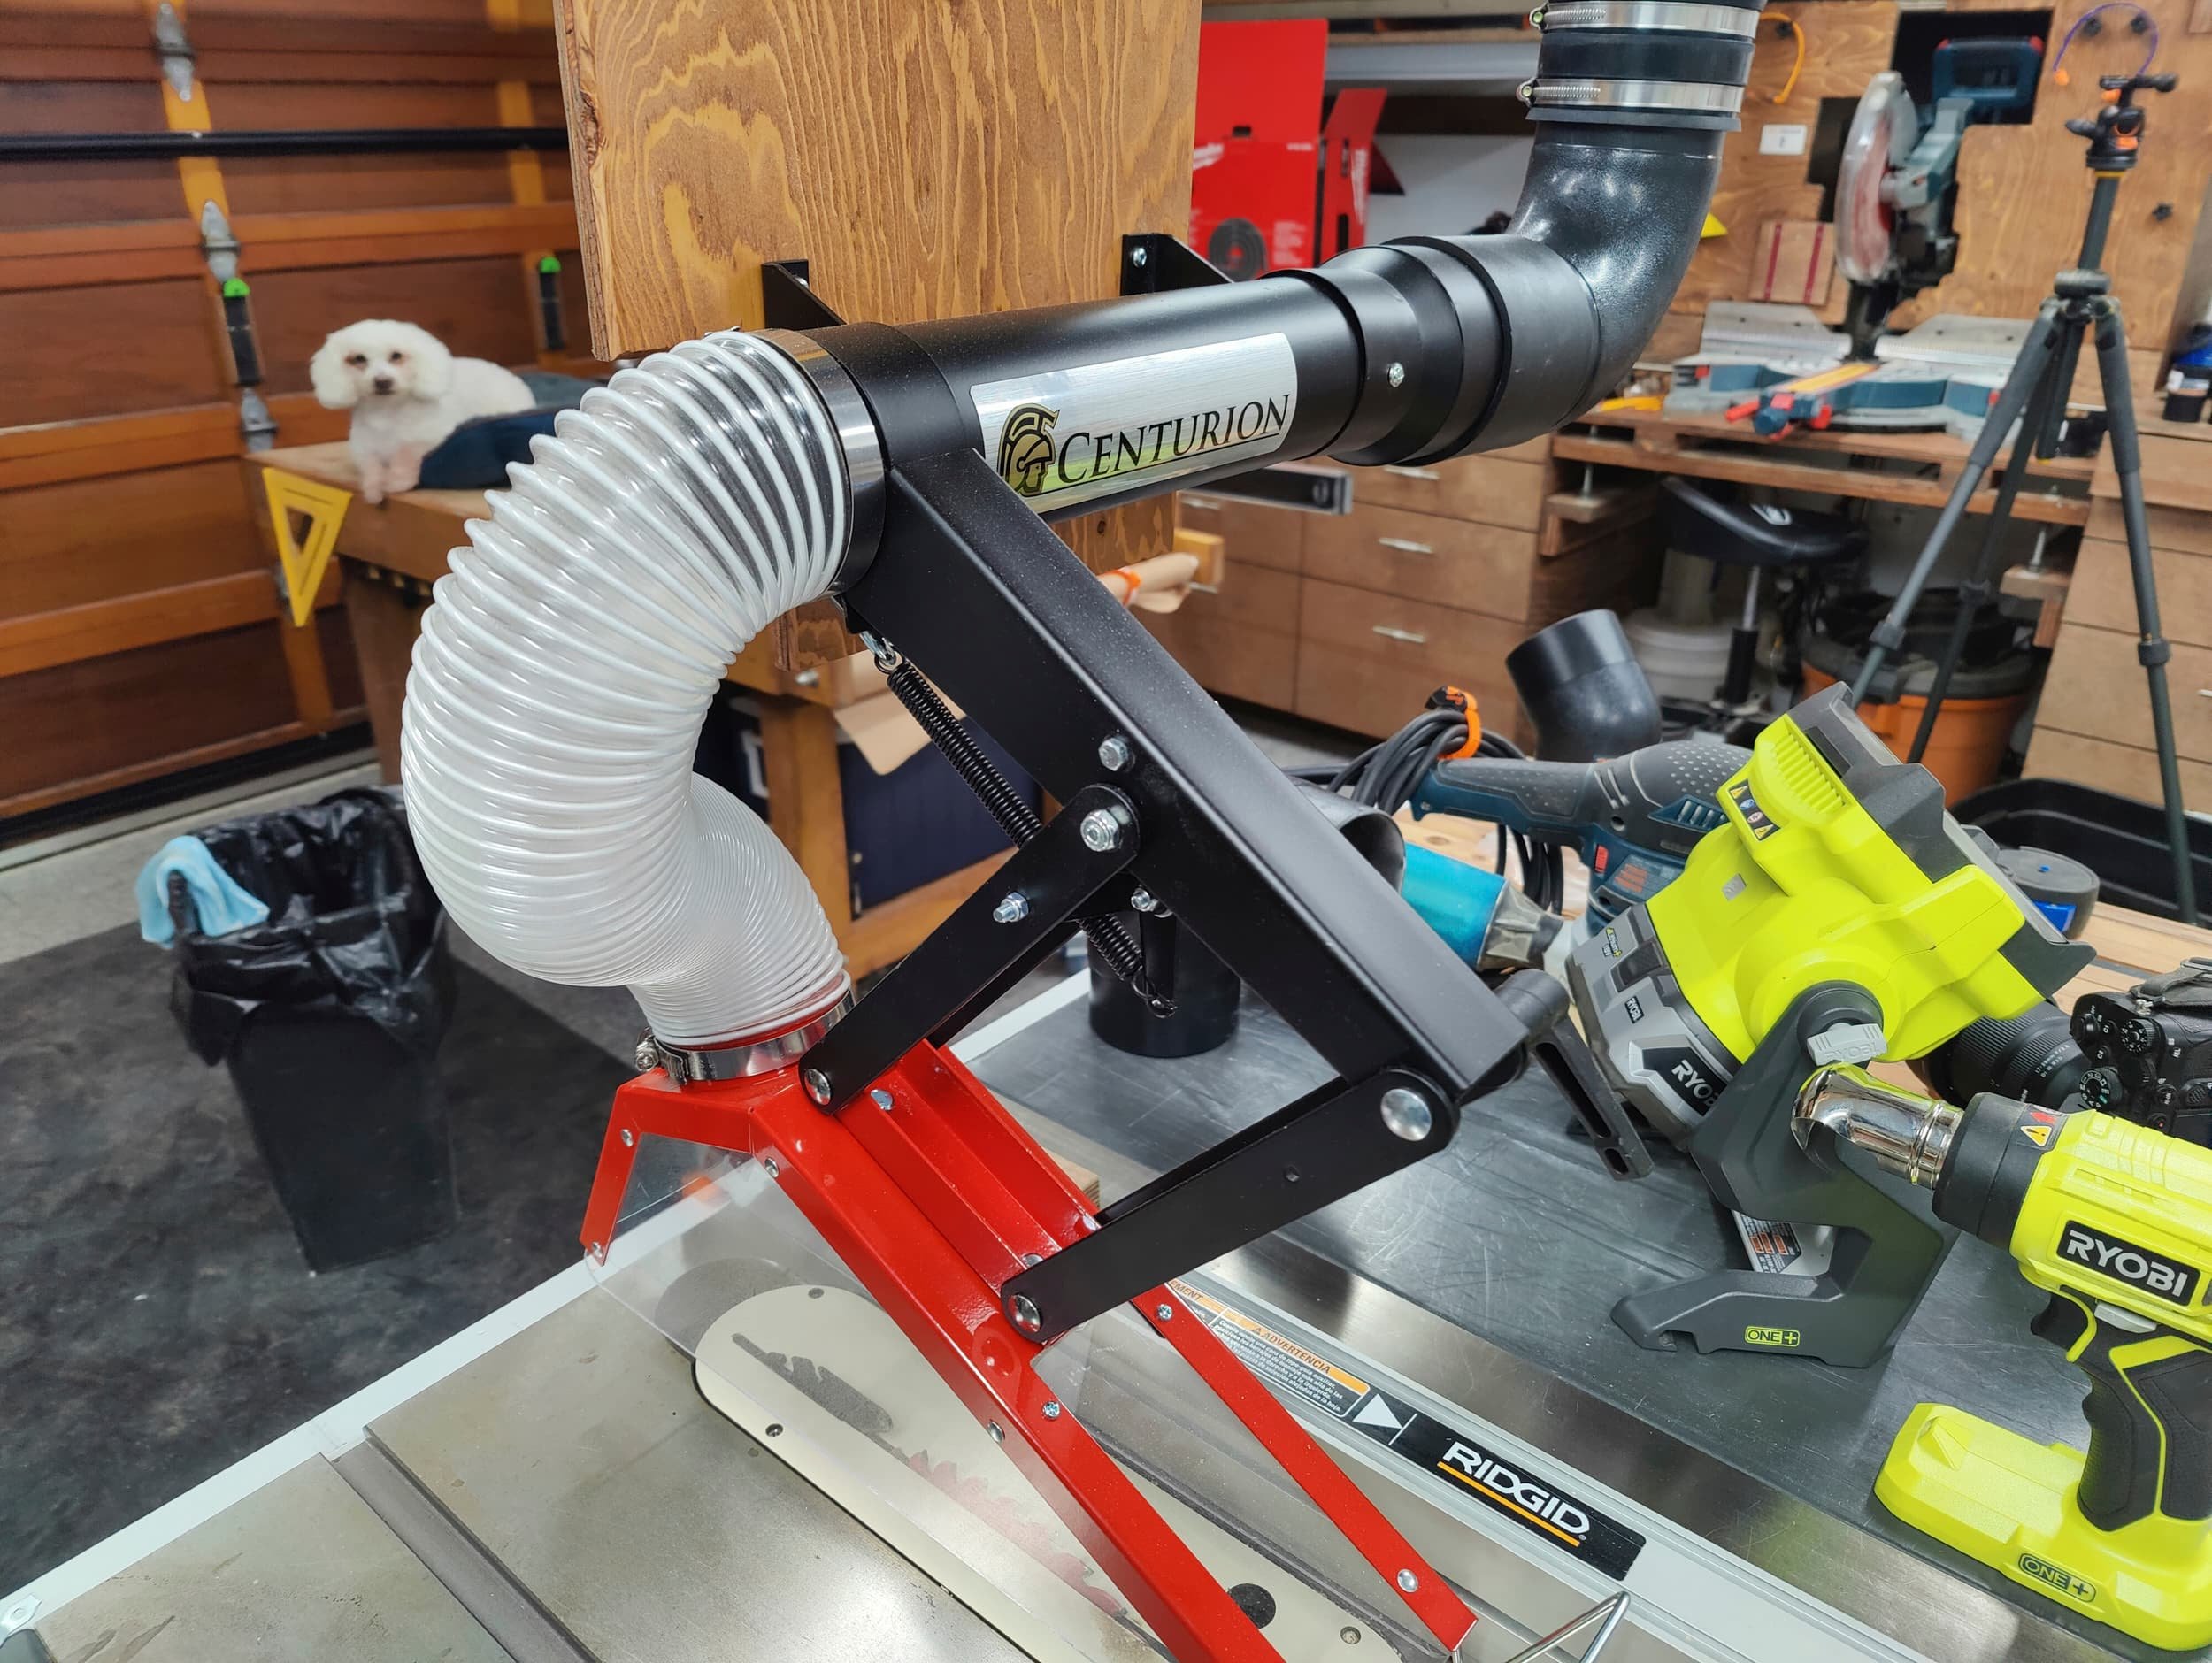
It’s not exactly what I wanted (a pipe going straight up, or left-only) but it was the closest option I found that I could actually order.
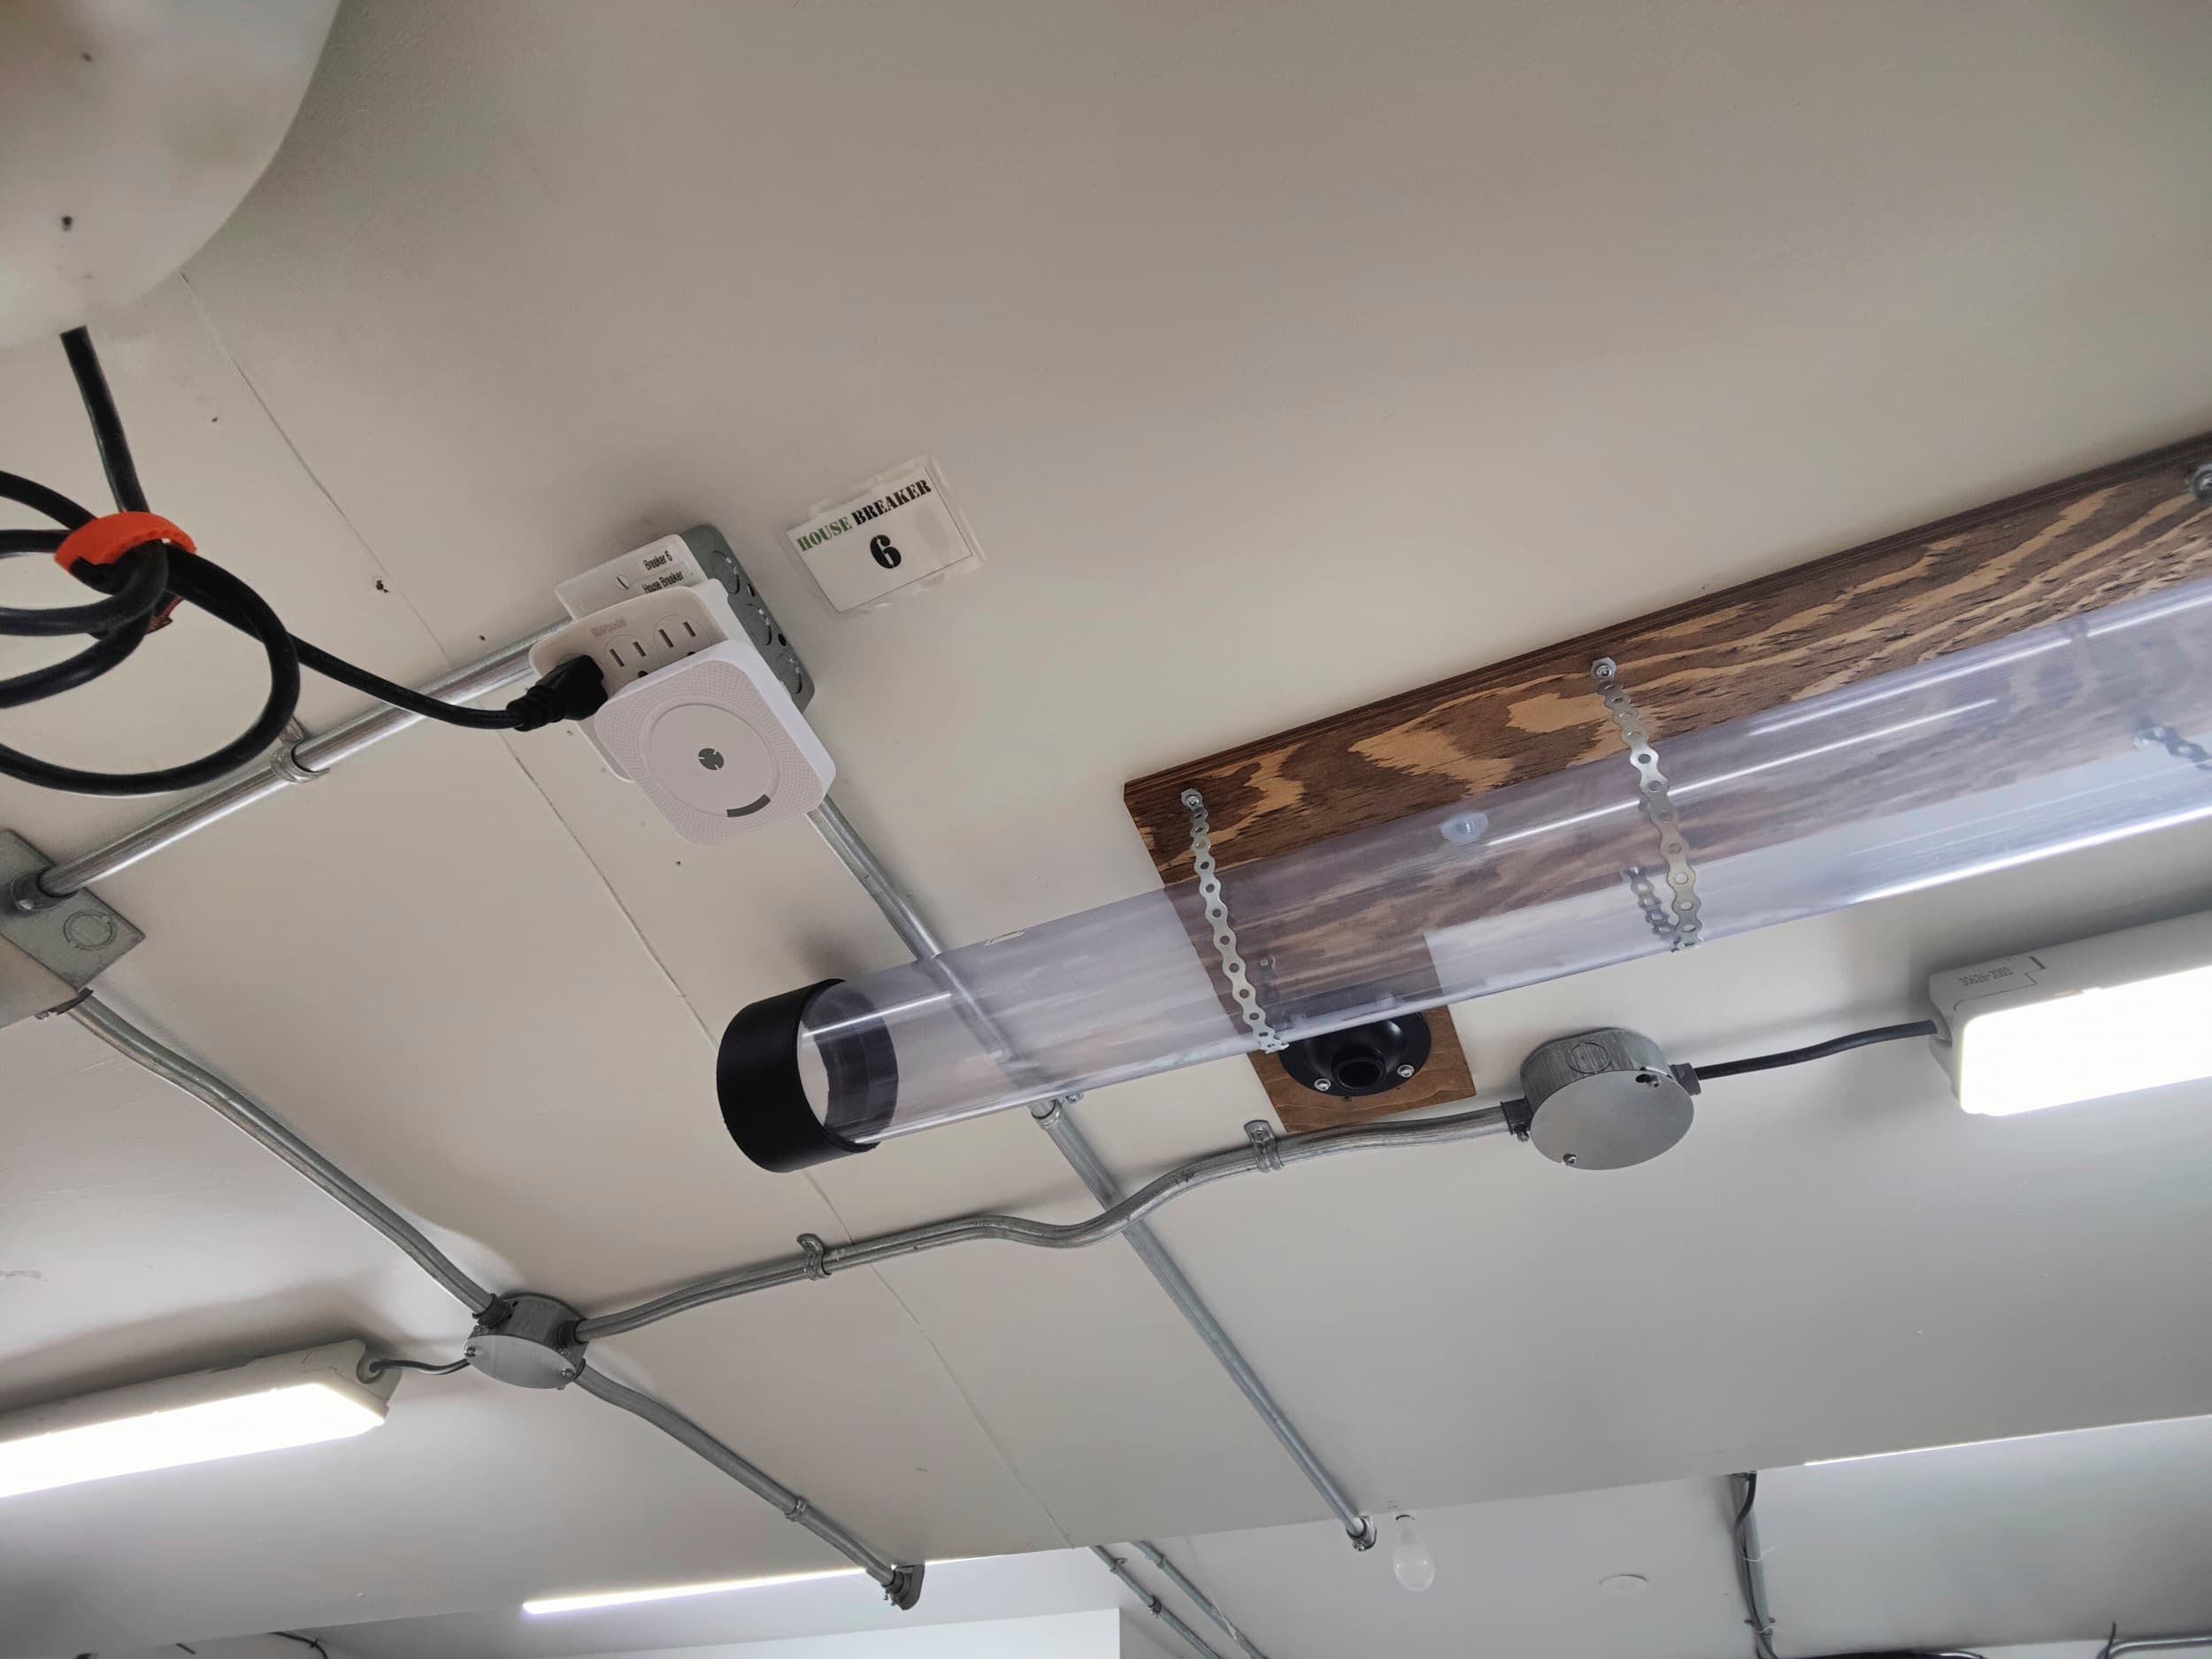
Installation
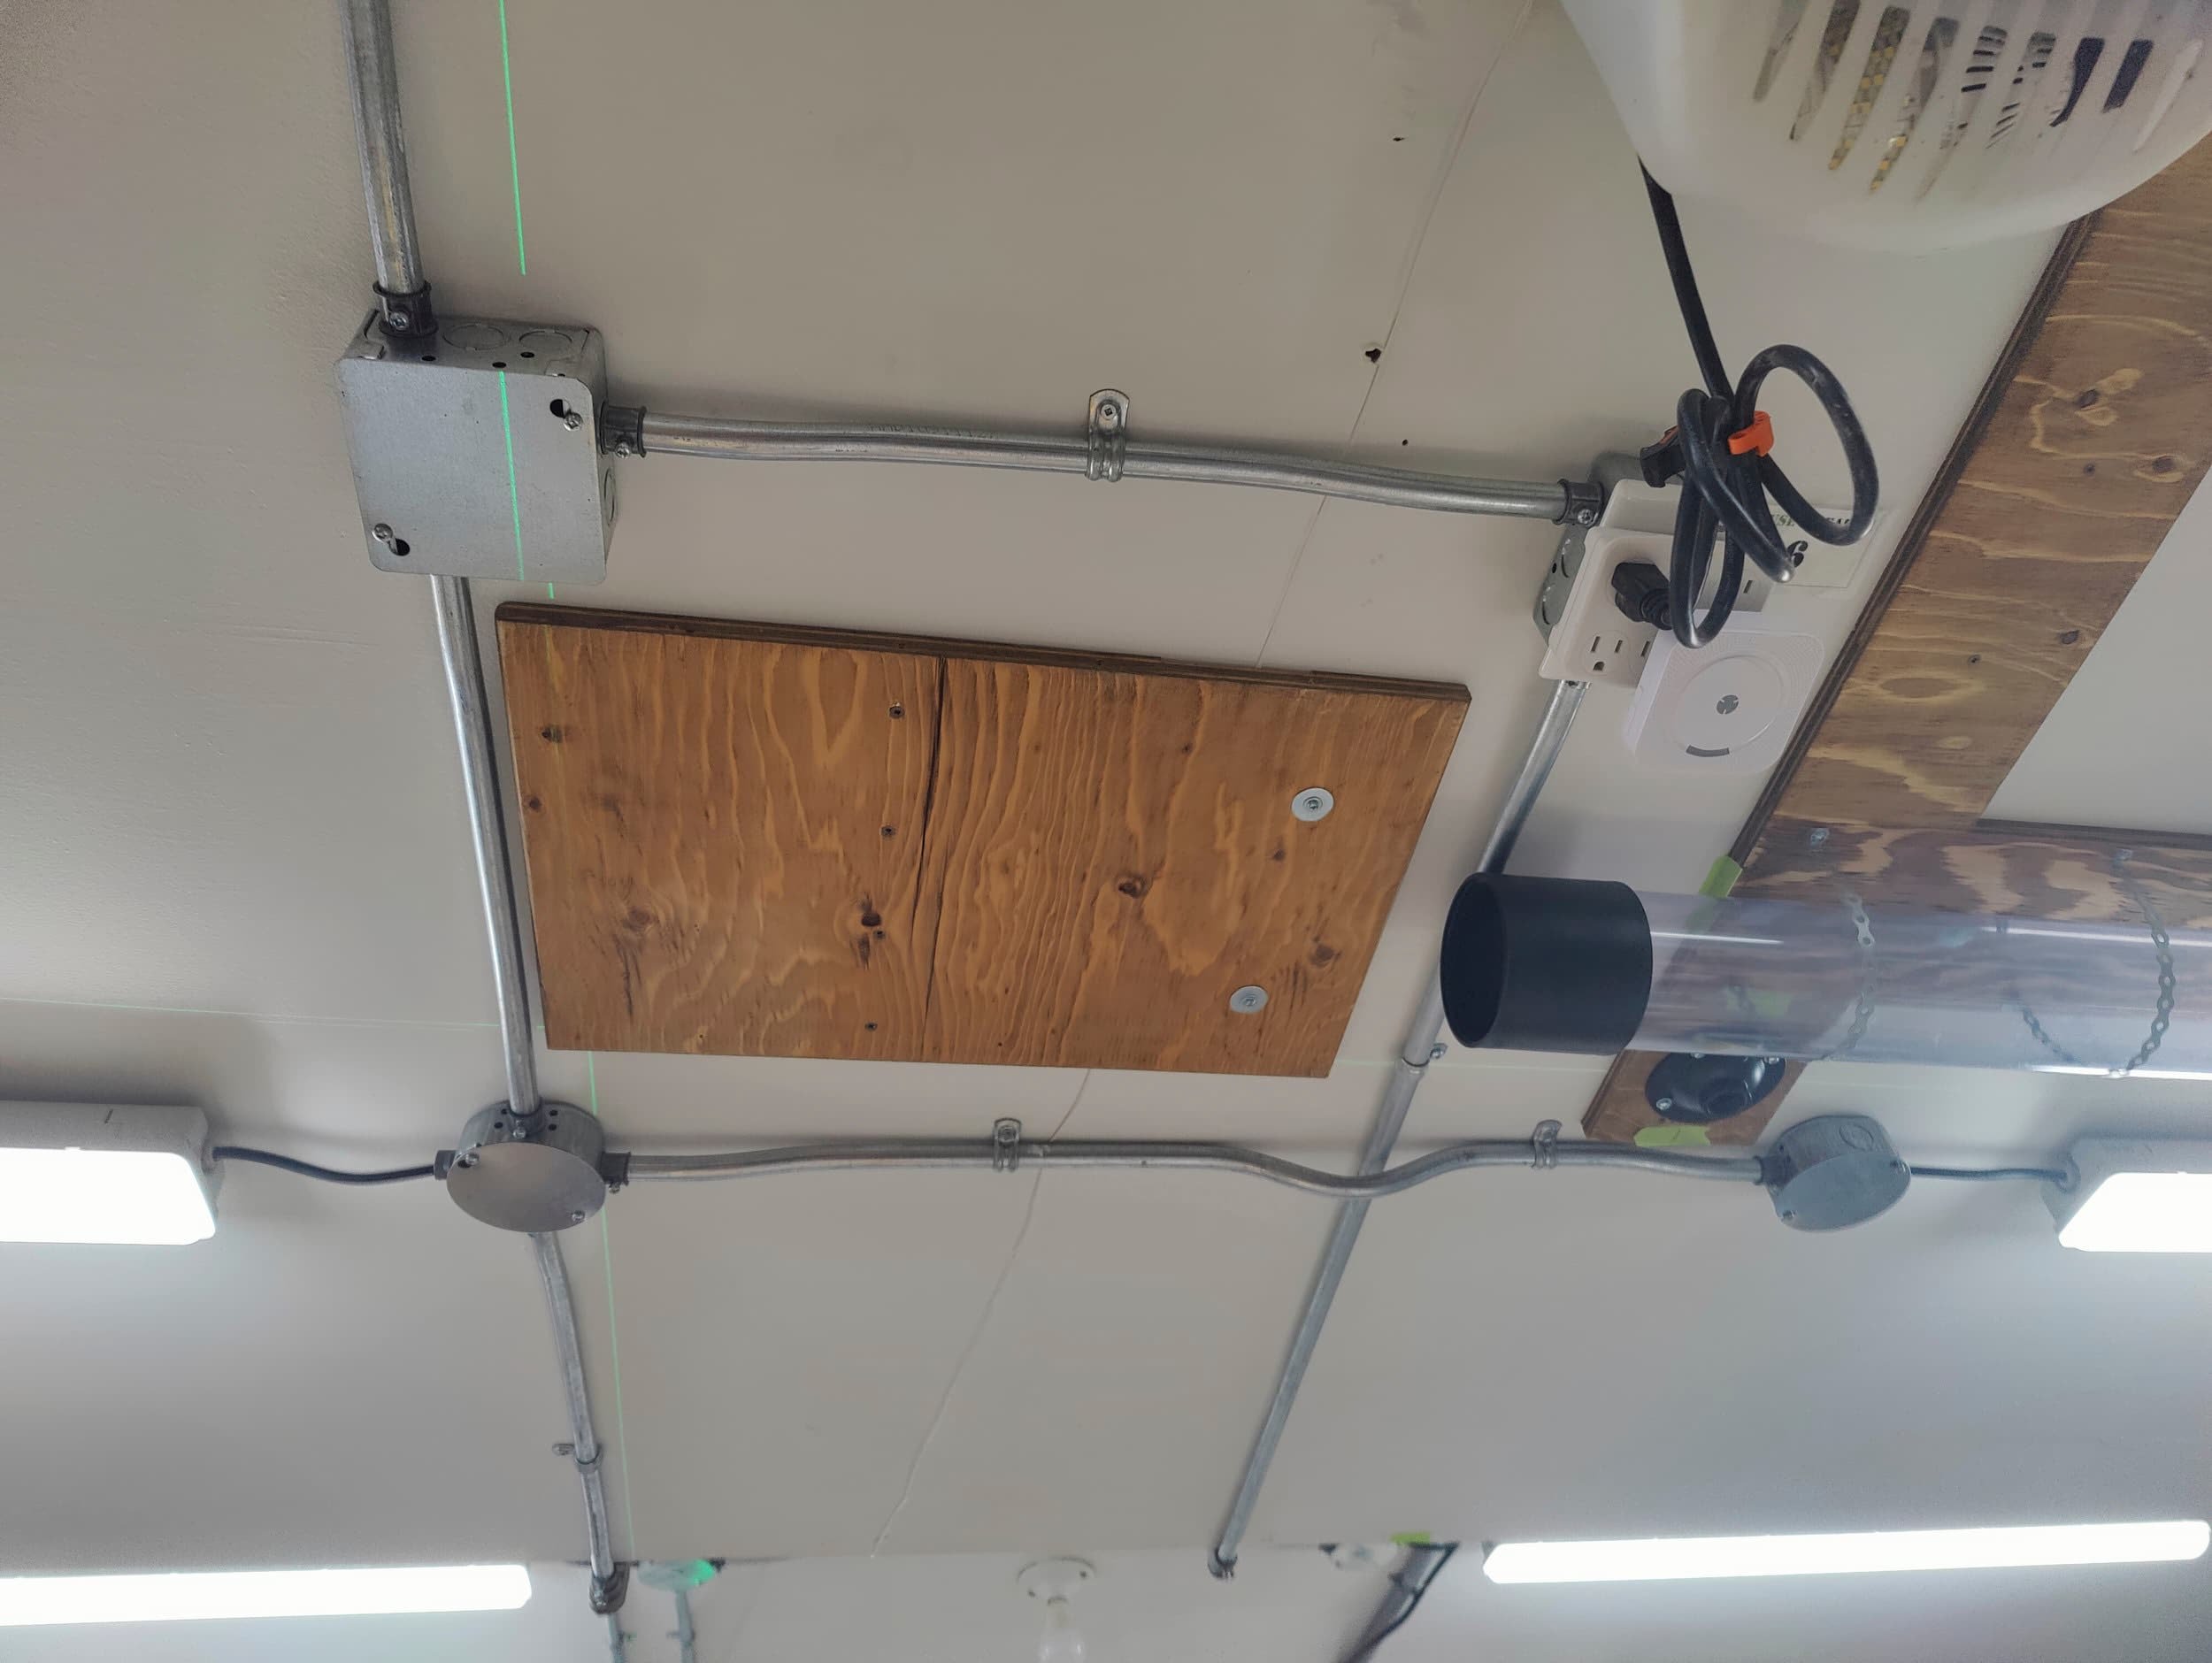
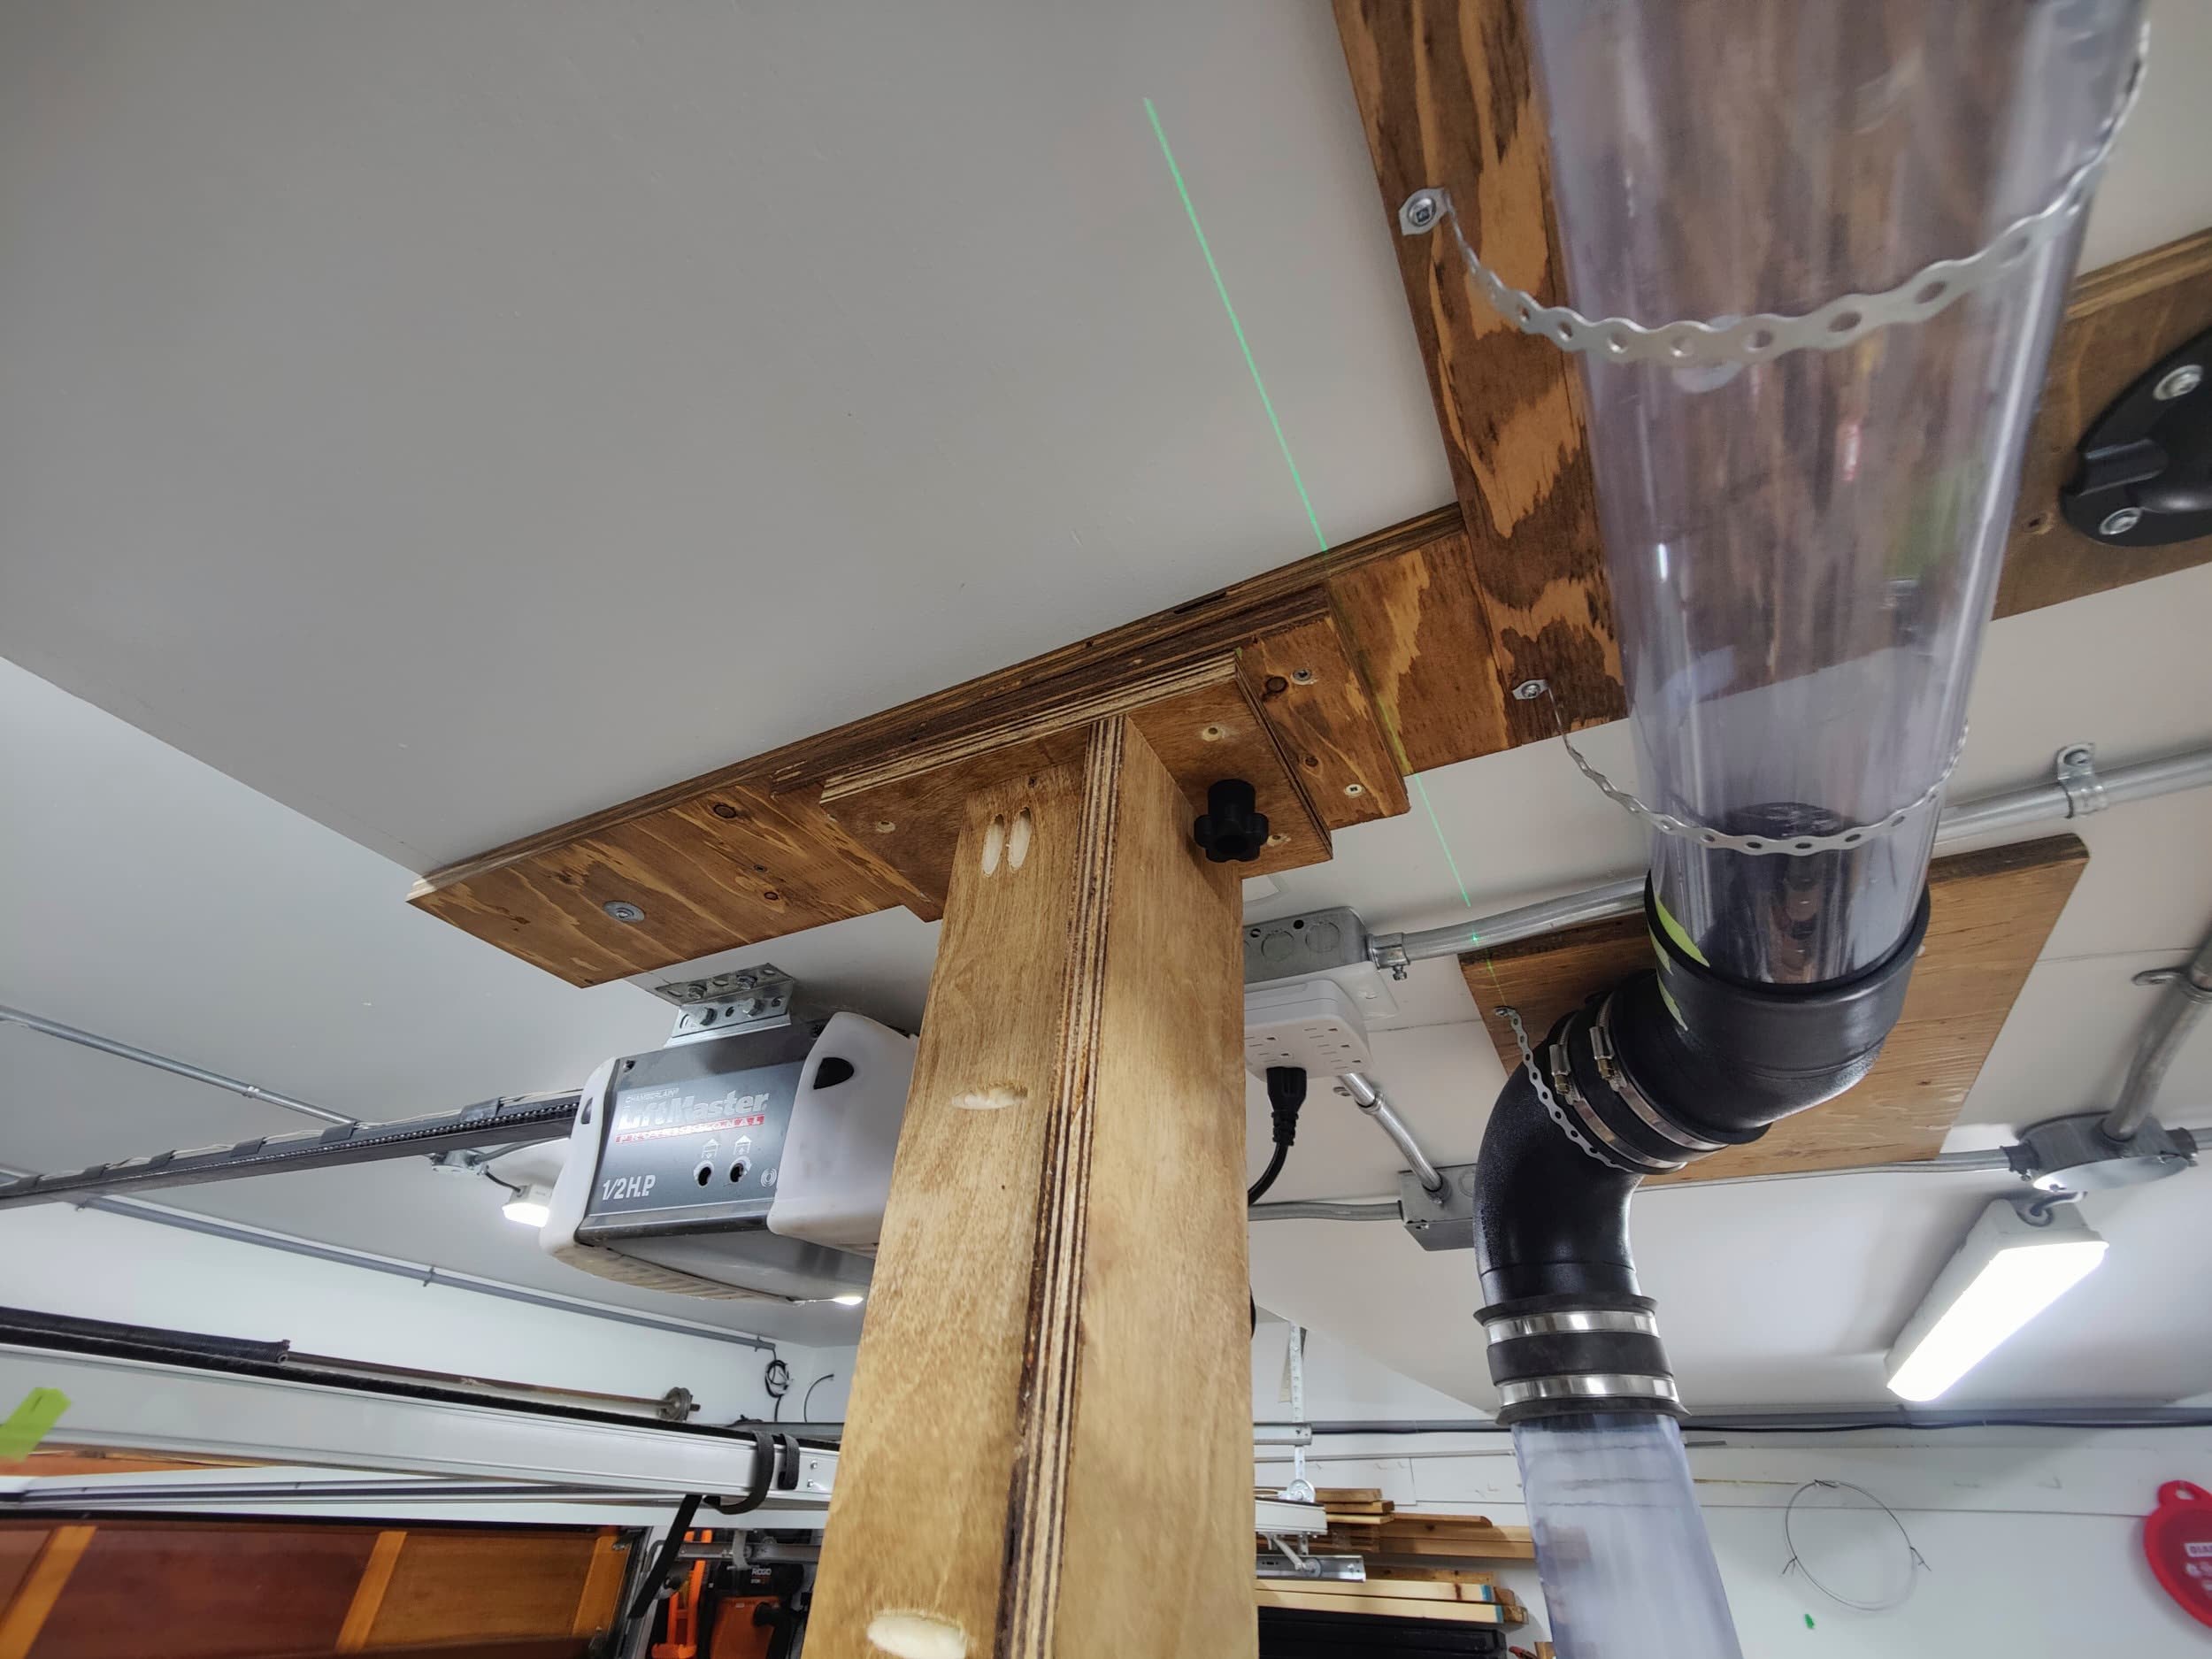
I have a bulkhead running across the ceiling over the table saw and with foil-lined insulation, there was a whole lot of ‘who knows what is behind the drywall’. Installation went in three stages
Mounting some plywood to the ceiling — this would allow me to secure piping to the plywood and not have to fret so much about whether I was mounting to wood or not,
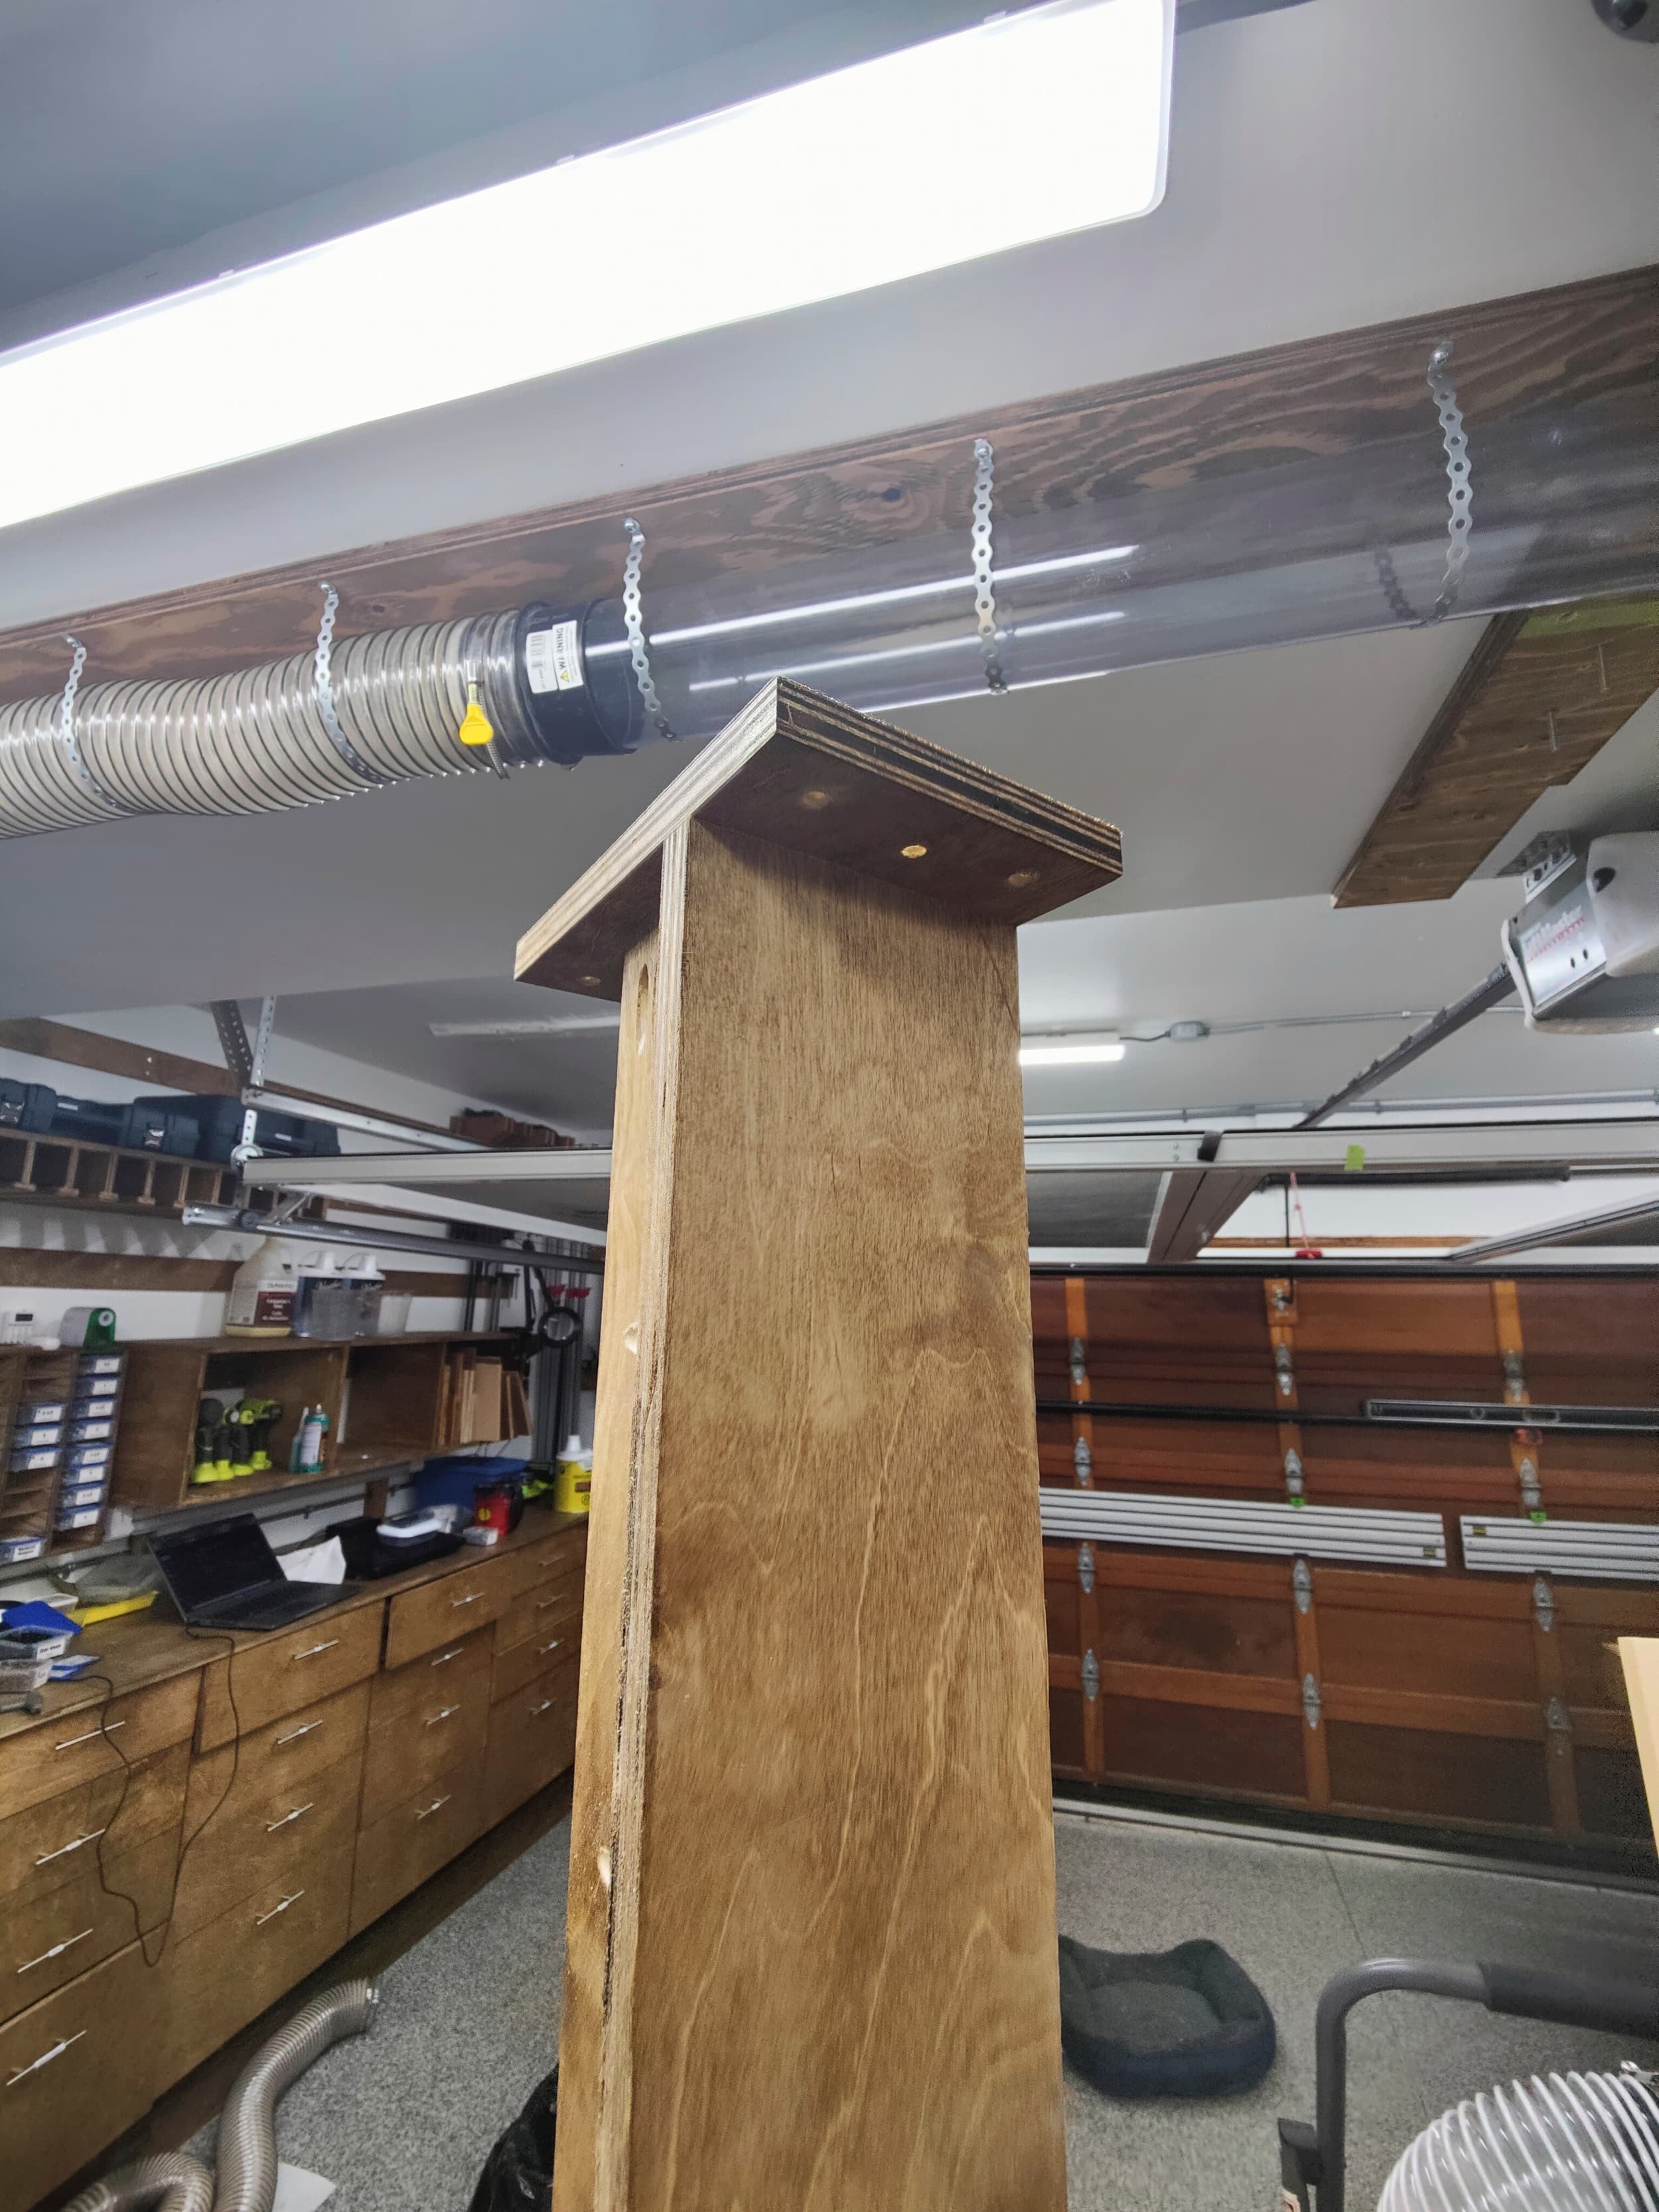
Some kind of a vertical drop-down bar that I could mount the guard to and
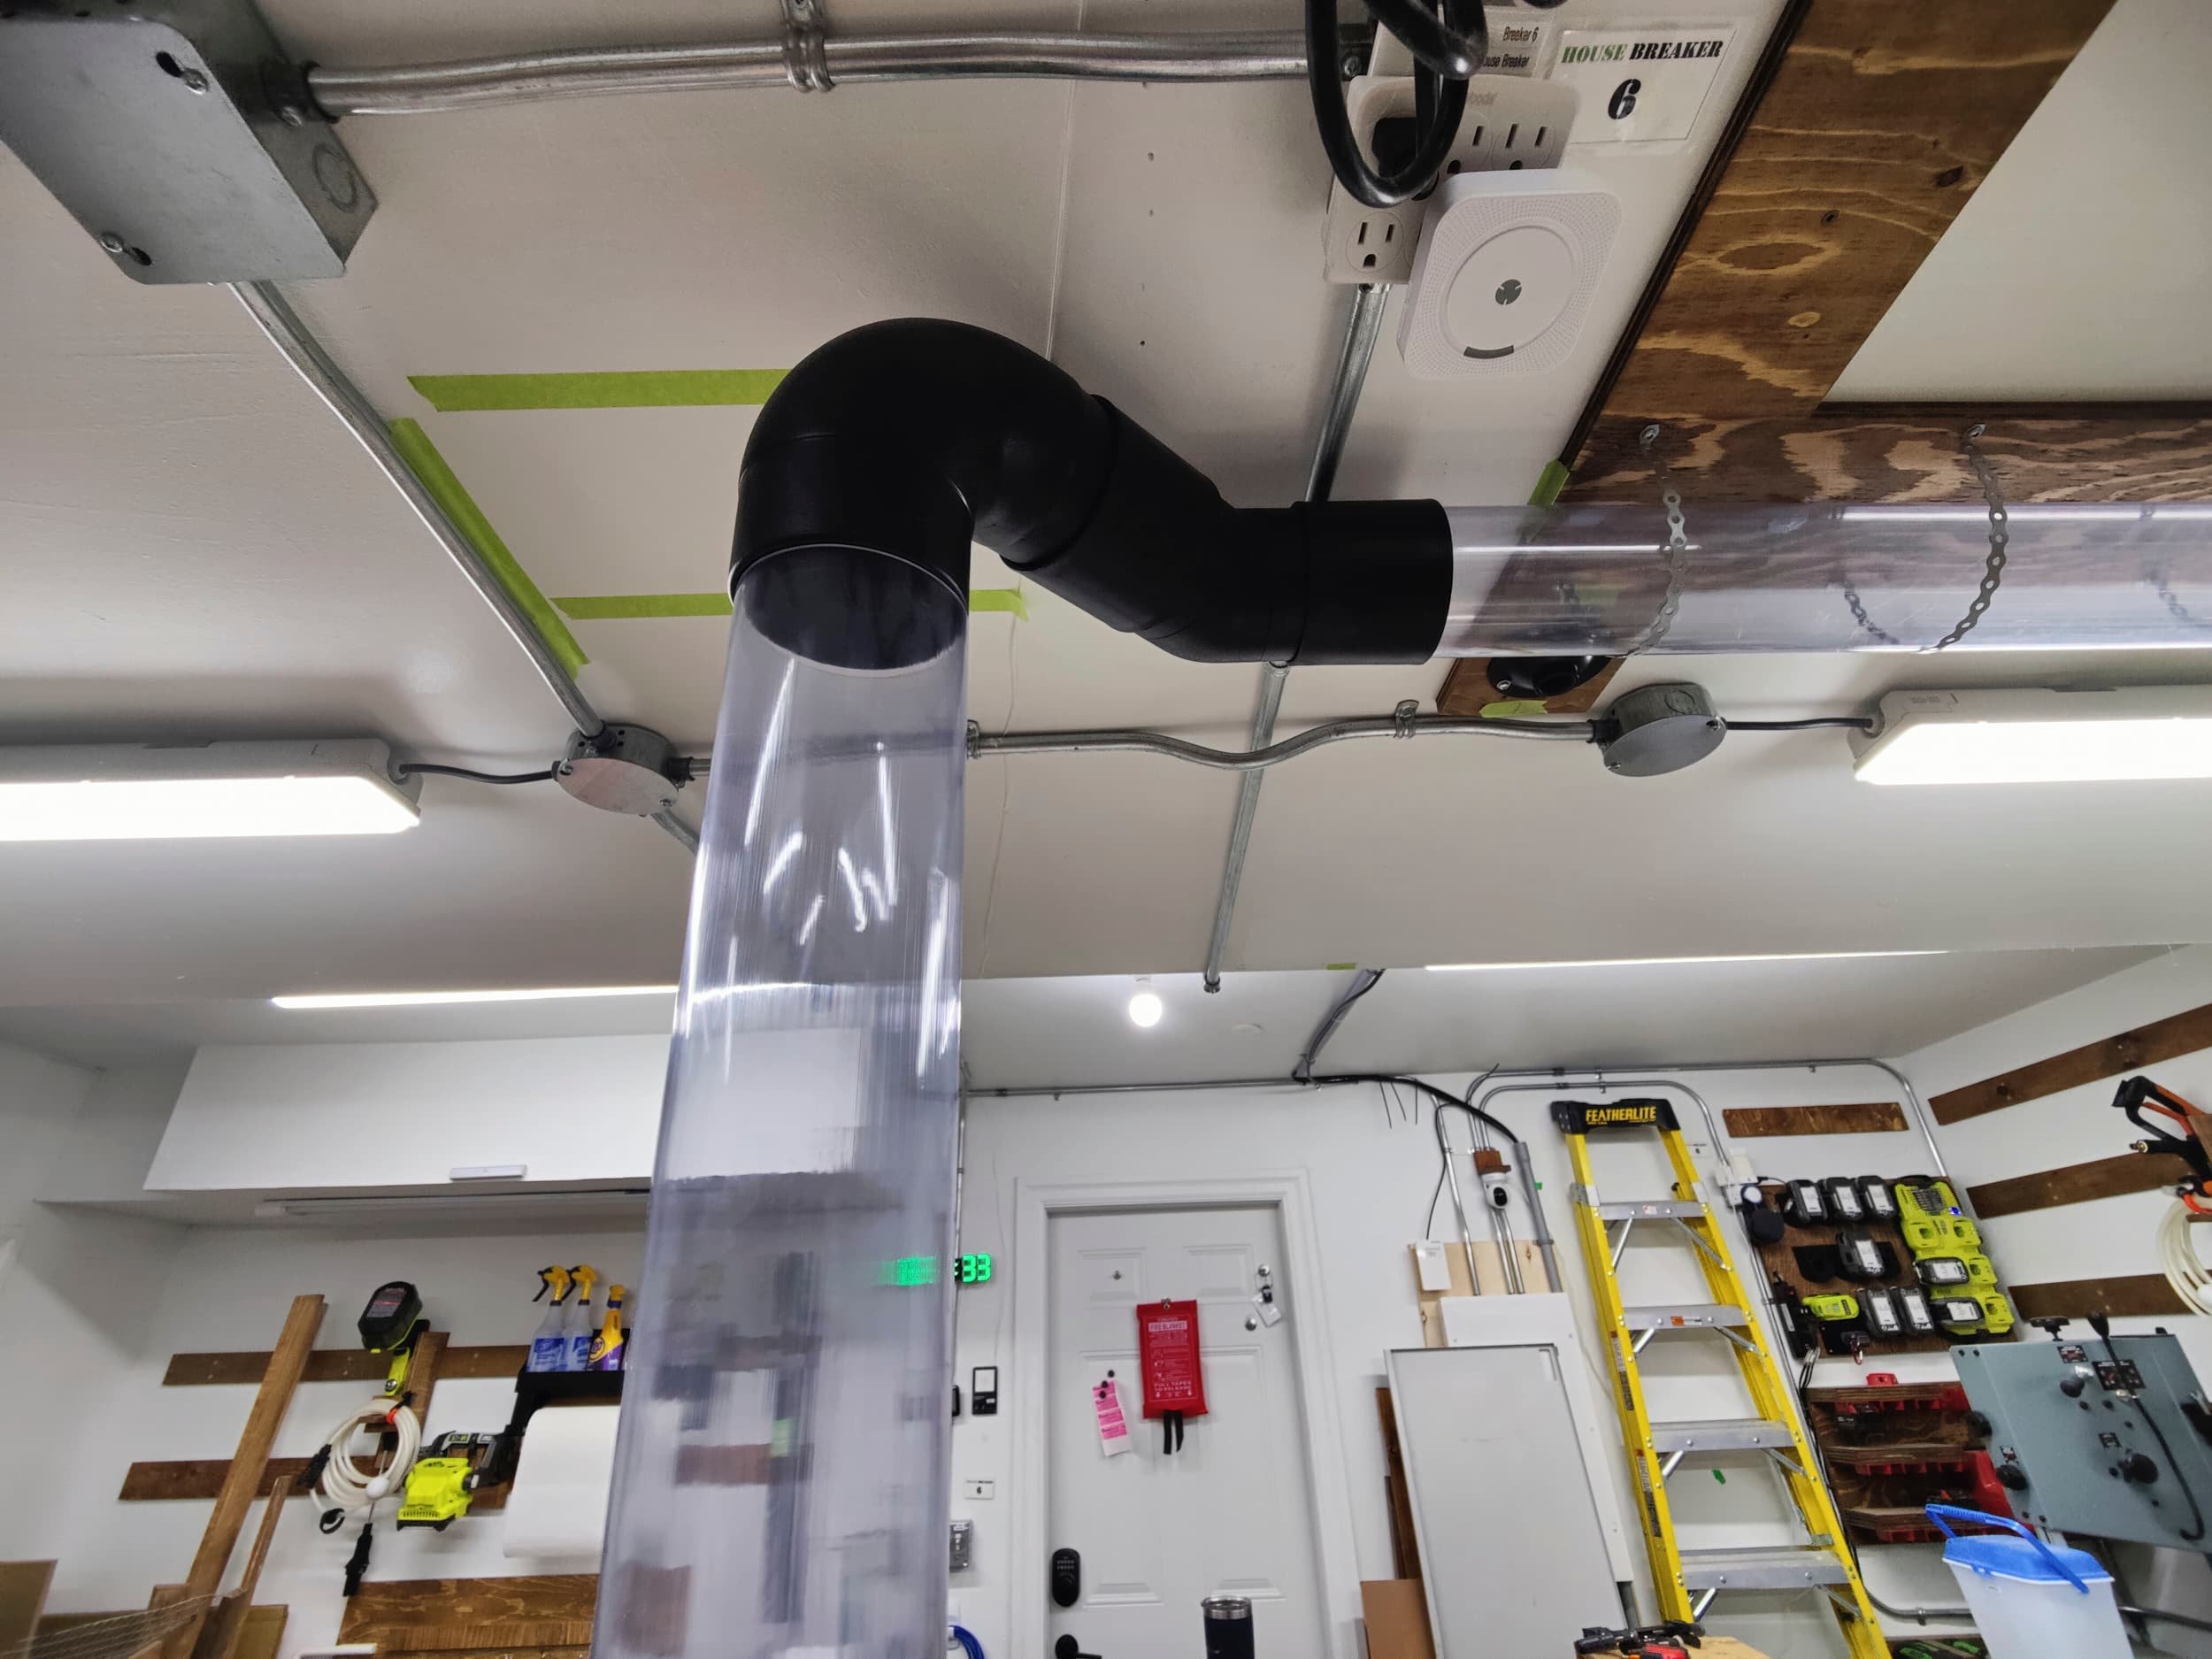
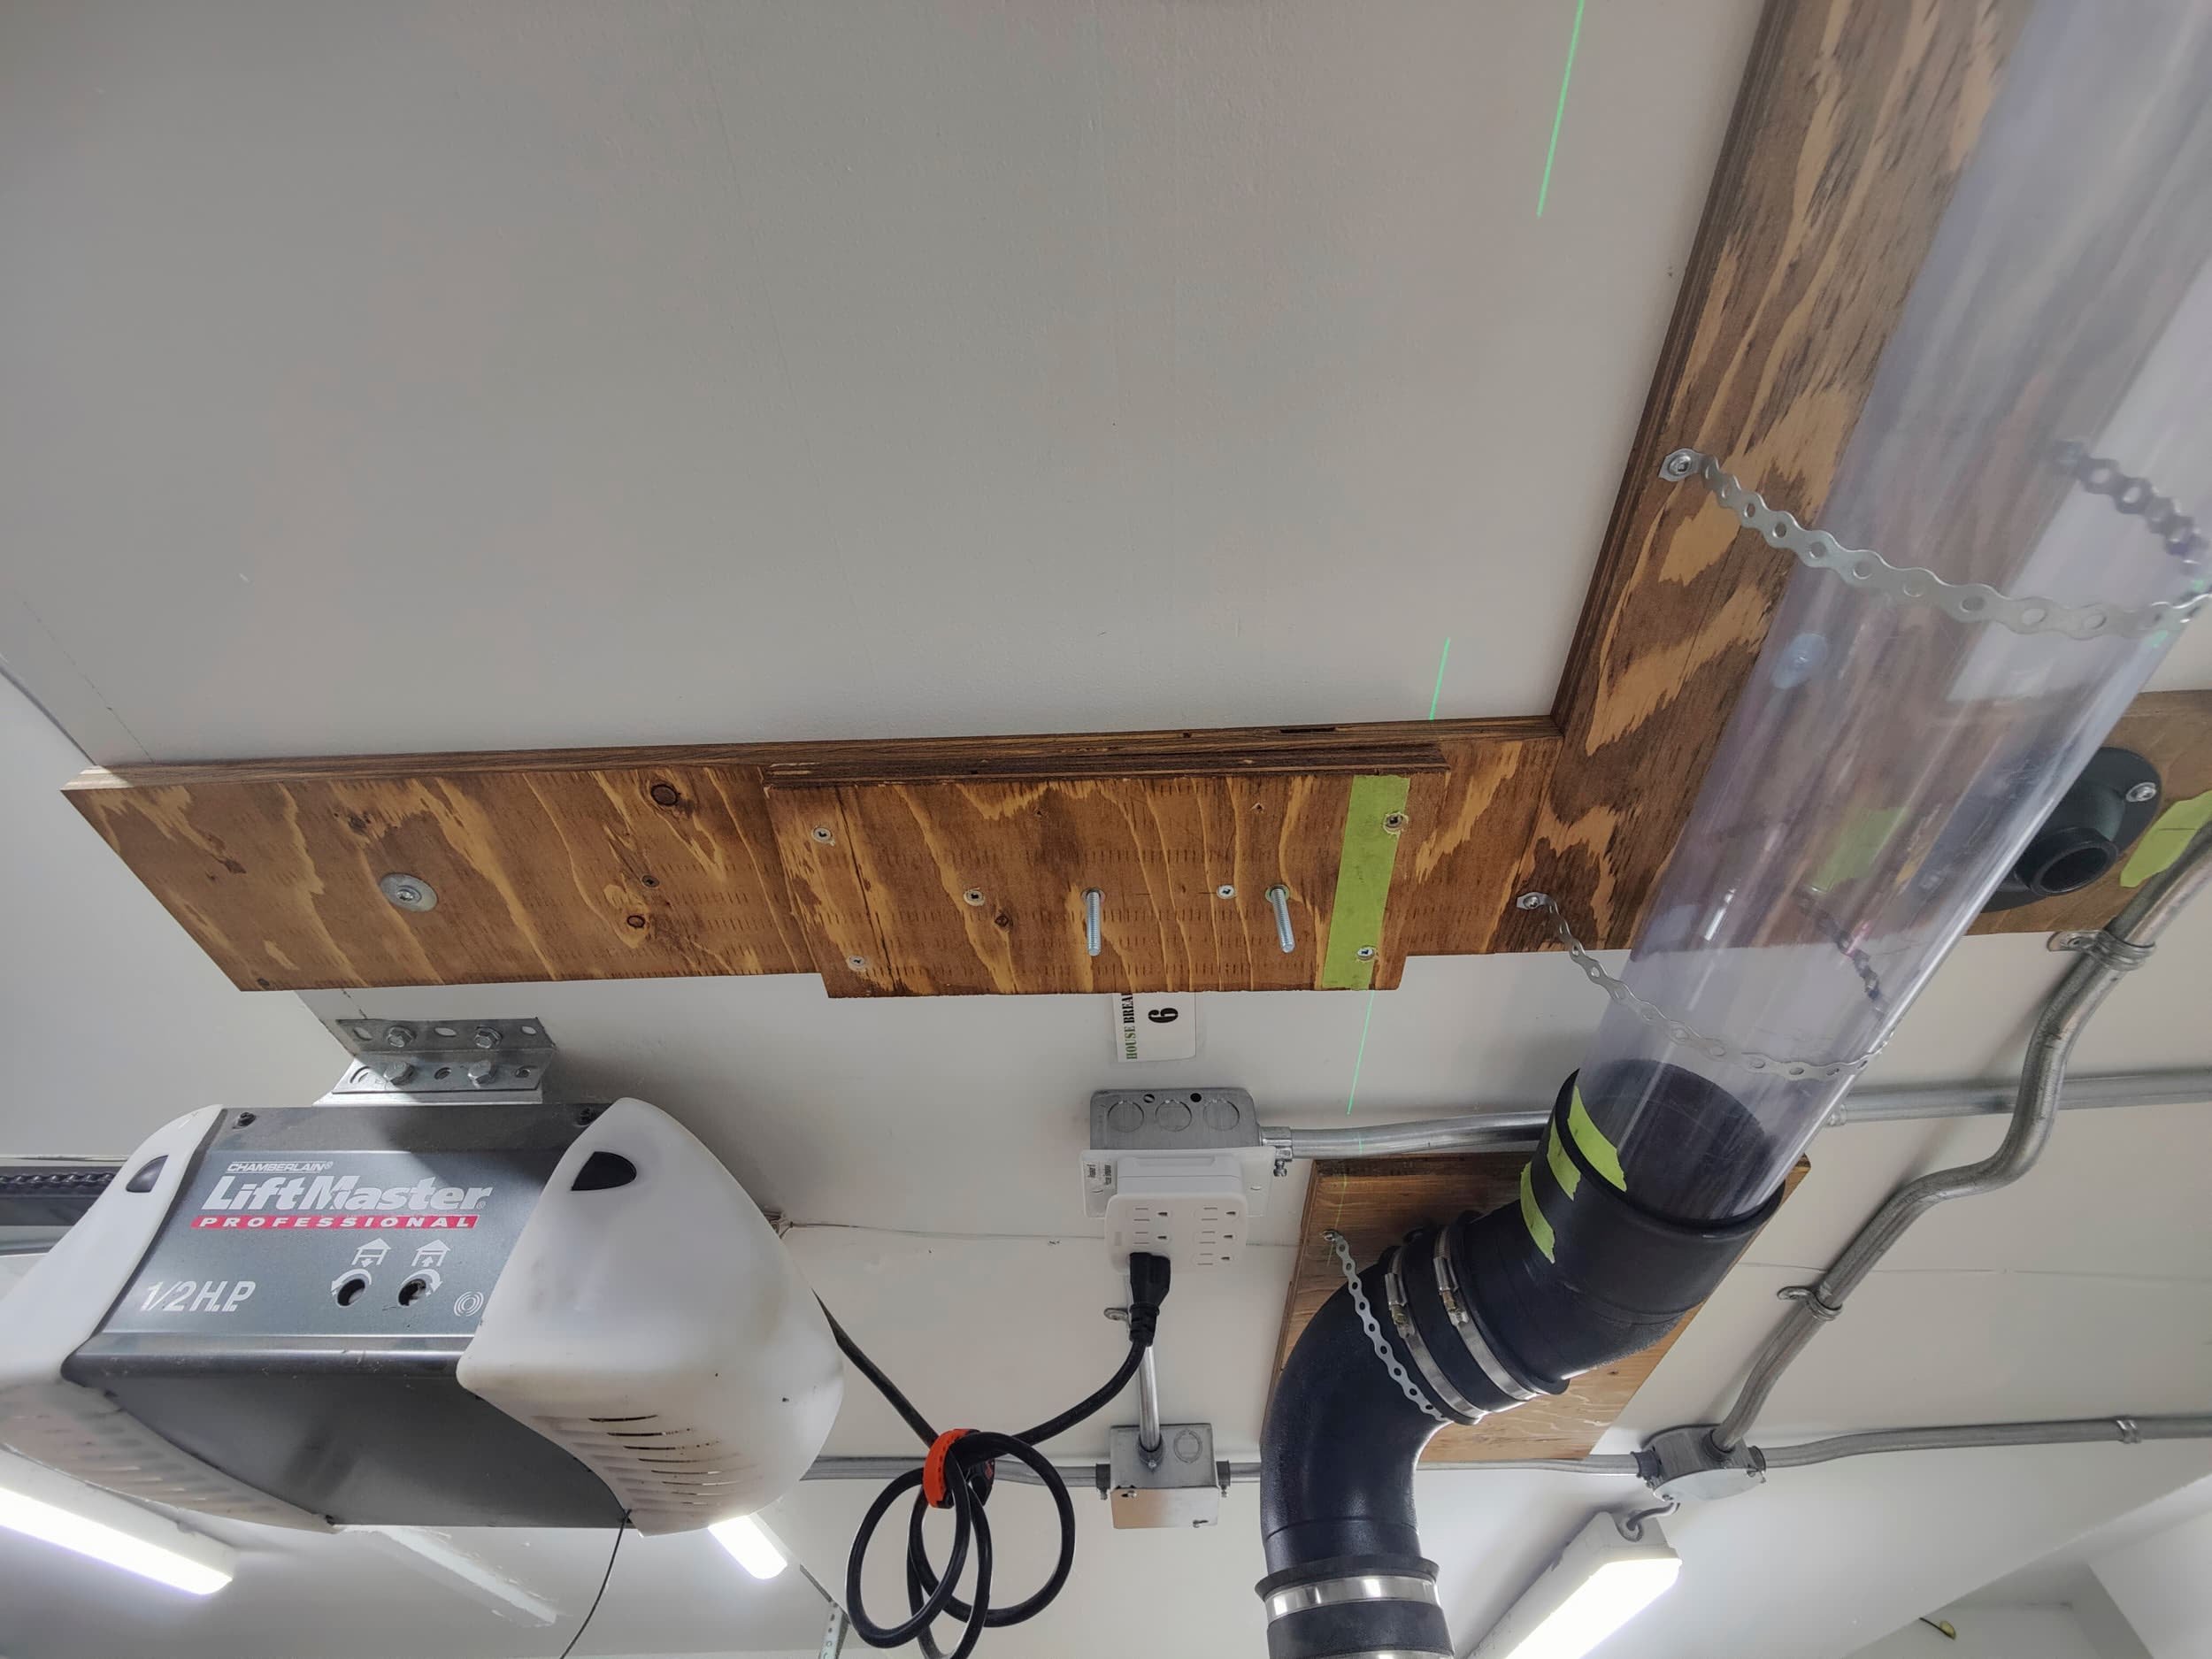
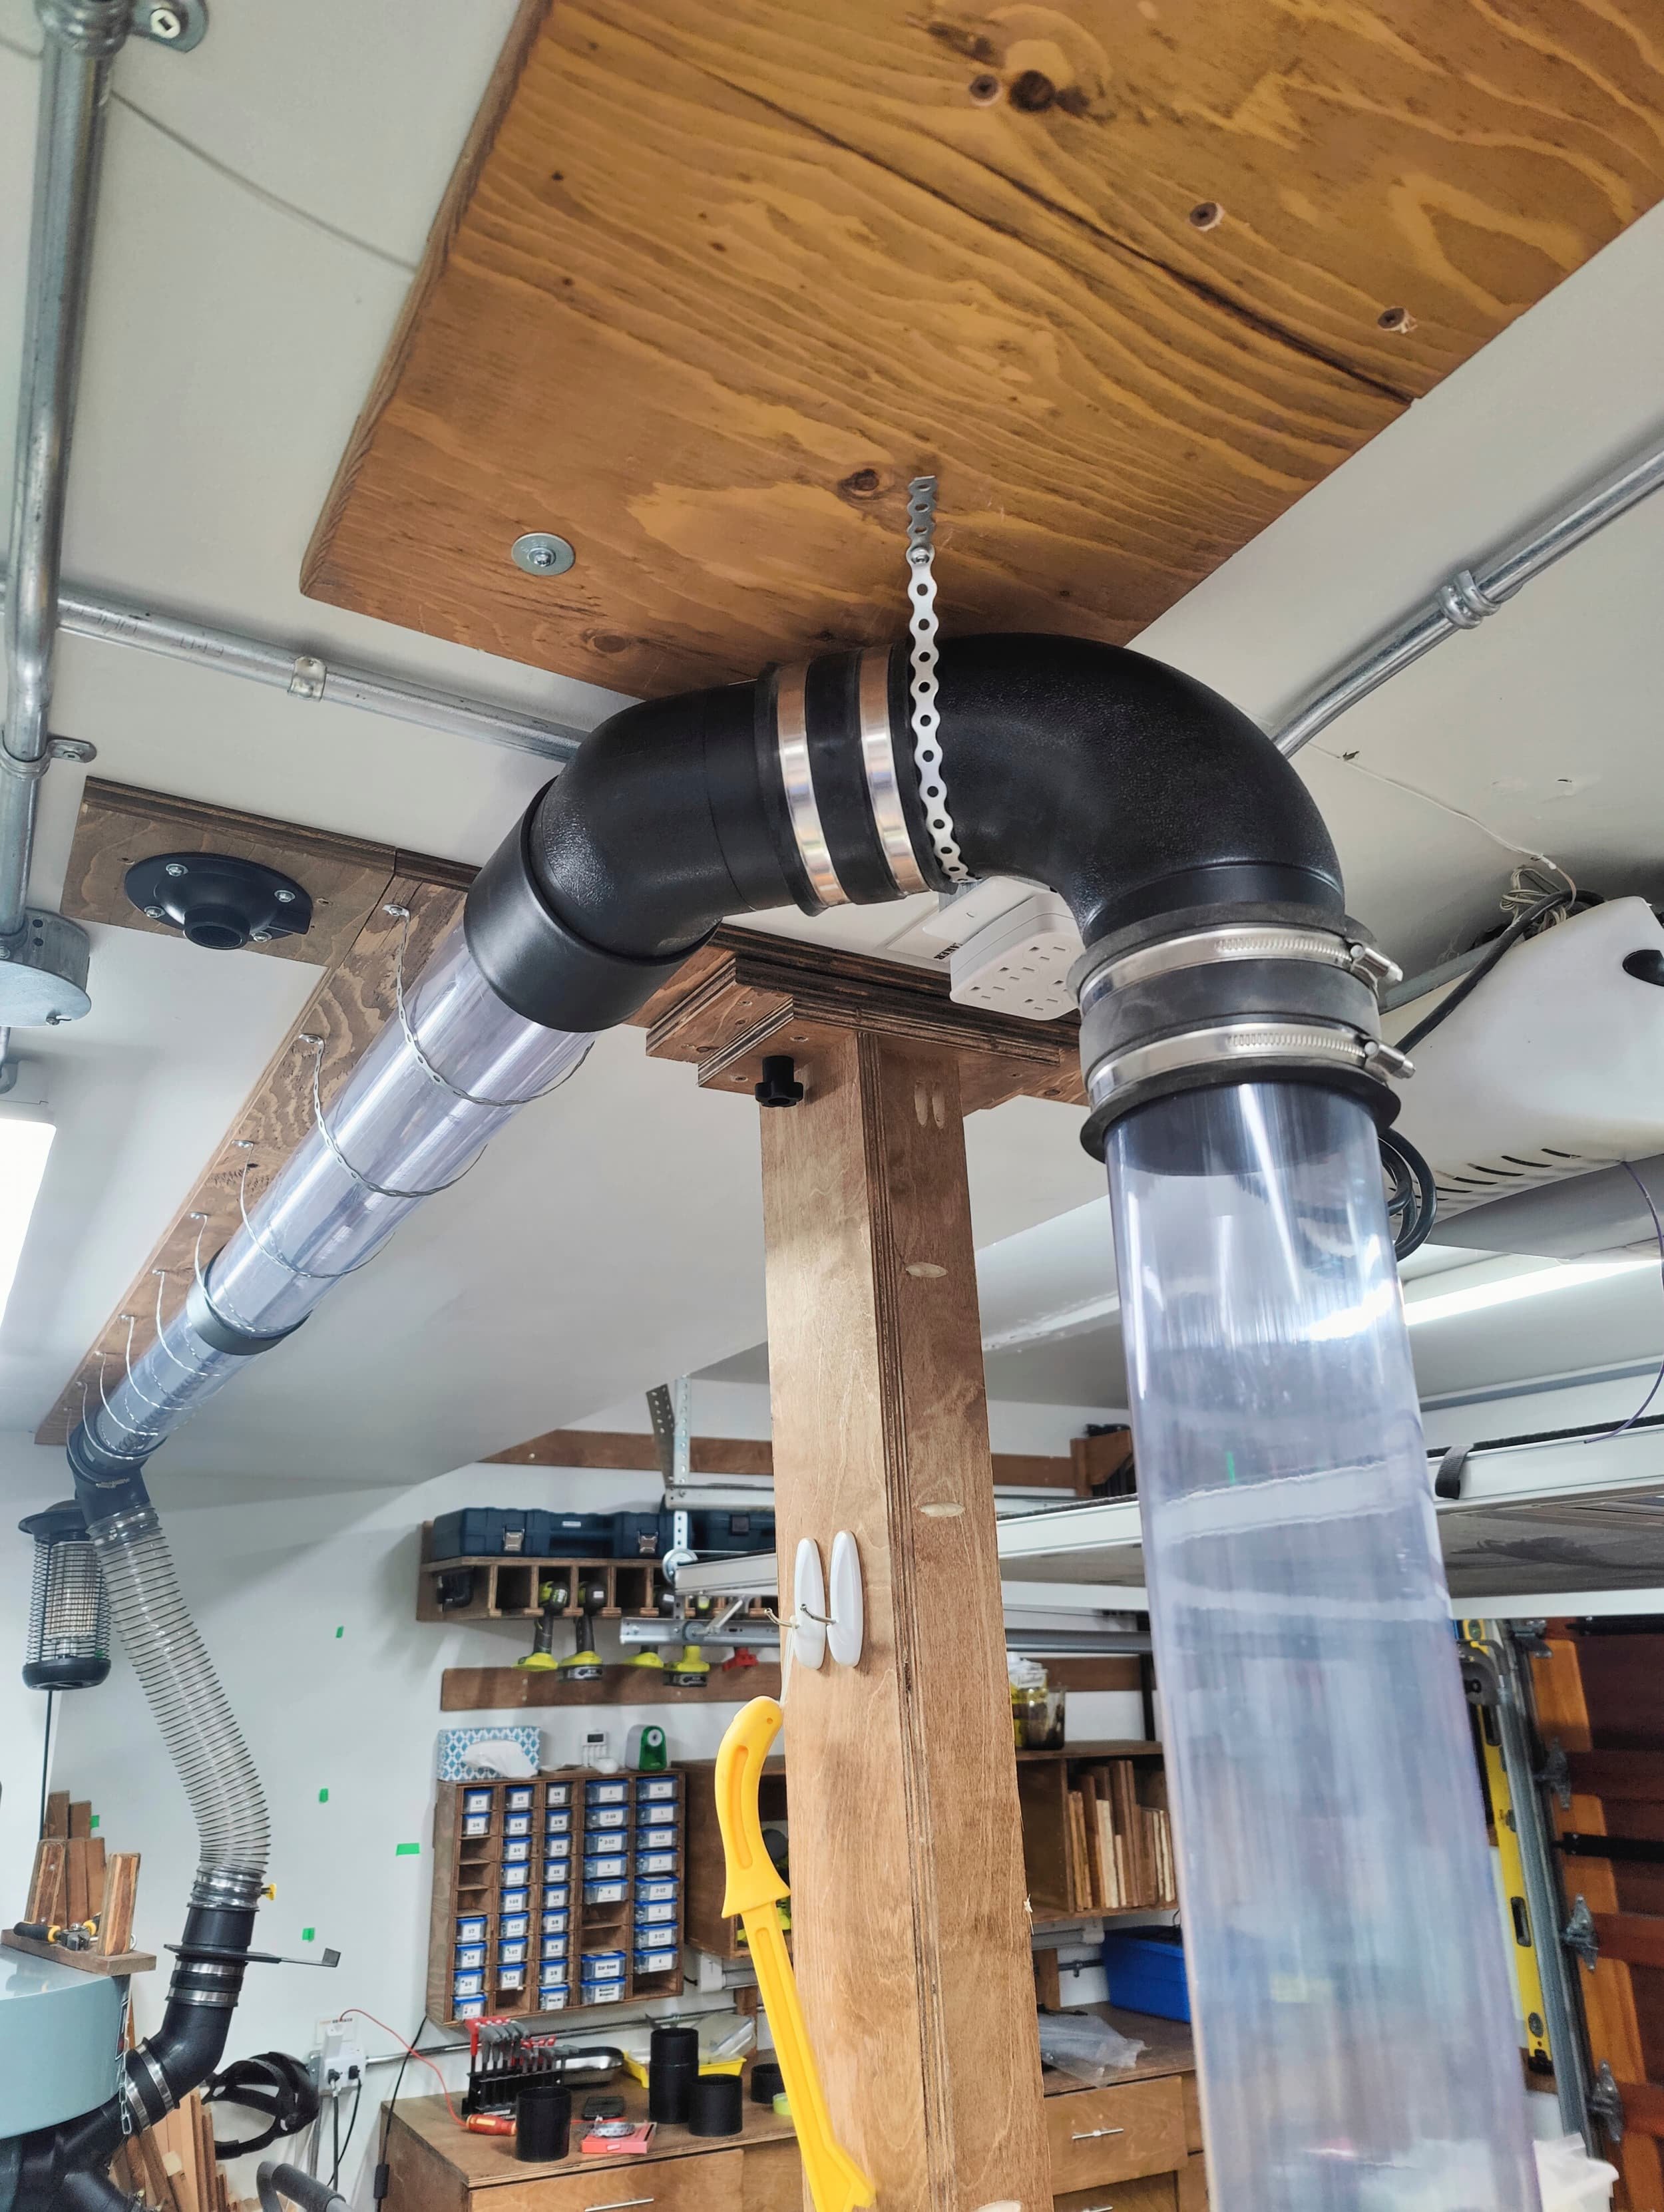
Replacing the dust-hose with rigid piping and tidying everything up
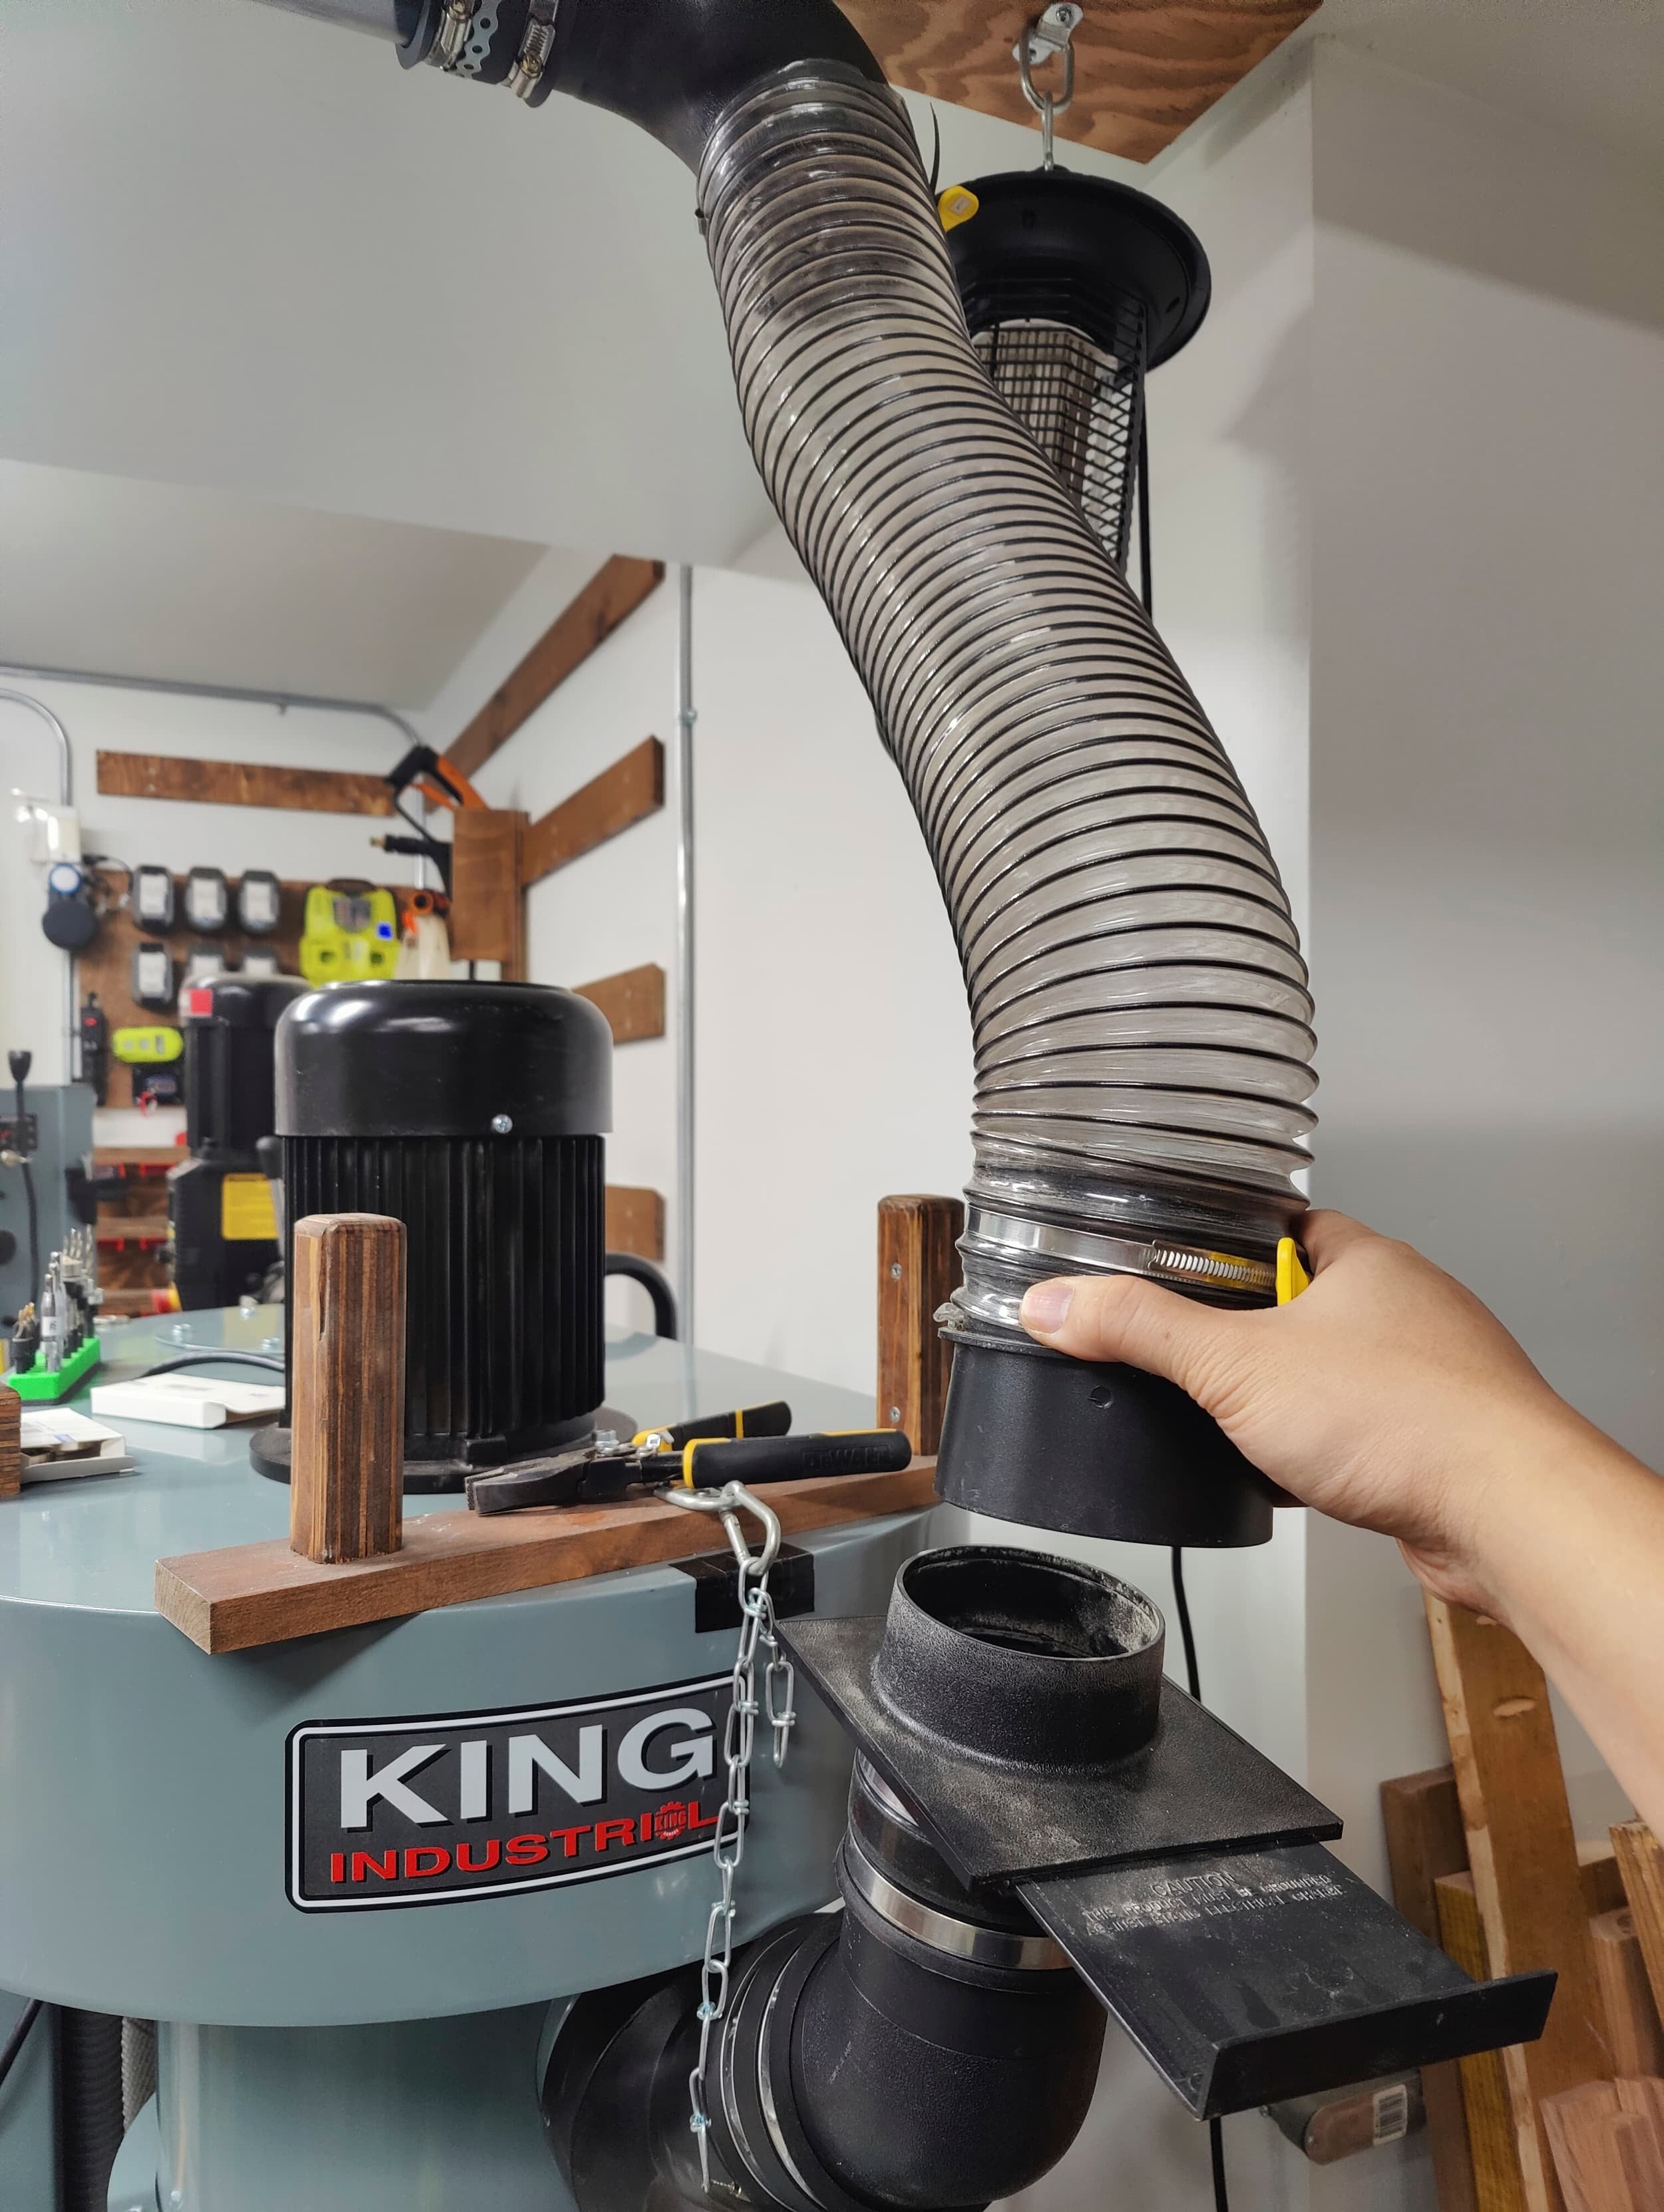
Since this was a relatively big change, I took the opportunity to swap out the ribbed hose for straight pipe where I could: I left the final connection to the dust collector as a flex-hose so that I could easily disconnect the dust collector

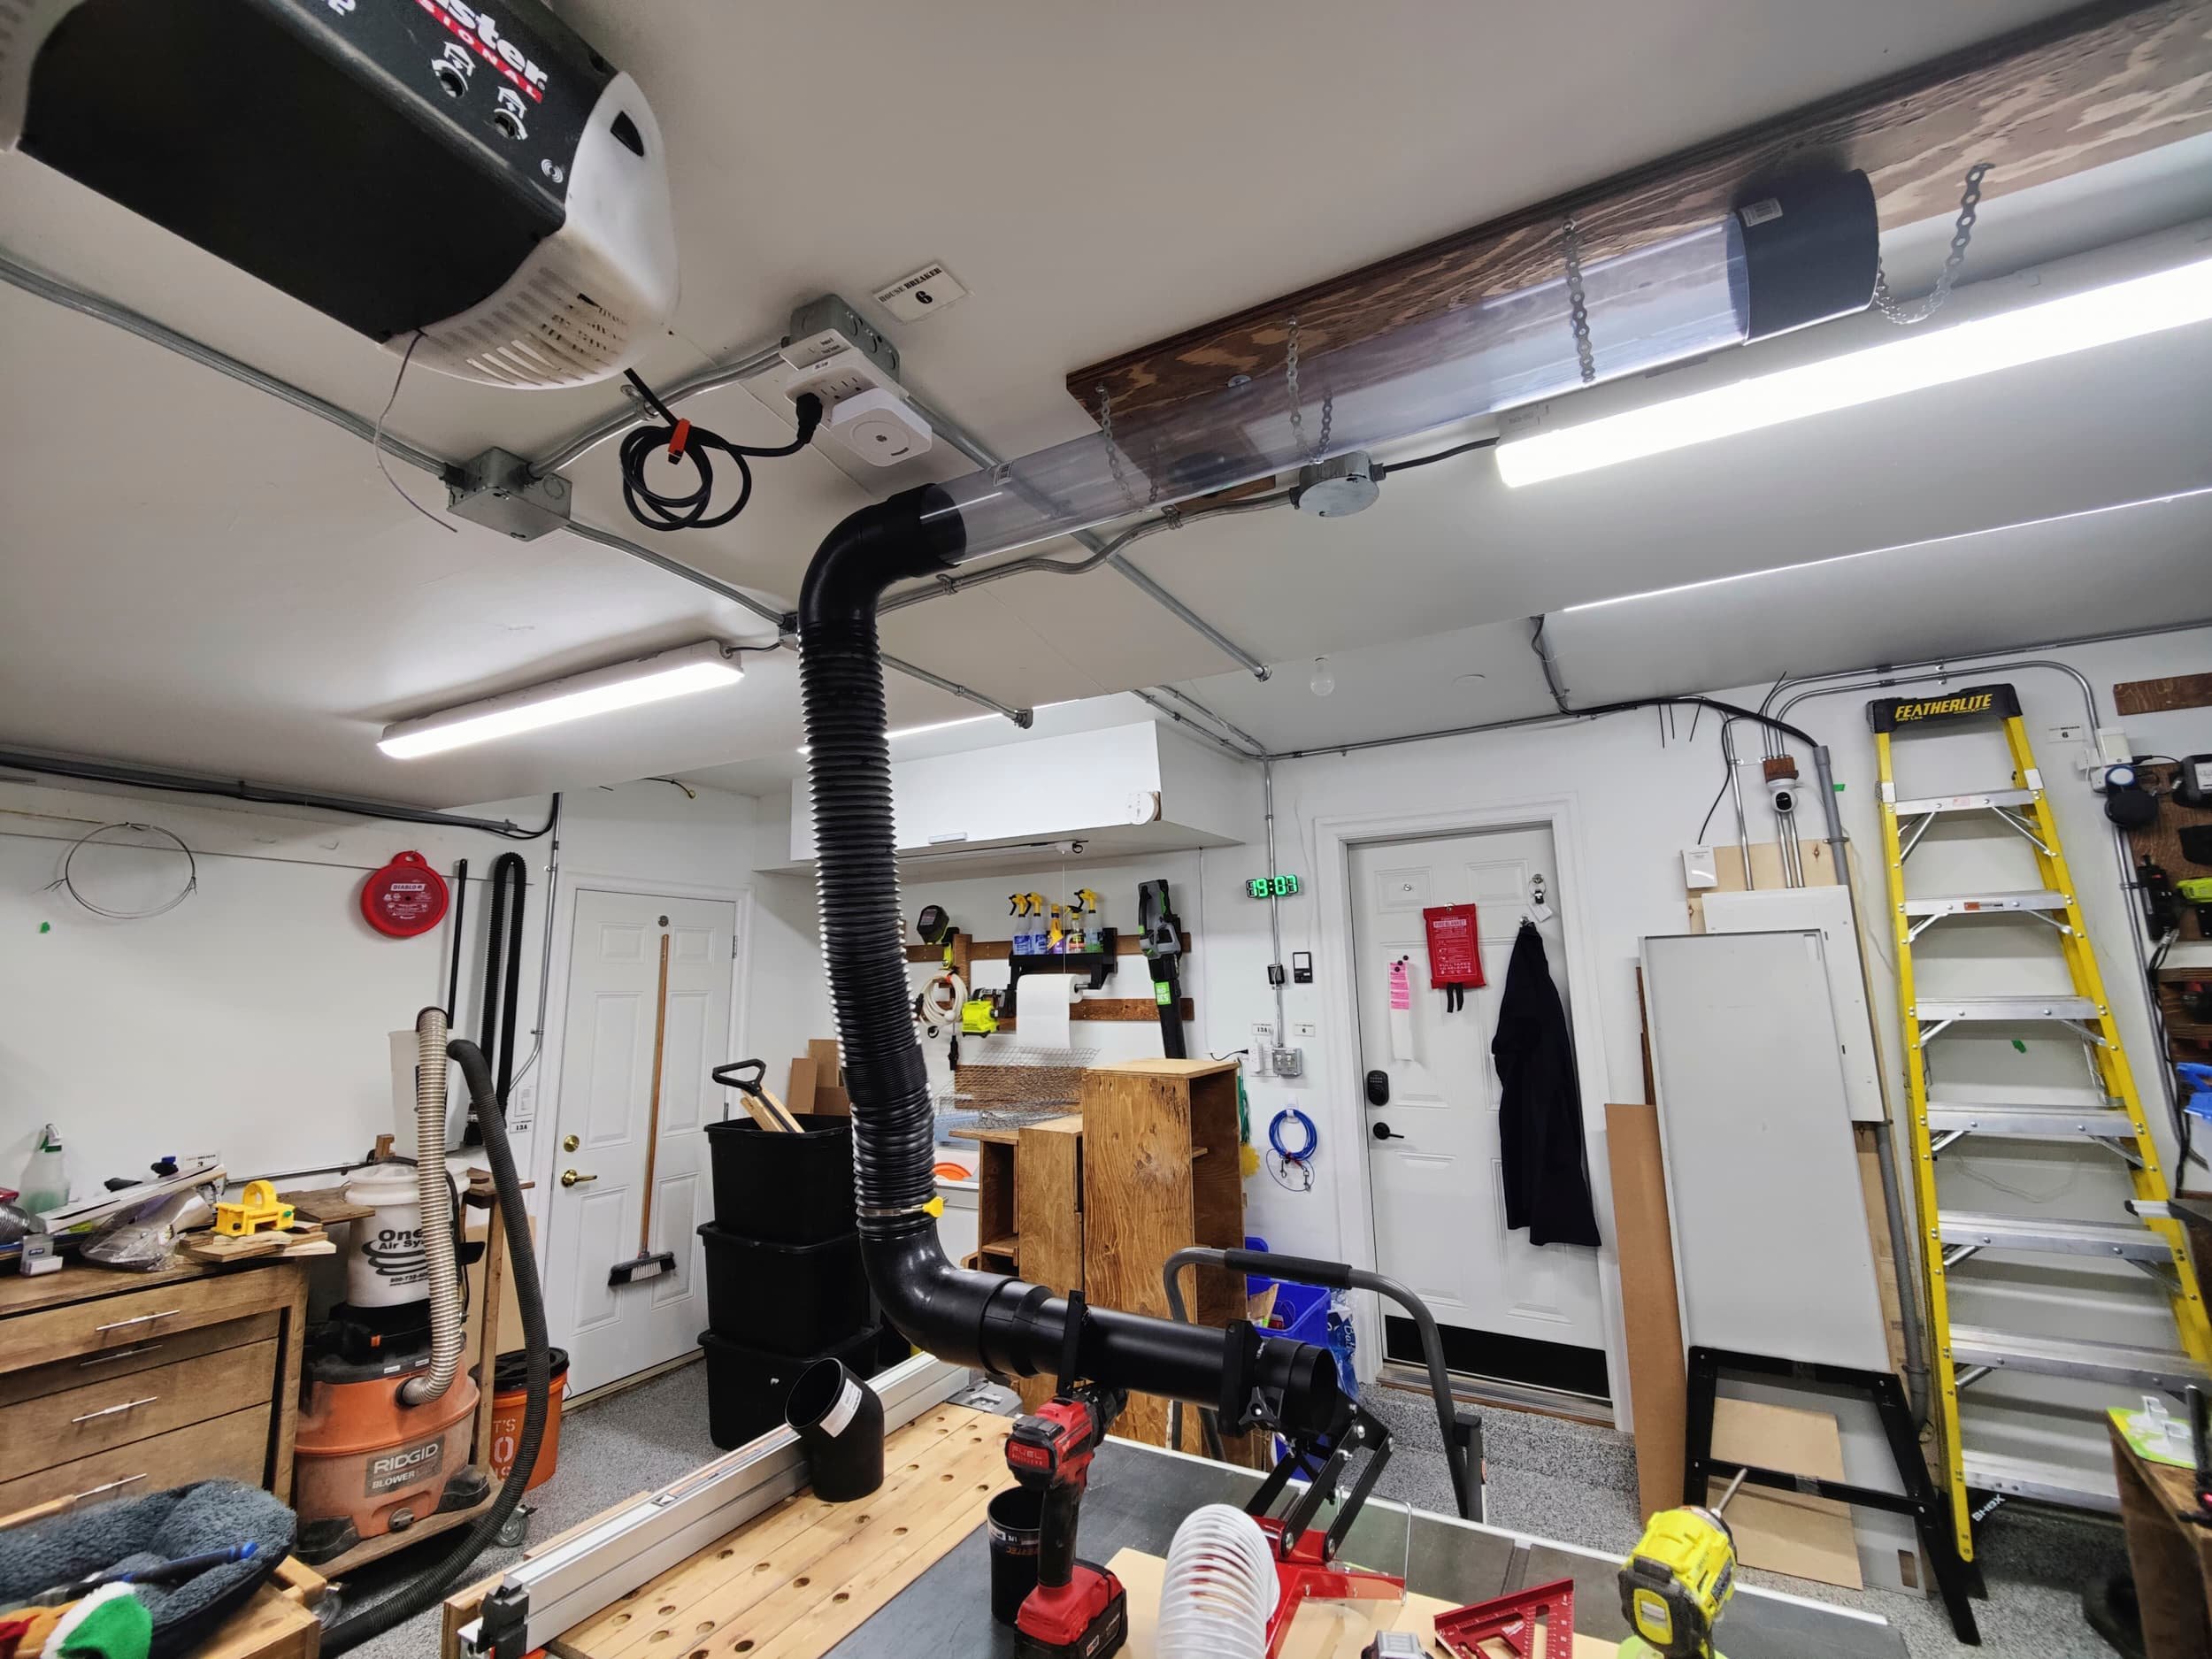
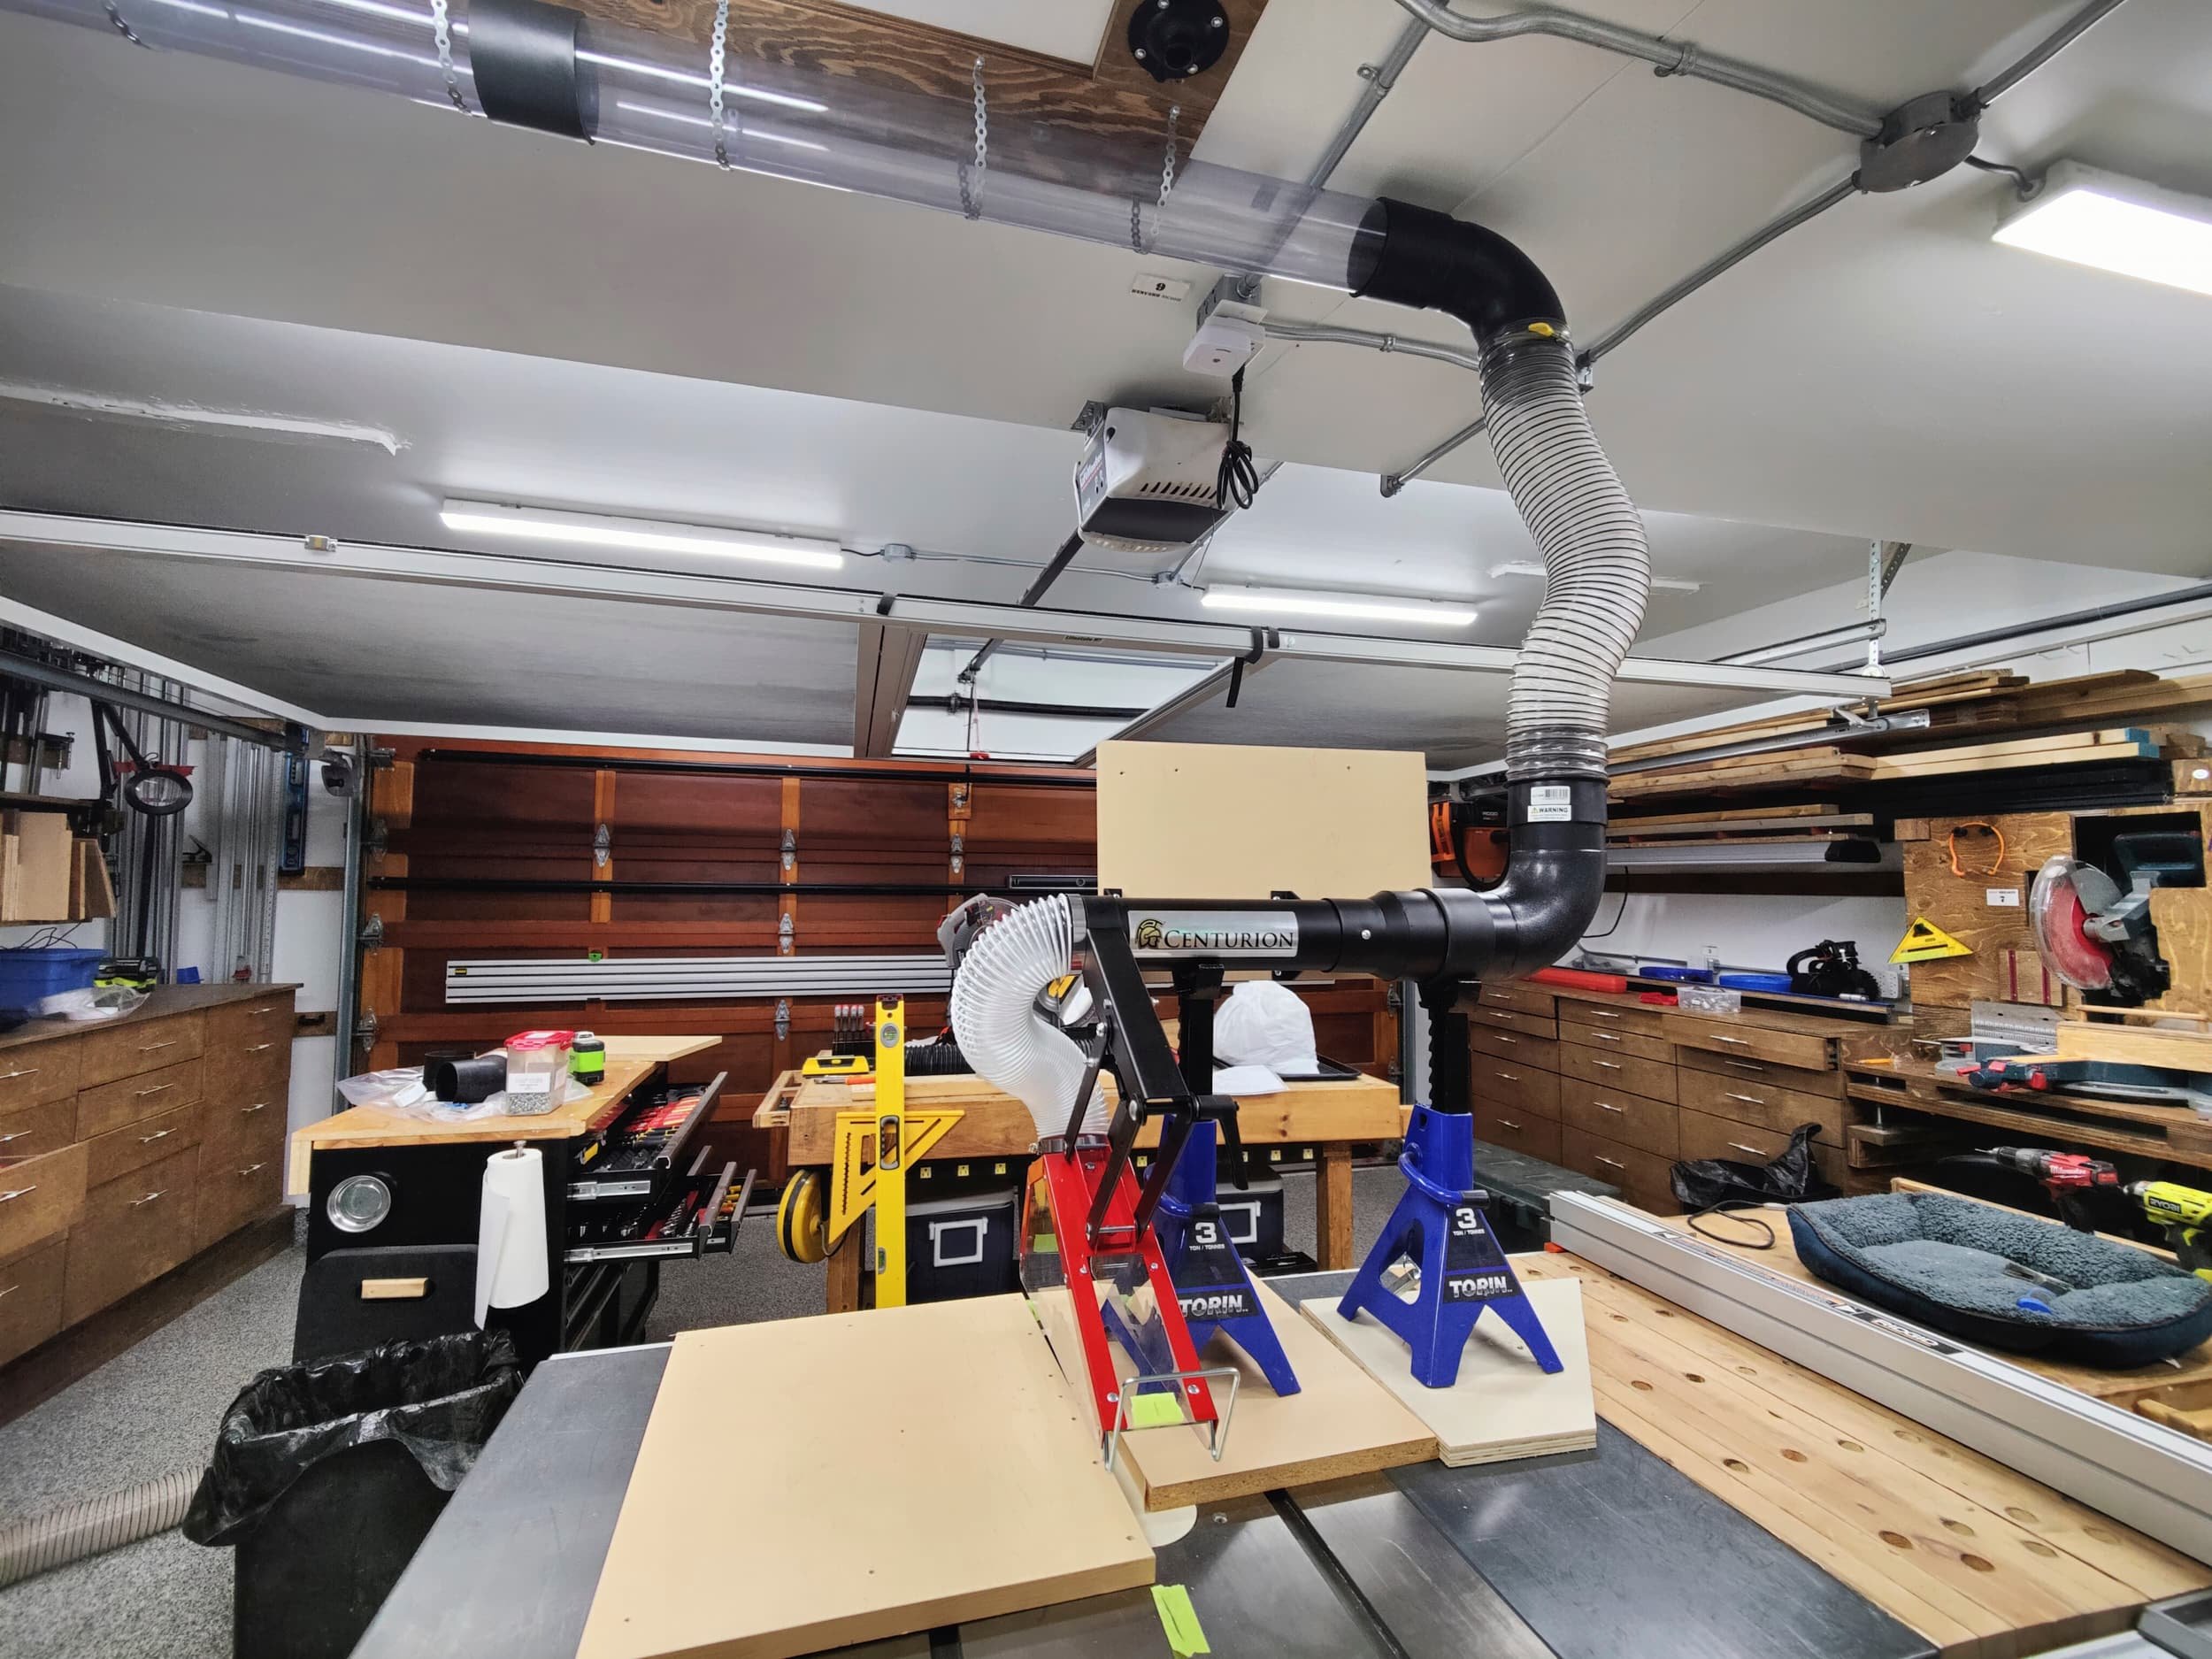


Thoughts
After getting the guard initially mounted, I did some rough testing (using an excessively long length of flex hose); compared to what I was used to with the guard-mounted collection, the dust collection was promising but not great. Once I finished the transition to straight pipe, I spent a bit of time tuning the pitch and elevation of the guard and as you can see, there’s a substantial improvement.


I have a few complaints about the dust guard:
It doesn’t come with any instructions or anything. There’s a lot of custom stuff you have to do to mount this guard so I understand being light on the hand-holding but I was hoping for a bit of guidance on setting the elevation of the mount (i.e., how high to mount the unit above the table saw surface)
This is an extremely ungainly unit — this is something you find out the hard way when you’re trying to visualize how high above your table you might want to mount the guard. So you get to play a balancing act with random boxes (or jack stands) to try and guess the elevation
Although this is only 13lbs, it feels needlessly heavy (magnified by its unbalanced nature). Was it necessary to use steel for everything? It’s not like the tubing is under immense crushing pressure or anything; I feel like this wouldn’t have been such a pain to balance (despite the lopsided weight distribution) if it was half the weight
The use of 3” hose and 3” tubing is dumb. All it means, is you now need to have an adapter to bring it up to 4”. The adapter was also incredibly loose. There is a screw that use to tie the two together but was it that much of an ask to get a better friction fit? I ended up using a couple pieces of foam tape to take the play out

The loosest fitting adapter I’ve seen… ever.
All of the above issues mostly arise while you are installing the guard. I did have a few grips that persist even after everything is installed:
The blade guard uses a parallelogram arm-linkage; being a parallelogram, it’s difficult to introduce a pitch in the actual guard i.e,m to have the trailing edge be angled higher than the leading edge (to make it easier to move material past the cut). This is a minor gripe which may go away as I get more comfortable with the guard
Adjusting the tension on the linkage is obtuse: you have to skewer a hex key through the back side whilst holding a nut captive with a wrench. Is it too hard to make this lockable with a front/top mounted screw?
The guard provides a clamping knob that lets you lock the guard in the down position — but there is no way to lock it in the up position. You can move the guard out of the way but once you let go, it drops in down a bit
For my specific use case, the tube running left-right seems wider than necessary. For my use case, I was hoping to have the least amount of right-ward travel from the guard to the dust port
I think the dust collection from this over-the-blade solution is really close to the performance from the blade-guard solution (with a small advantage going to the blade-guard) but there’s a substantial advantages in usability that can’t be ignored:
There will always be cuts you simply can’t use dust collection for; being able to retract the chute out of the way (or just moving the saw) is super straightforward
For those that need to see the cut as they make it? The clear guard here is a winner
This will work with dados!
After a cut is complete, being able to gently tug the guard to drop it to the table (boosting suction) collects nearly all the dust that may have escaped
This system will be universal to any table saw I might have
Miter saw dust collection
I build my current miter station with dust collection and containment in mind: the saw is enclosed in a box that tries to keep any dust that isn’t collected by the saw from spilling. First order of business was to take the front covers off an do a clean. This was the first time taking the covers off in a year or so (although I do regularly shove a vac nozzle back there to try and keep things tidy), and we can see the containment aspect is working pretty well.


Since I had everything disassembled, I used the opportunity to laminate the hardboard with some packing tape; the hope is that it makes the surface easier to blast with compressed air. I spent a bit more time this time to (very generously) seal the innards with duct tape to reduce the chances of dust falling sneaking out.


To connect my saw to a vac, previously, I ran a 2.5” flex hose, from below, up through the table, to the saw. This obviously, requires a hole in the table for the hose to go through. I was extremely careful in drilling the absolute smallest hole I could that would allow the hose to pass through but inevitably, some dust does sneak through. Since I had everything apart, I wanted to see if I could seal up the gap.
I bought two 2.5” dust ports that would sandwich the hole, removing any chance for dust to sneak through. Additionally, this allows me to decouple what happens ‘above the table’ from below the table’.


Doing this brings two usability improvements:
I no longer needed to have bits of plywood in the dust box to control the hose (above the saw)
When I need to empty the cyclone, I can just disconnect the cyclone without having to worry about hoses flopping and falling all over the place
New dust hose
Since doing a minor rebuild of my dust-cart, I found that the cyclone that that I initially thought would be ‘good enough’, in fact, wasn’t. It does pre-separate but I was finding it was closer to 30%. Since I use that cart as my primary “clean up cart”, I switched to the more familiar Dust Deputy 2.5. I initially retrofitted a generic bucket lid to work with this but found it just wasn’t sturdy enough (even with a plywood backing), so I opted to get a reinforced lid which, as expected, worked perfectly (you can also get everything as a single kit). Compared to the previous iteration of the dust deputy (which I have on my miter saw), this unit has a higher airflow.
I’ve been using the new cyclone setup for about a year now and two things have really started to bother me over the time:
How utterly useless the stock vac hose is and
Why it is so damn hard to find a nice, 2-1/2” hose without spending an absolute fortune
With my cyclone mounted above the vac, the hose starts off about five feet off the ground; with a stock seven foot hose, I’m constantly having to drag the vac-cart around with me wherever I wanted to clean. So I knew I wanted something that gave me a bit more than the seven-foot reach I had. So I went through some options:
| A | B | C | D | E | F | G | H | I | |
|---|---|---|---|---|---|---|---|---|---|
1 | Brand | Model | Hose Length | Hose Diameter | Connector A ("Tool End") | Connector A Removable? | Connector B ("Vac End") | Connector B Removable? | Notes |
2 | |||||||||
3 | DeWalt | DMV9315 | 15 | 1-1/4 | Universal [DeWalt] tool connection | Yes | DeWalt dust-extractor connection | Yes | Advertsied as crush-proof |
4 | D279058 | 14 | 1-1/4 | Universal [DeWalt] tool connection | Unsure, likely yes | DeWalt dust-extractor connection | Unsure, likely yes | Advertsied as crush-proof | |
5 | DMV9316 | 15 | 1-1/4 | Universal [DeWalt] tool connection | Yes | DeWalt dust-extractor connection | Yes | Antistatic | |
6 | DMV9314 | 8 | 2-1/2 | 2-1/4 | Unsure, likely yes | DeWalt dust-extractor connection | Unsure, likely yes | ||
7 | DXVA19-2501 | 7 | 2-1/2 | 2-1/4 | Unsure, likely no | 2-1/4 with locking tab | Unsure, likely no | Product page for the DXV12-QTA states this is the included hose, but no product page exists | |
8 | DXVA19-2500 | 7 | 1-7/8 | 1-7/8 | Unsure, likely no | 1-7/8 with locking tab | Unsure, likely no | Product page for DXV09P-QTA states this is the included hose, but no product page exists | |
9 | DXVA19-2556 | 7 | 2-1/2 | 2-1/4 | Unsure, likely no | 2-1/4 with locking tab | Unsure, likely no | Product page for DXV12P-QT states this is the included hose but no product page exists | |
10 | |||||||||
11 | Dustless Tools | 14251 | 12 | 1-1/2 | 2-1/4 | Unsure | 2-1/4 | Unsure | Advertsied as Crushproof, kinkproof |
12 | H0946 | 25 | 1-1/2 | 1-1/2 | Unsure | 1-1/2 | Unsure | Advertsied as Crushproof, kinkproof | |
13 | 14291 | 25 | 1-1/2 | 2-1/4 | Unsure | 2-1/4 | Unsure | Advertsied as Crushproof, kinkproof | |
14 | H0038 | 25 | 2 | 2-1/2 | Unsure | 2-1/2 | Unsure | ||
15 | |||||||||
16 | Rigid | VT1720 | 7 | 1-7/8 | 1-7/8 | No | 1-7/8 with locking tab | No | |
17 | LA2570 | 10 | 1-7/8 | 1-7/8 | No | 1-7/8 with locking tab | No | Advertised as flexible, kink-resistant | |
18 | LA2522 | 20 | 2-1/2 | 2-1/4 | No | 2-1/4 with locking tab | No | ||
19 | VT2534 | 10 | 1-1/4 | 1-1/4 | No | 2-1/4 | No | Advertised as flexible, kink-resistant | |
20 | LA2520 | 7 | 2-1/2 | 2-1/4 | No | 2-1/4 with locking tab | No | ||
21 | VT1721 | 7 | 1-7/8 | 1-7/8 with air relief valve | No | 1-7/8 with locking tab | No | Expandable hose, collapses down to 2ft | |
22 | LA2521 | 13 | 2-1/2 | 2-1/4 | Looks like yes | 2-1/4 with locking tab | No | ||
23 | |||||||||
24 | Milwaukee | 49-90-2006 | 9 | 2-1/2 | 2-1/4 | Yes | 2-1/2 with nubs | Yes | Advertised as flexible, kink-resistant and antistatus |
25 | 49-90-2004 | 16 | 2-1/2 | 2-1/4 | Yes | 2-1/2 with nubs | Yes | Advertised as flexible, kink-resistant and antistatus | |
26 | 49-90-1984 | 16 | 1-7/8 | 1-7/8 | Yes | 1-7/8 with nubs | Yes | Advertised as flexible, kink-resistant and antistatus | |
27 | 49-90-1996 | 9 | 1-7/8 | 1-7/8 | Yes | 1-7/8 with nubs | Yes | Advertised as flexible, kink-resistant and antistatus |
The only real candidate from my quick survey was the 16-foot Milwaukee hose which hit all the checkboxes: good length, 2-1/2 hose, antistatic, premium build. I didn’t actually notice the nubs on the hose until after I got home. The nubs are on designed (presumably) for the hose to securely latch onto the Milwaukee vacuums however, I was hoping to connect this hose to my cyclone which was roughly the same size so it would not fit.
Initially, I bought a 2-1/2” flex cuff to clamp the Milwaukee hose to the cyclone


Since the hose ends (both) can be unscrewed, ideally, I could just buy another standard 2-1/2 end and use that but the hose end does not appear to be purchasable as a standalone product. I thought perhaps I could accommodate the nubs my drilling into the flex cuff and that worked brilliantly.


The flex cuff is a bit of a tight fit, so if I ever want to pull it off, it will take me a moment to do so but overall, I don’t think I’ll really need to remove it often. With the massive 16-ft reach, I can clean the shop without constantly having to move the vac cart around (and inevitably backing the cart over the power cord which is infuriating).
Compared to the 7-ft Ridgid hose I had before, this is a dream to use, not just for the extended reach but also for it being anti-static. The only notable downside is that everything about this hose is heavier and I will need to be mindful that repeated drops from operating-height to the concrete floor will likely end up with a cracked connector. Also, the additional hose can be a bit unwieldy. These are minor quibbles to put up with for the vastly improved experience.
Ceramic (and poly) all the things!
After going through all the effort to improve the dust collection efforts throughout the shop, I did one more final step of craziness: I coated all the surfaces in the shop:
Metal surfaces were ceramic-coated: I did all the major metal surfaces (tool chest, table saw, dust collector etc.)
For the wood surfaces, I applied a coat or two of polyurethane and then sanded to 800-grit - I did all the drawer faces and surfaces of the cabinets and miter saw station and the garage door
The hope here is that dust will be less likely to stick to things and when it does, I can just hit it with some compressed air and not have to bust out the brush or damp rag.


I also opted to ceramic coat additional items and surfaces like the rigid piping for the over-the-blade dust collection as well as the plastic scoop I use to empty out the cyclone. Anything to try and keep things dust free…

Small Shop Improvements (2023.1)
Product links may be affiliate links: MinMaxGeek may earn a commission on any purchases made via said links without any additional cost to you.