

Build Log: DIY Truck Bed Divider (Improved!)
I built my original truck bed divider a few years ago as a quick project one evening and it’s been solid, especially considering I didn’t really put too much effort into using outdoor-specific fasteners etc. — the tonneau does most of the heavy lifting as far as keeping things dry anyways. There are two things about my divider that bother me a lot: firstly, that it weighs way too damn much and secondly, that I cut everything with ‘exact fit’ tolerances.
The weight, awkward shape and tight fitment makes for a huge pain to get the divider in and out of the bed for when I wanted full access to the bed and because of that, I’ve toyed with the idea of rebuilding the divider for the last few years, but each time, it’s never bothered me enough. Well, I’m finally getting around to remaking it now!
Quick Links
Starting Point
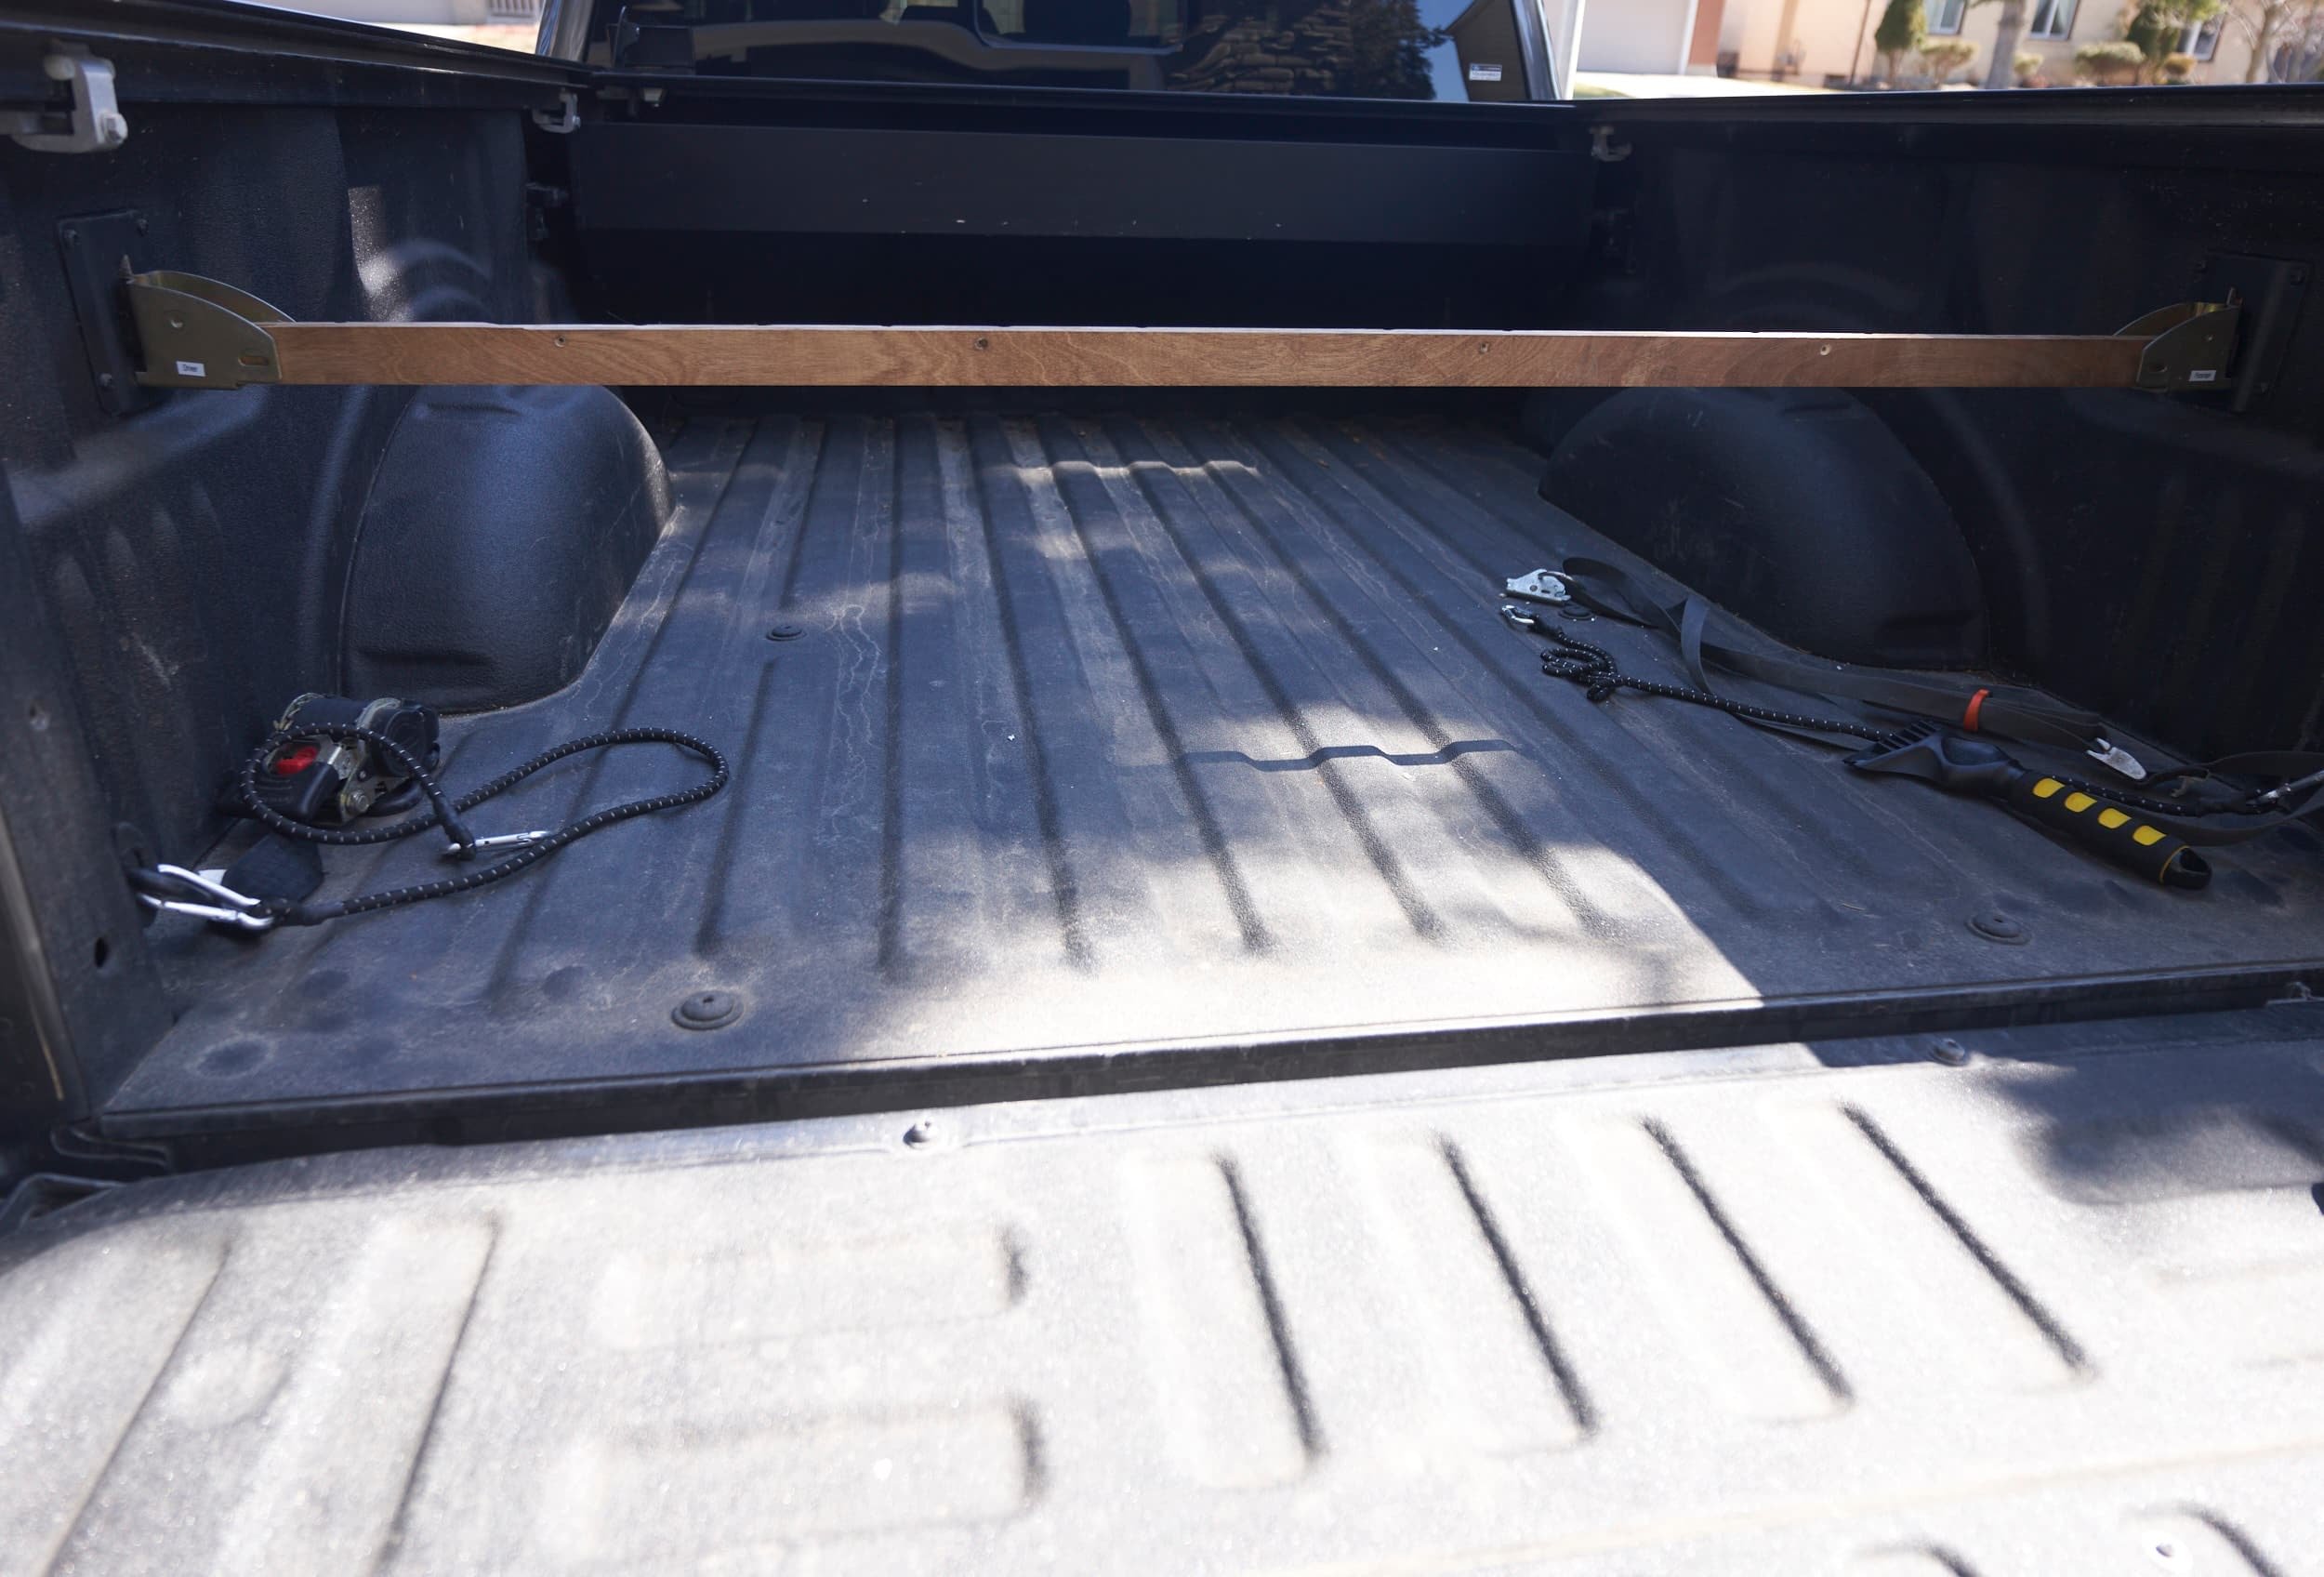
So my DIY divider has served me pretty well over the years and certainly hasn’t fallen apart or anything but because I cut the cross beams to fit so perfectly, you have to lift (or lower) the entire (heavy!) divider in just the perfect way to get it installed/removed. Off by 1/2”? It’s not dropping into the holder (or coming out). Oh, and did I mention it was heavy?
Even still, the divider worked and I only had to do the dance of getting it in and out a few times a year when I needed full access to the bed so there was never a big enough push - until recently.
I generally leave the divider in the truck by default — this lets me put stuff in the bed without having it roll/fall to the back. We had a fairly mild winter this year and I wanted to get a head start on some projects. Of course, right before I went to pick up materials, we had freezing rain. The tonneau did it’s job — didn’t really get any freezing rain in the bed, but the cover was also frozen solid — with my difficult-to-remove divide still inside…
Goals and Objectives
The style of divider works well for my needs, so I was mostly going to stick with a similar archetype with two requirements:
I need to be able to completely install and remove the divider while the tonneau is closed
Please weigh less!
As a bonus, it’d be nice if I could get some materials without having to fully remove the divider and to do all of this, hopefully without spending a ton of money on materials.
Rough Design
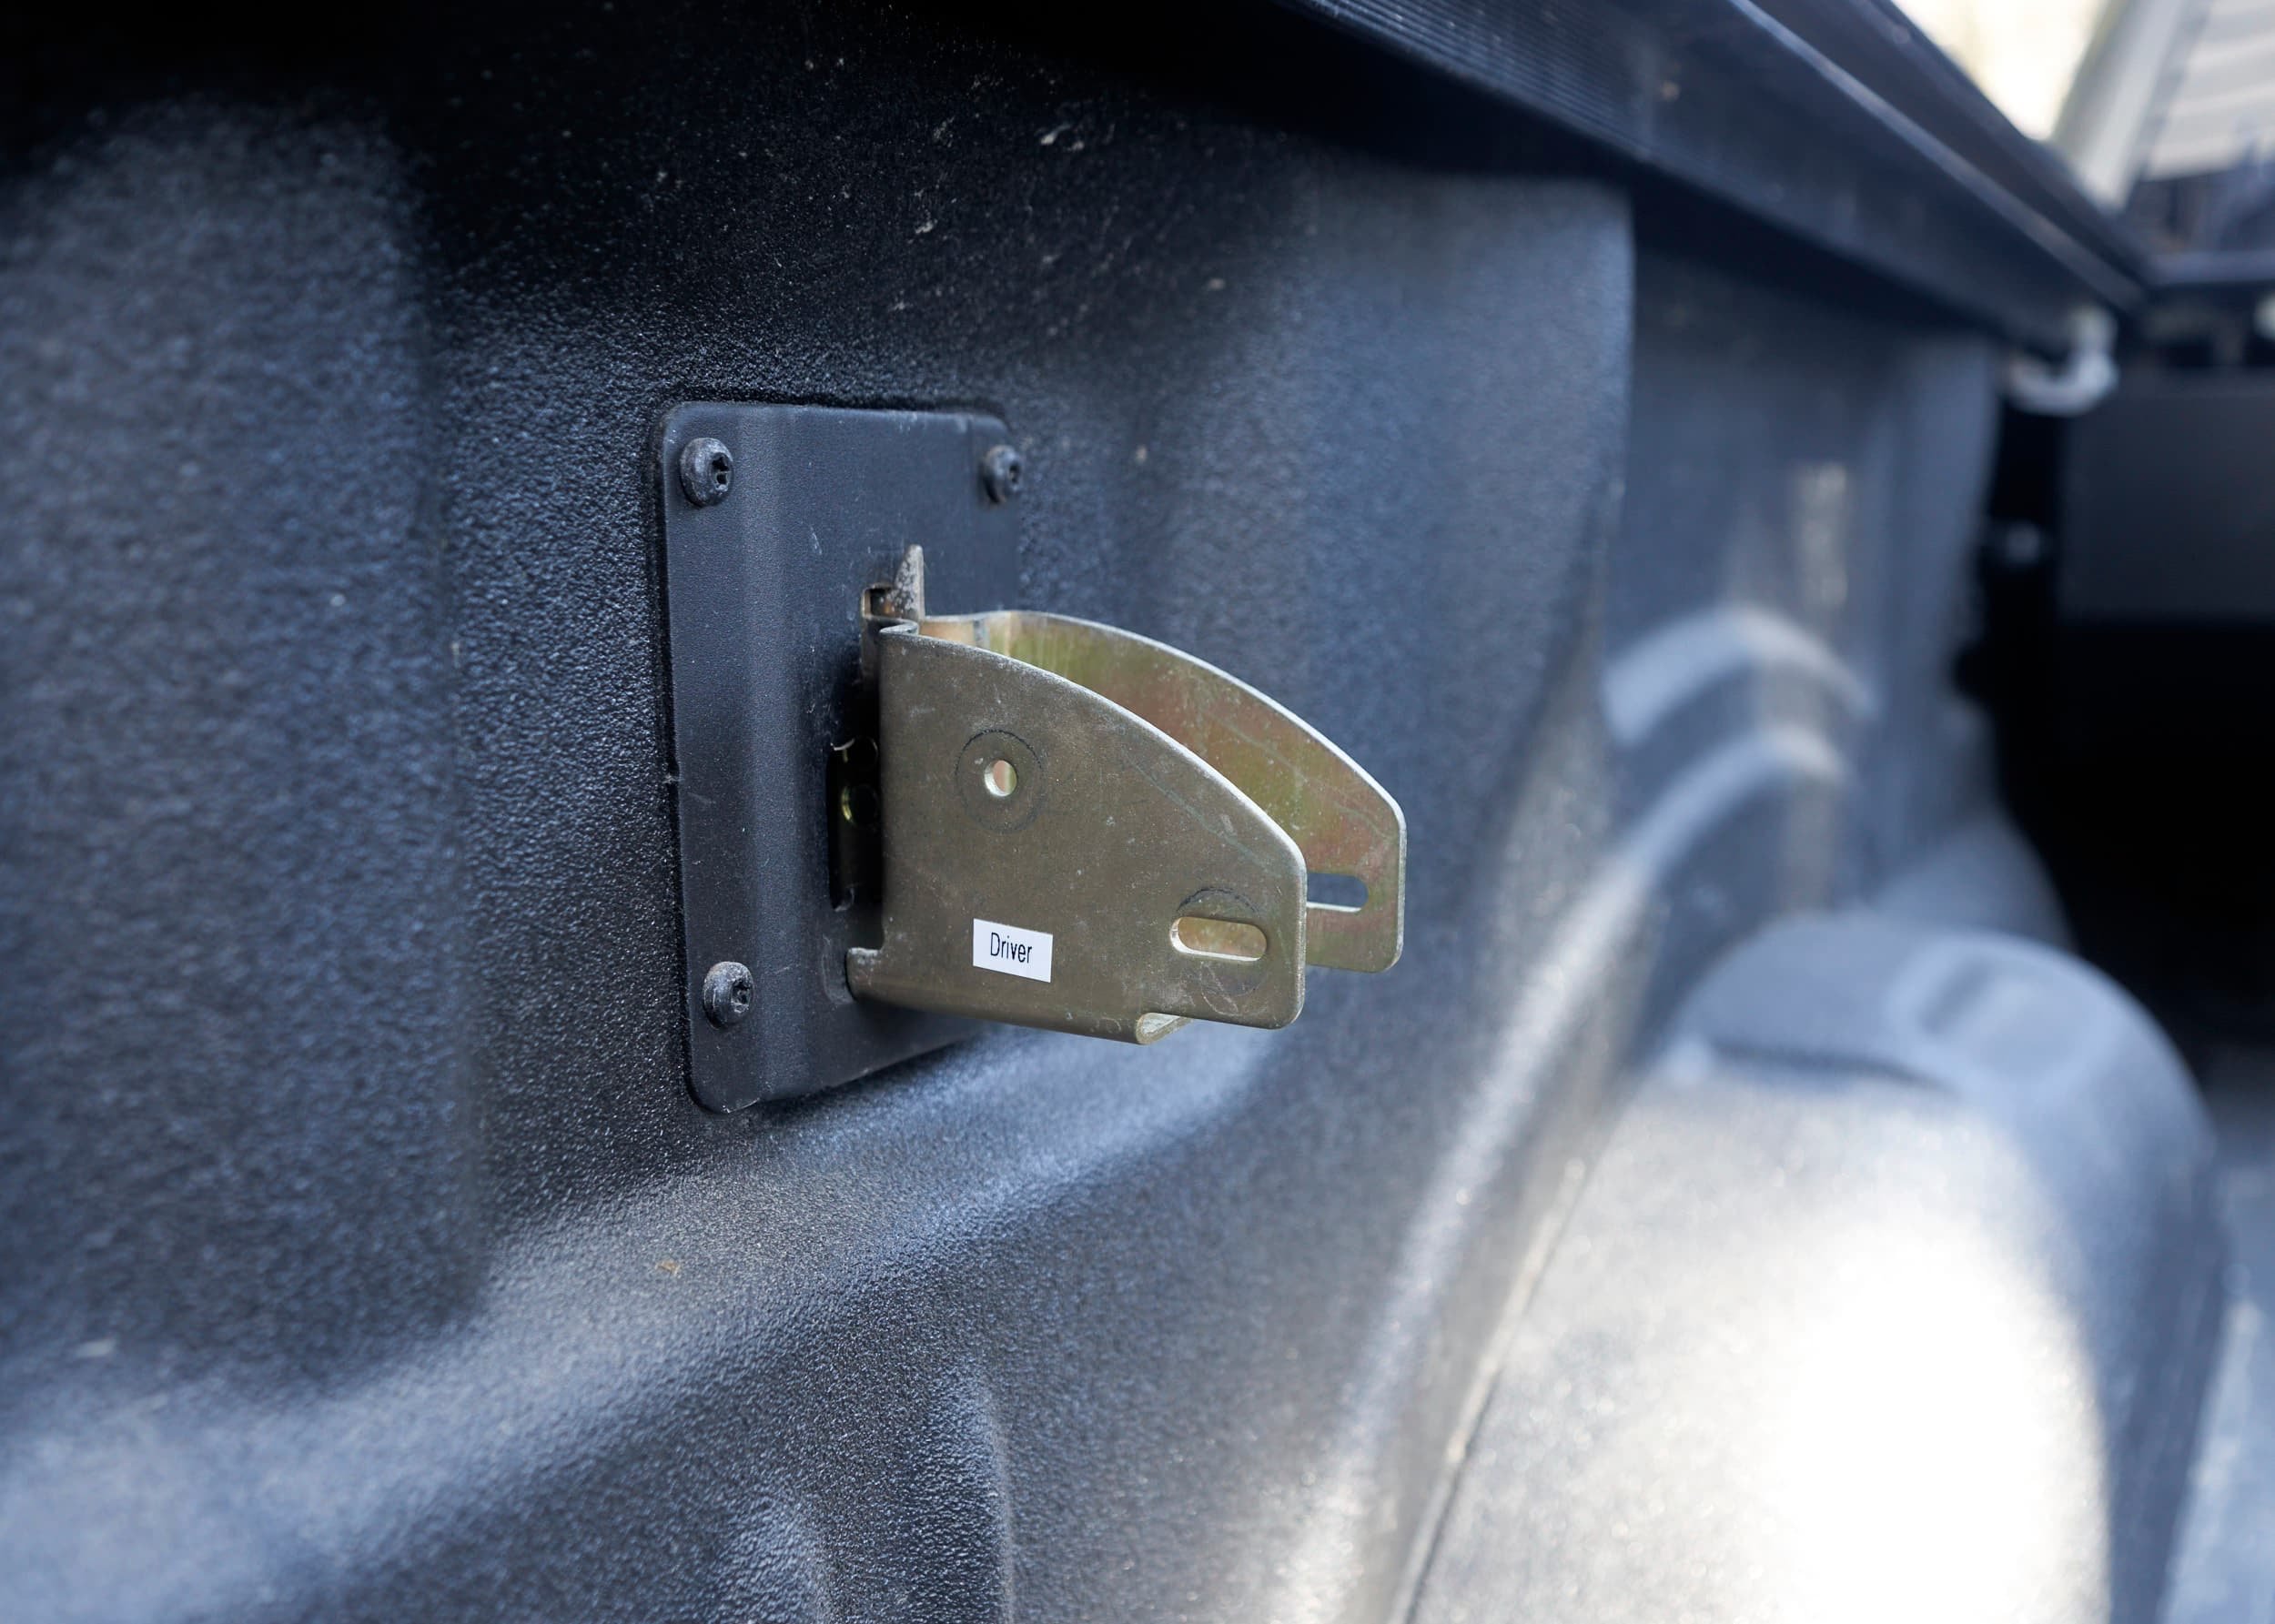
My current truck is a Ford and came with some BoxLink mounting points; I can use E-track accessories in the BoxLink. Like the original, this divider would be based around E-track lumber holders.
If you have a different make of truck, you’ll have the additional step of finding a way to add the E-track socket to the bed of your truck. You can get individual E-track tie-downs or you could get an E-track tie-down rail. The tricky part will be finding a way to securely mount it to your bed.


To make it easier to install/remove as well as store (my original design is very ‘fall over’ prone), I wanted to make this divider field-assemble-able. At a high level, this means that the divider as whole consists of three main pieces: a cross bar, a divider panel and to feet.
The main pieces of my bed divider
Step 1: Cross bar
In my original design, my crossbar was 66¼” wide which was a perfect fit if you had wide open access and it was just the bar you were maneuvering around. This time, I cut my bar to roughly 65½” which gives me plenty of wiggle room to get the bar in and out without having to fret too hard.


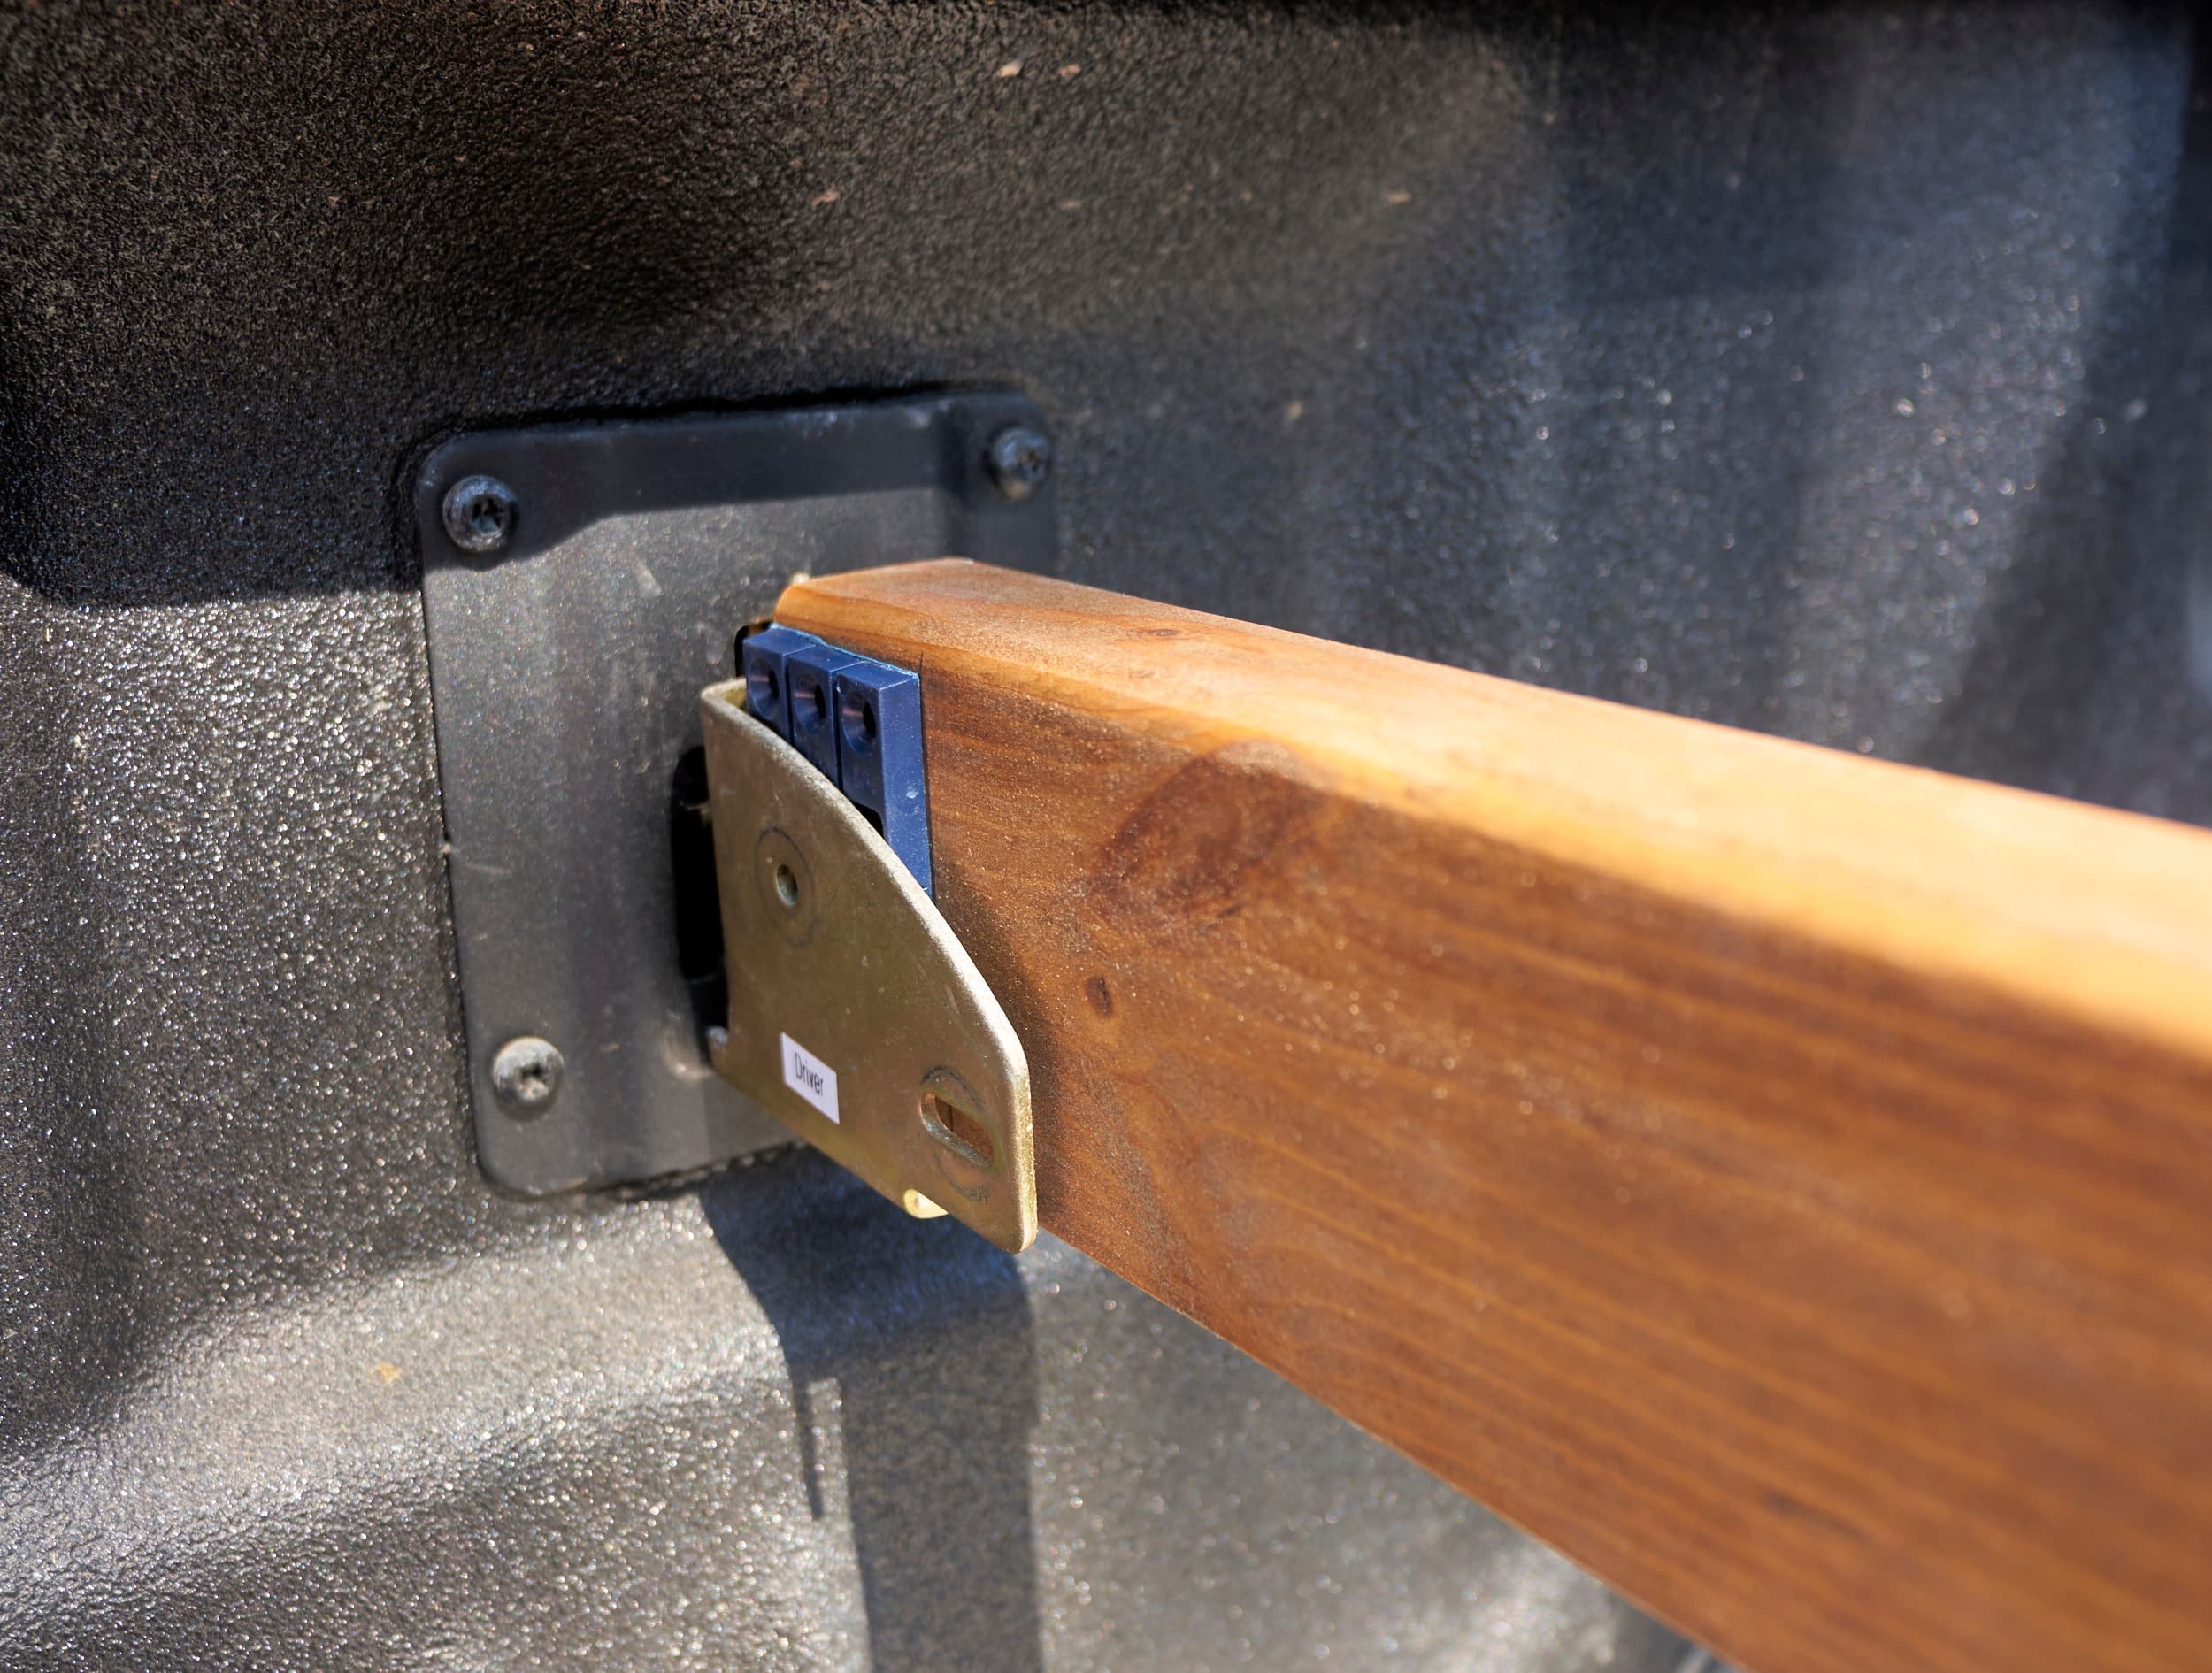

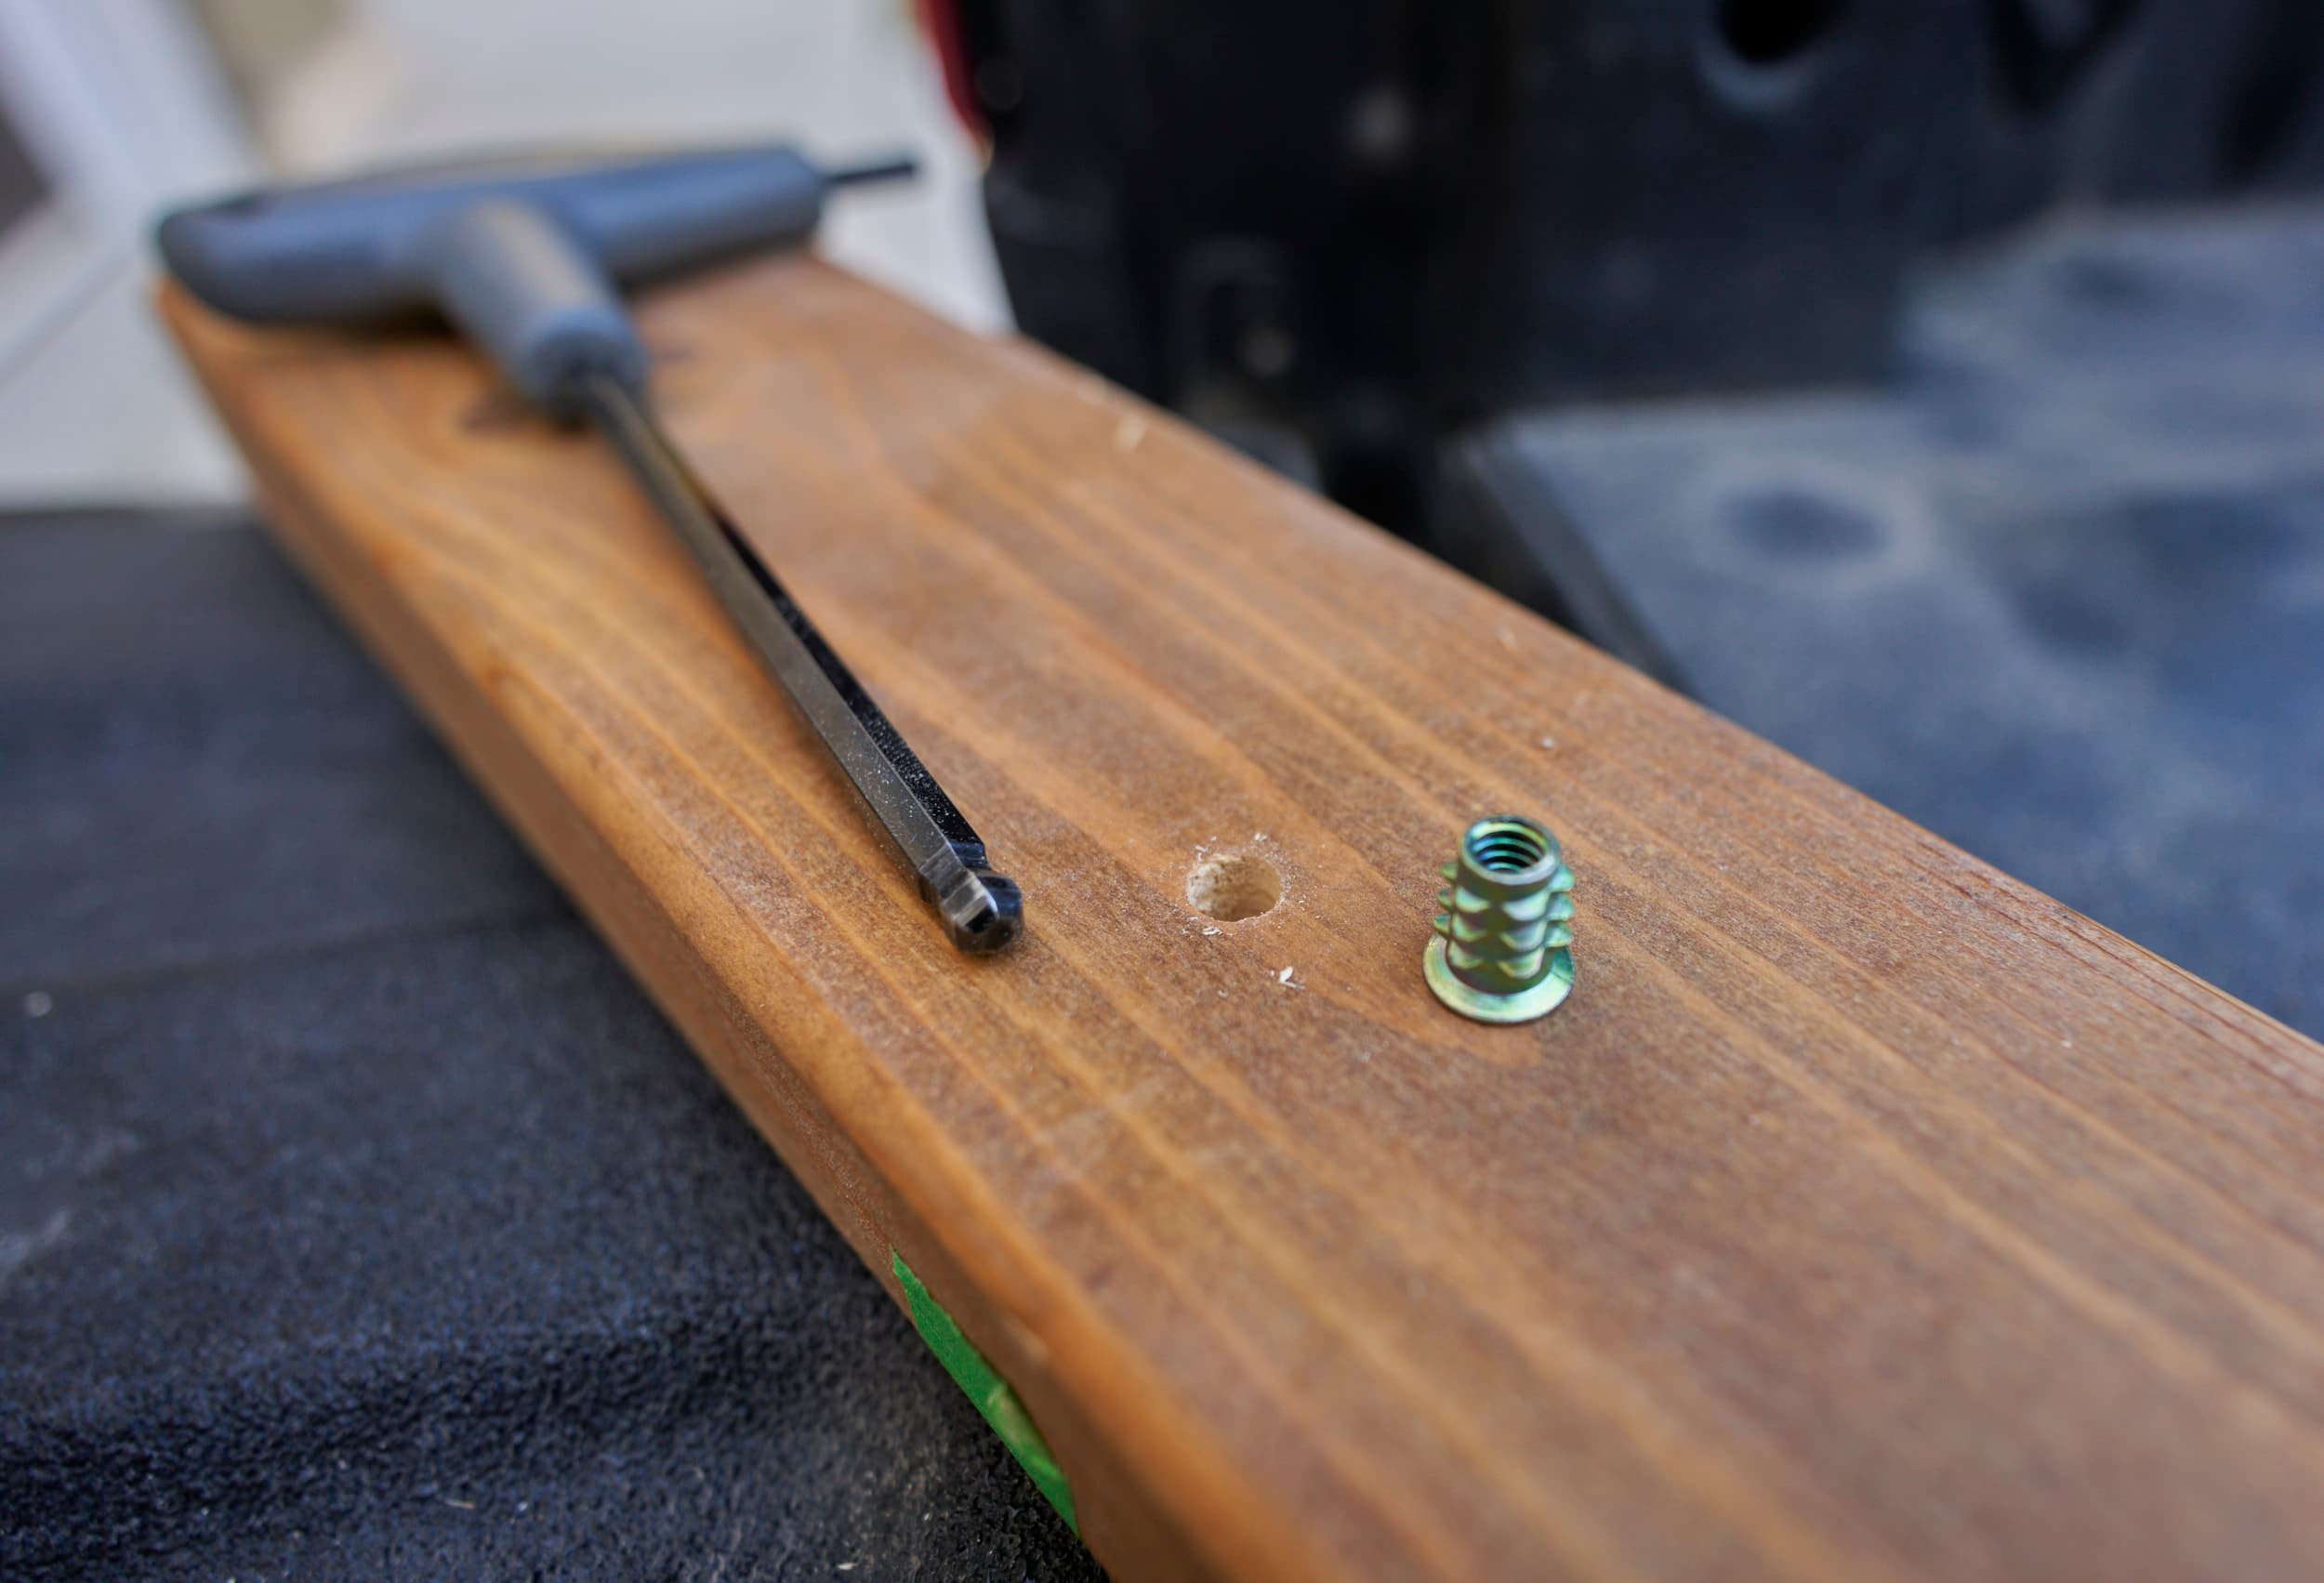
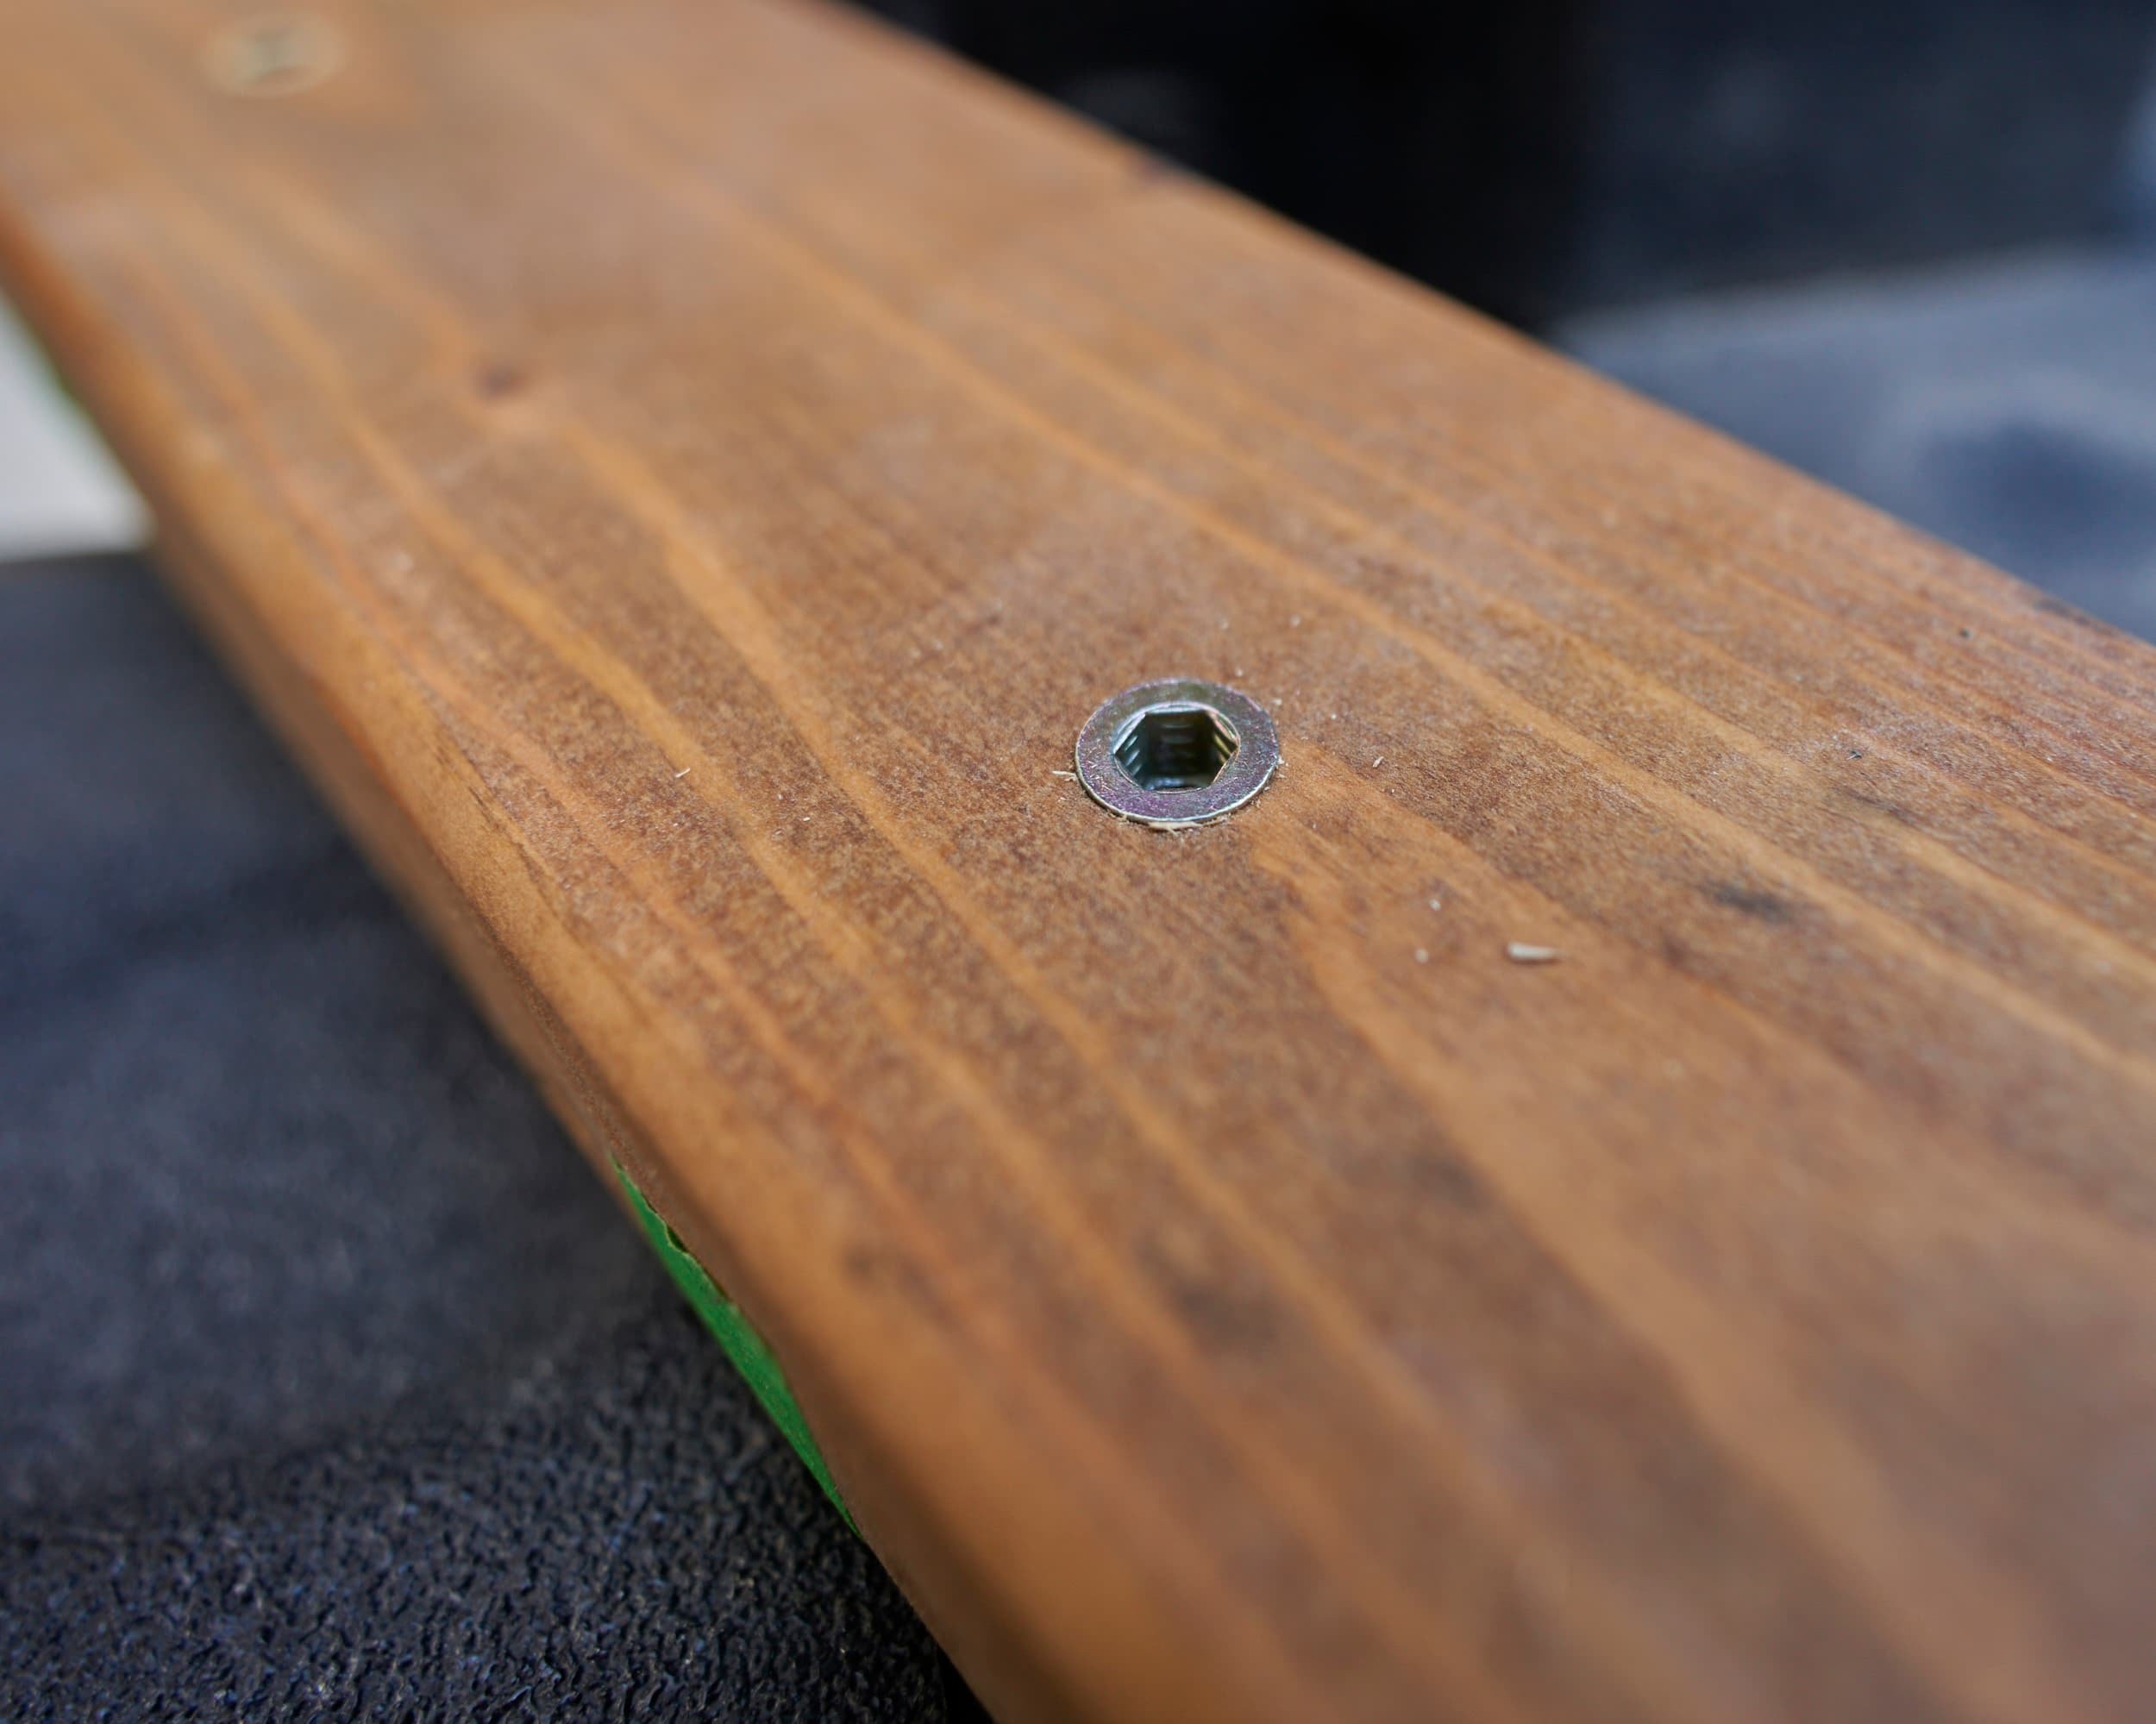
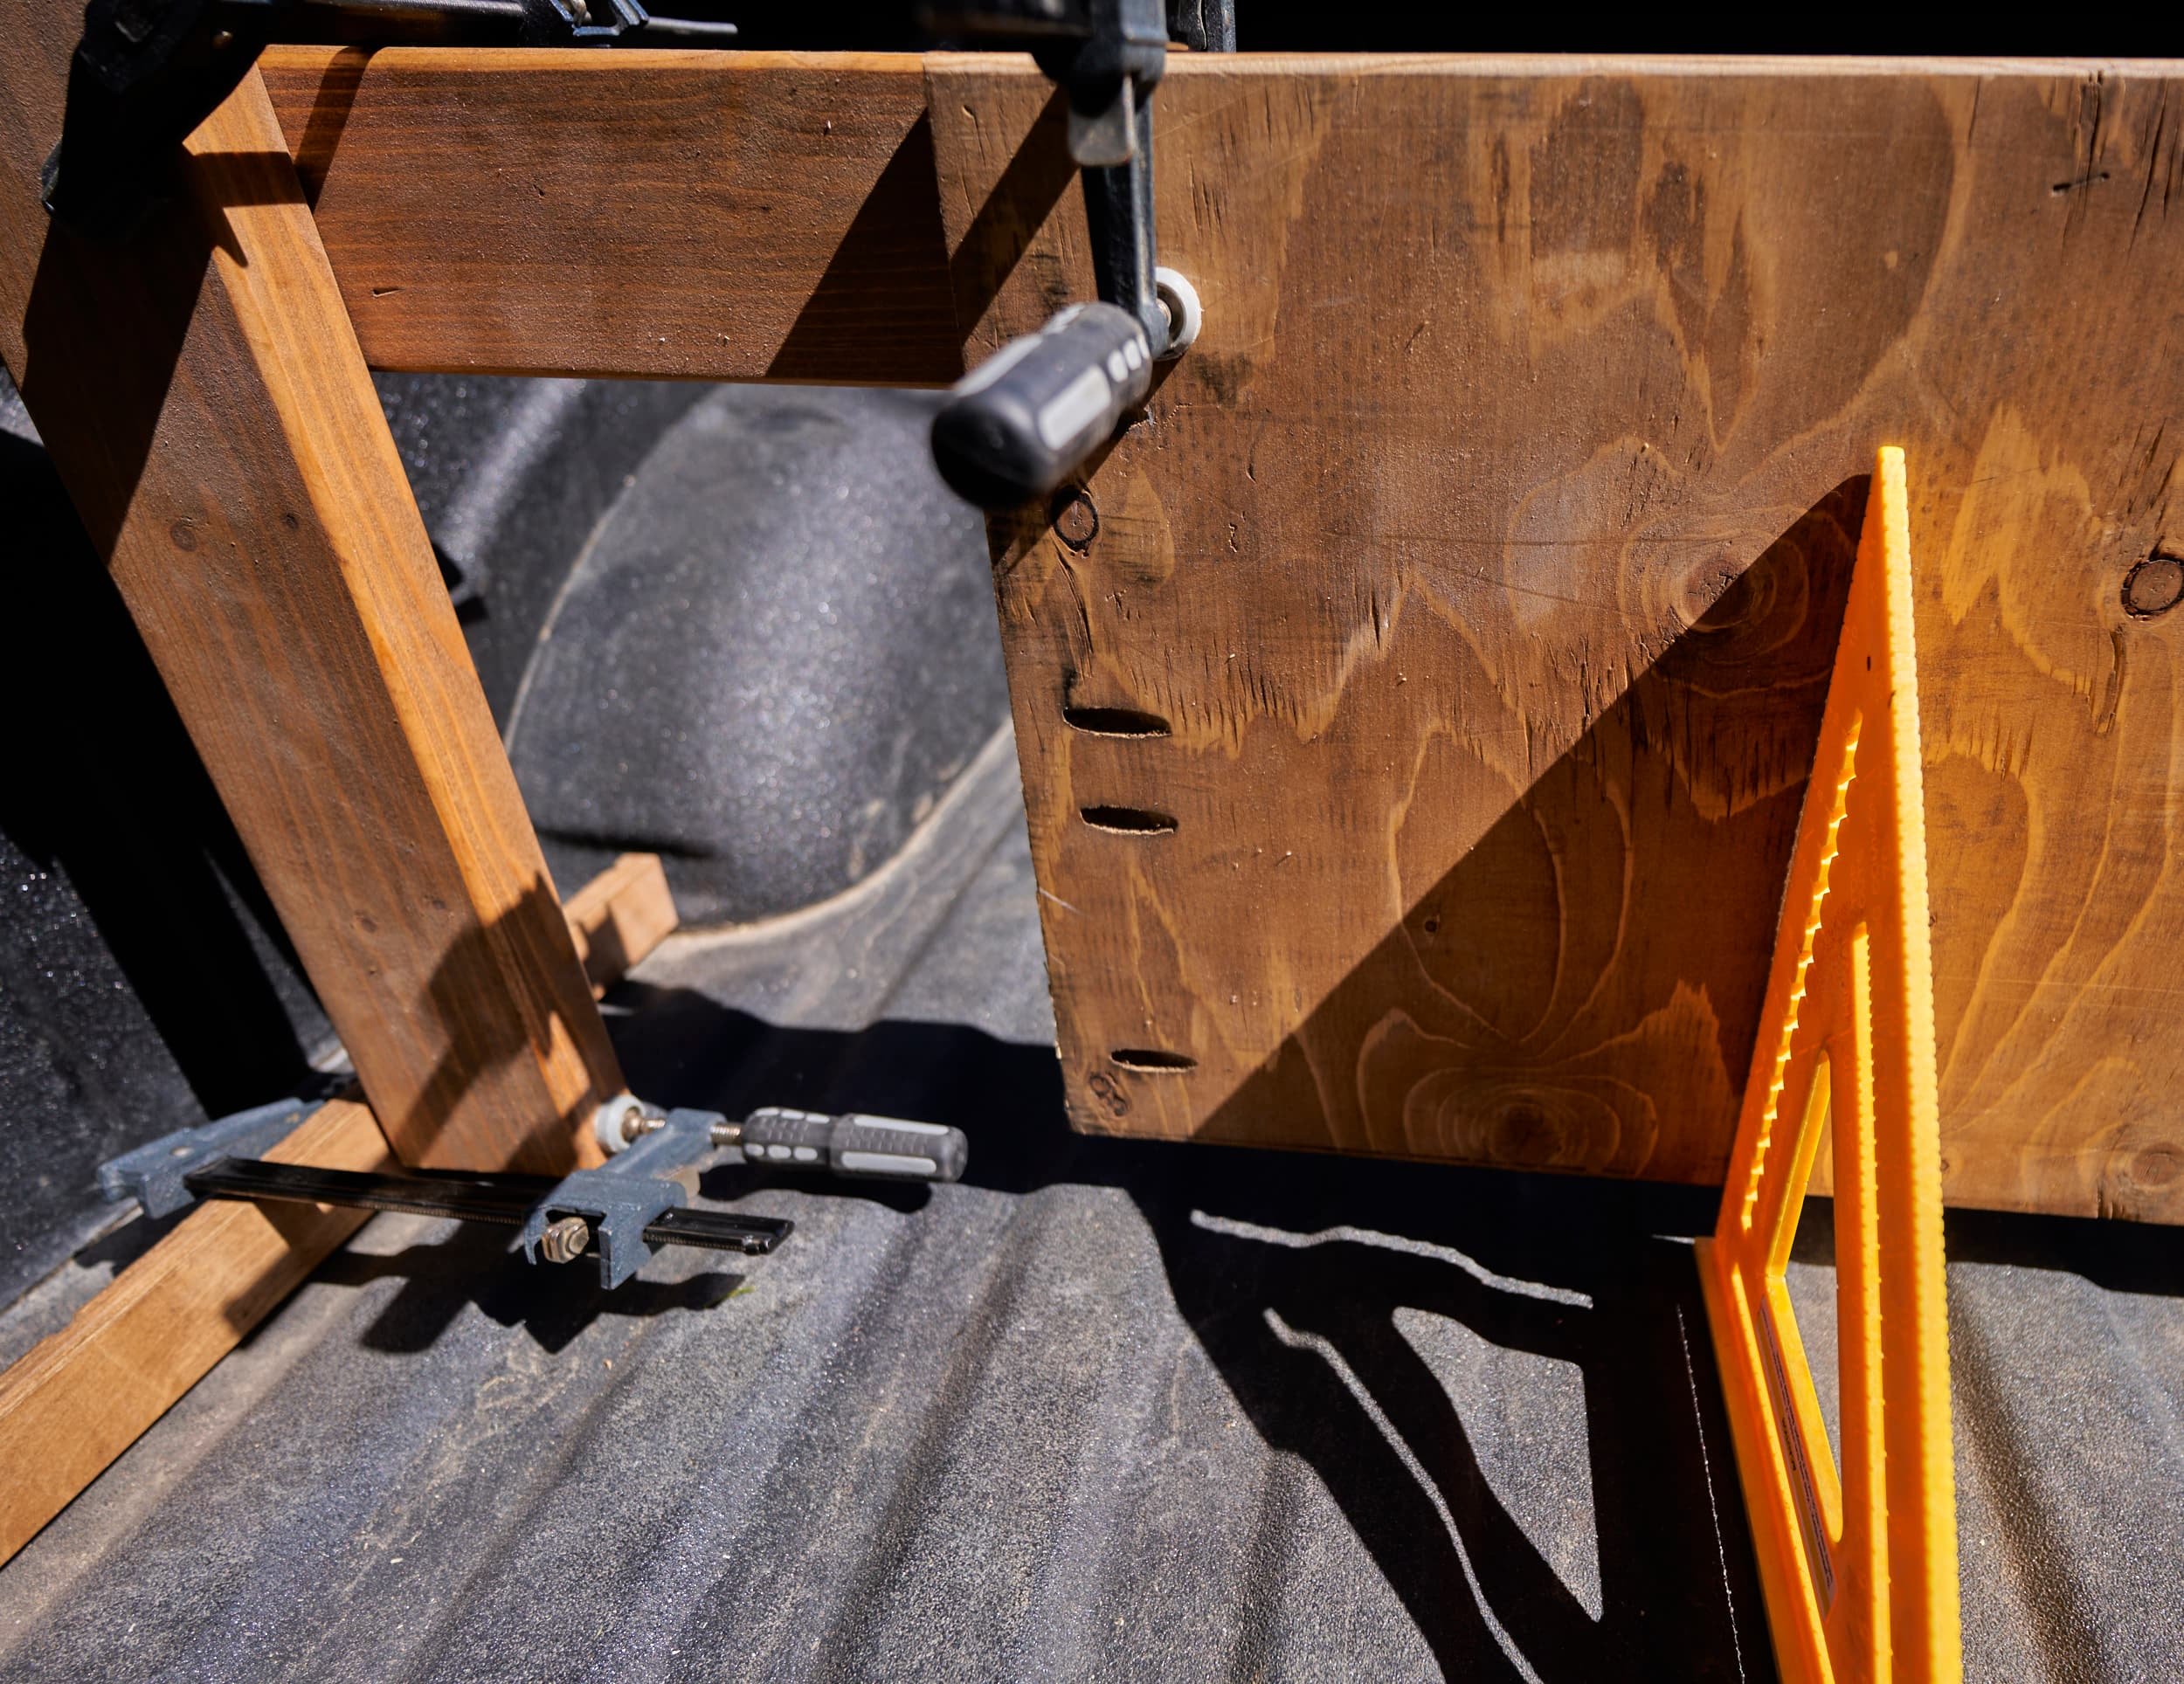
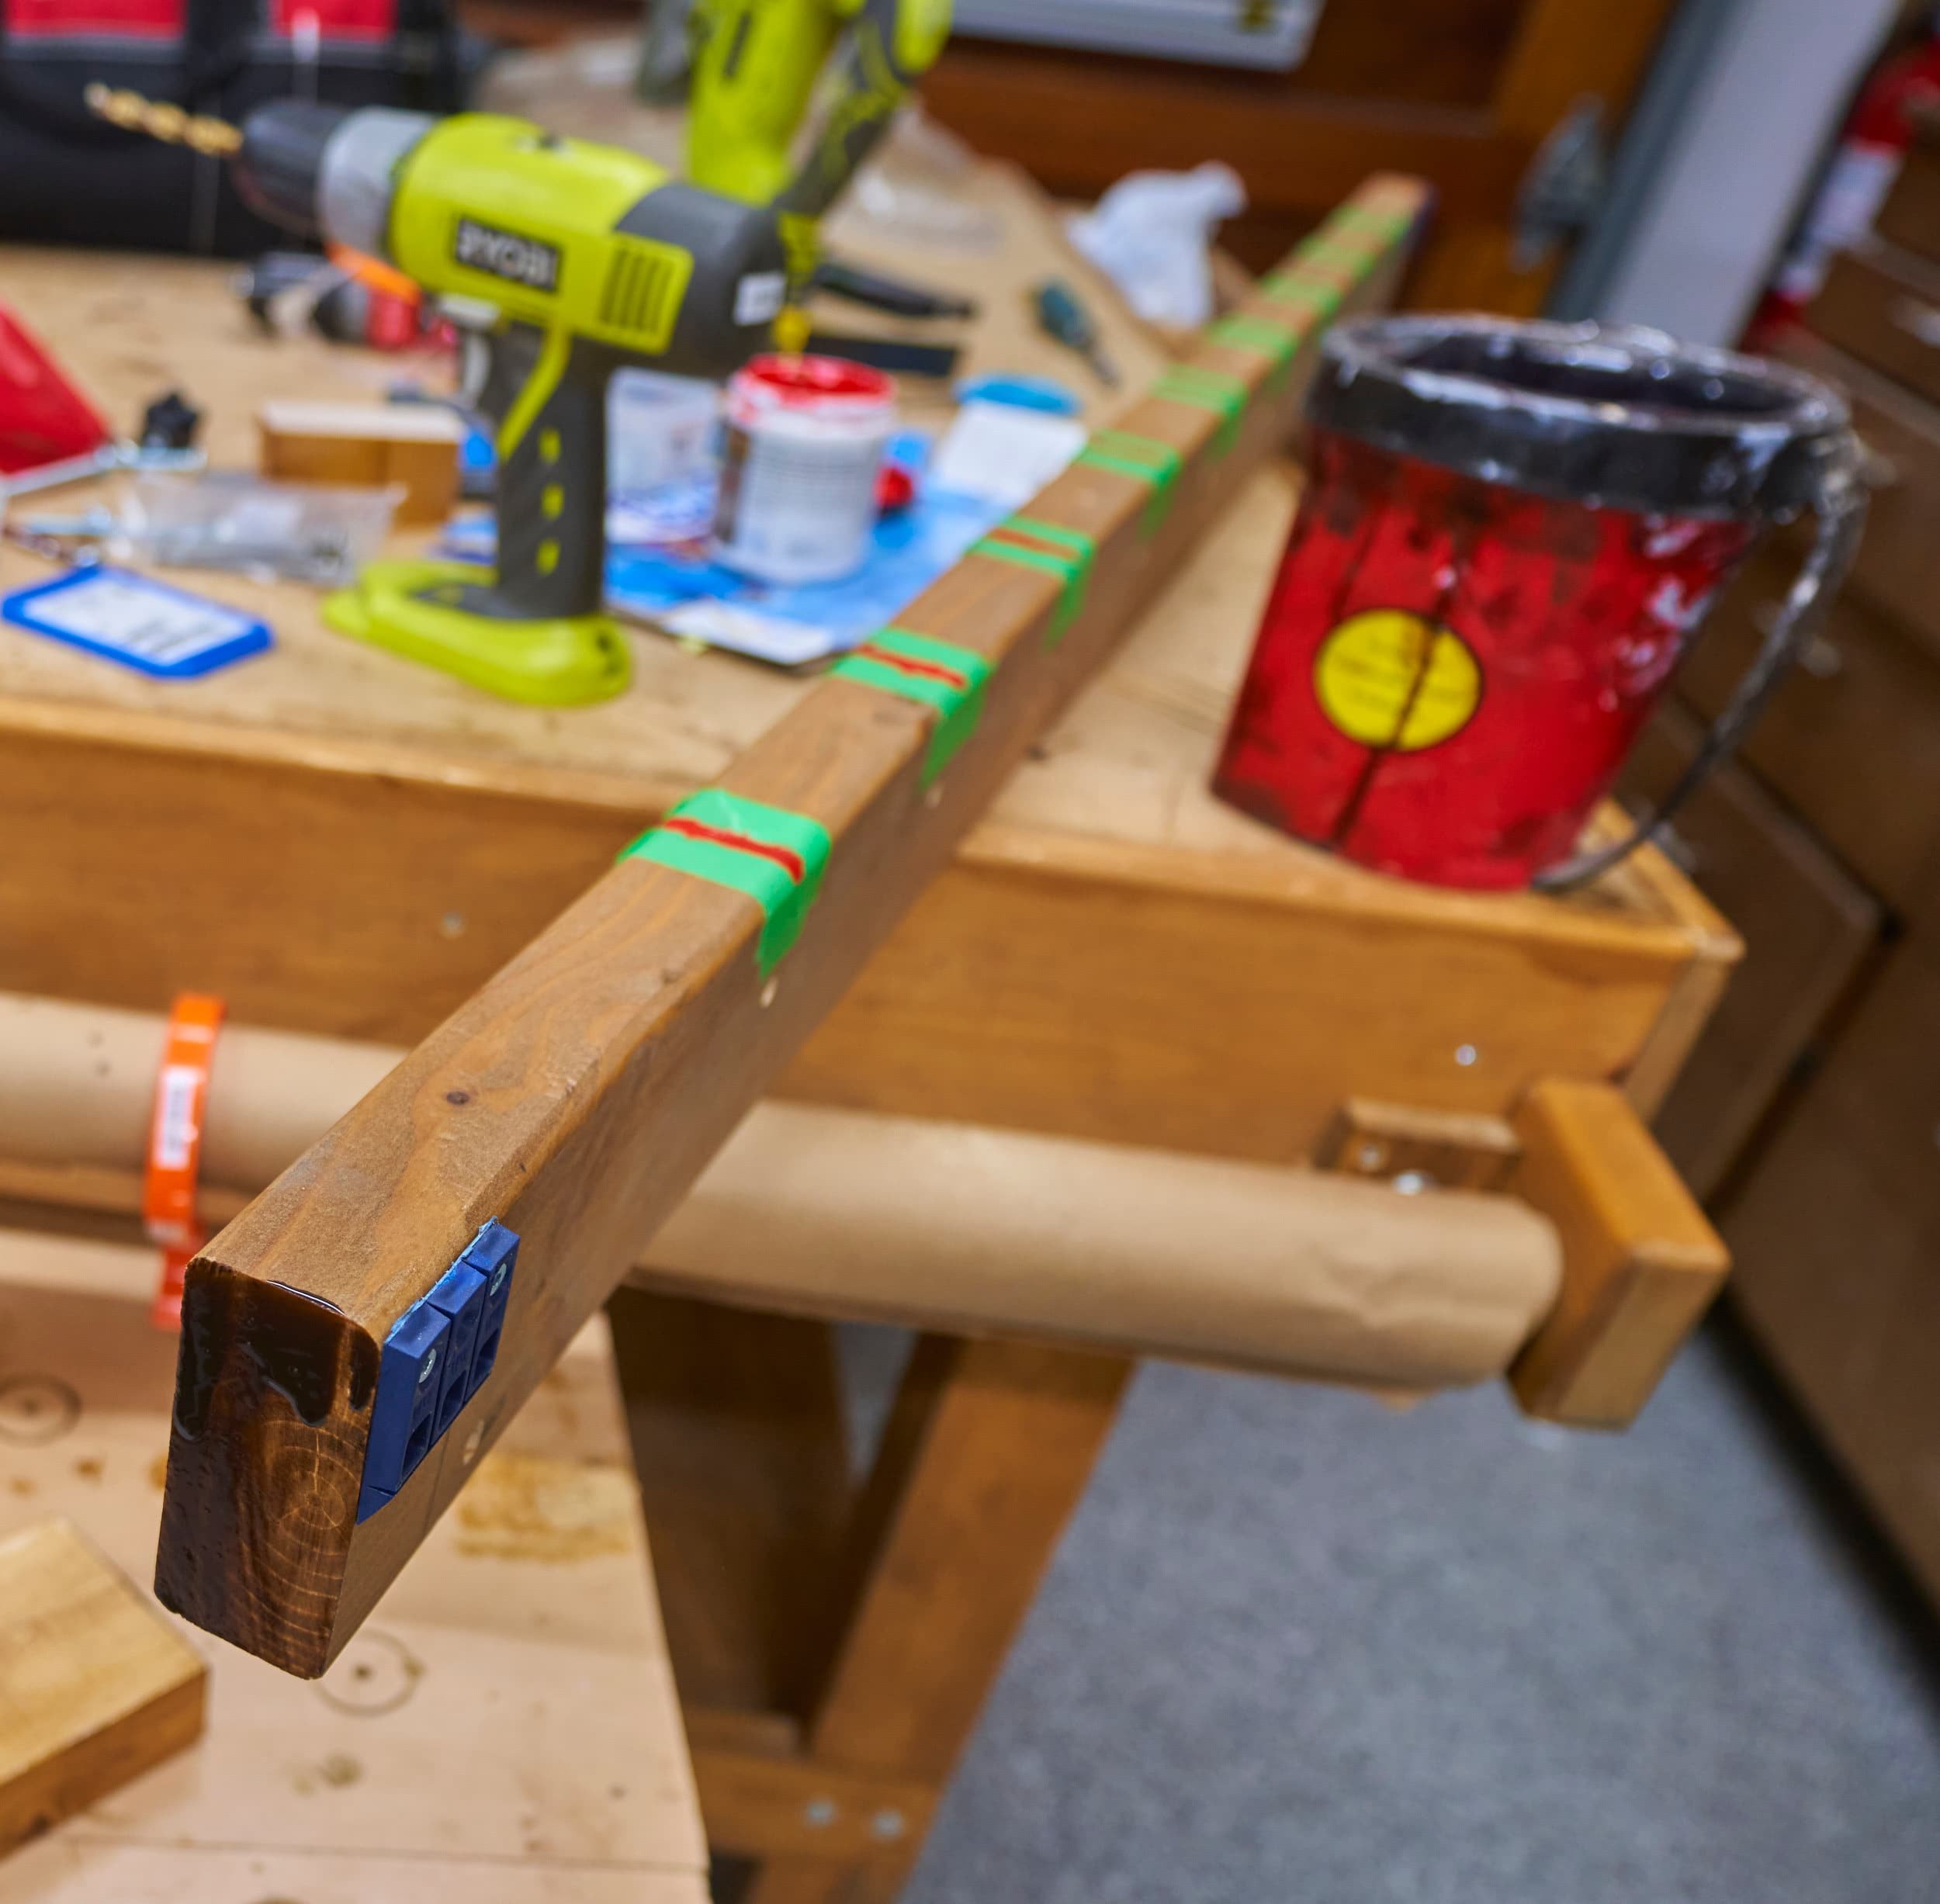
Step 2: Threaded inserts
I found a scrap panel that spanned most of the gap (happened to be 36” wide). I wanted to have the panel attach and detach from the cross bar — this would be crucial in allowing me to assemble/disassemble this divider with the tonneau cover closed up. Compared to my original design, this panel was only a couple inches smaller (left-to-right) but was also shorter (top-to-bottom). This has two benefits: firstly, it no longer rests on the bed of the truck (in case water does make it into the bed) and secondly, it keeps the rest of the divider dead-simple.
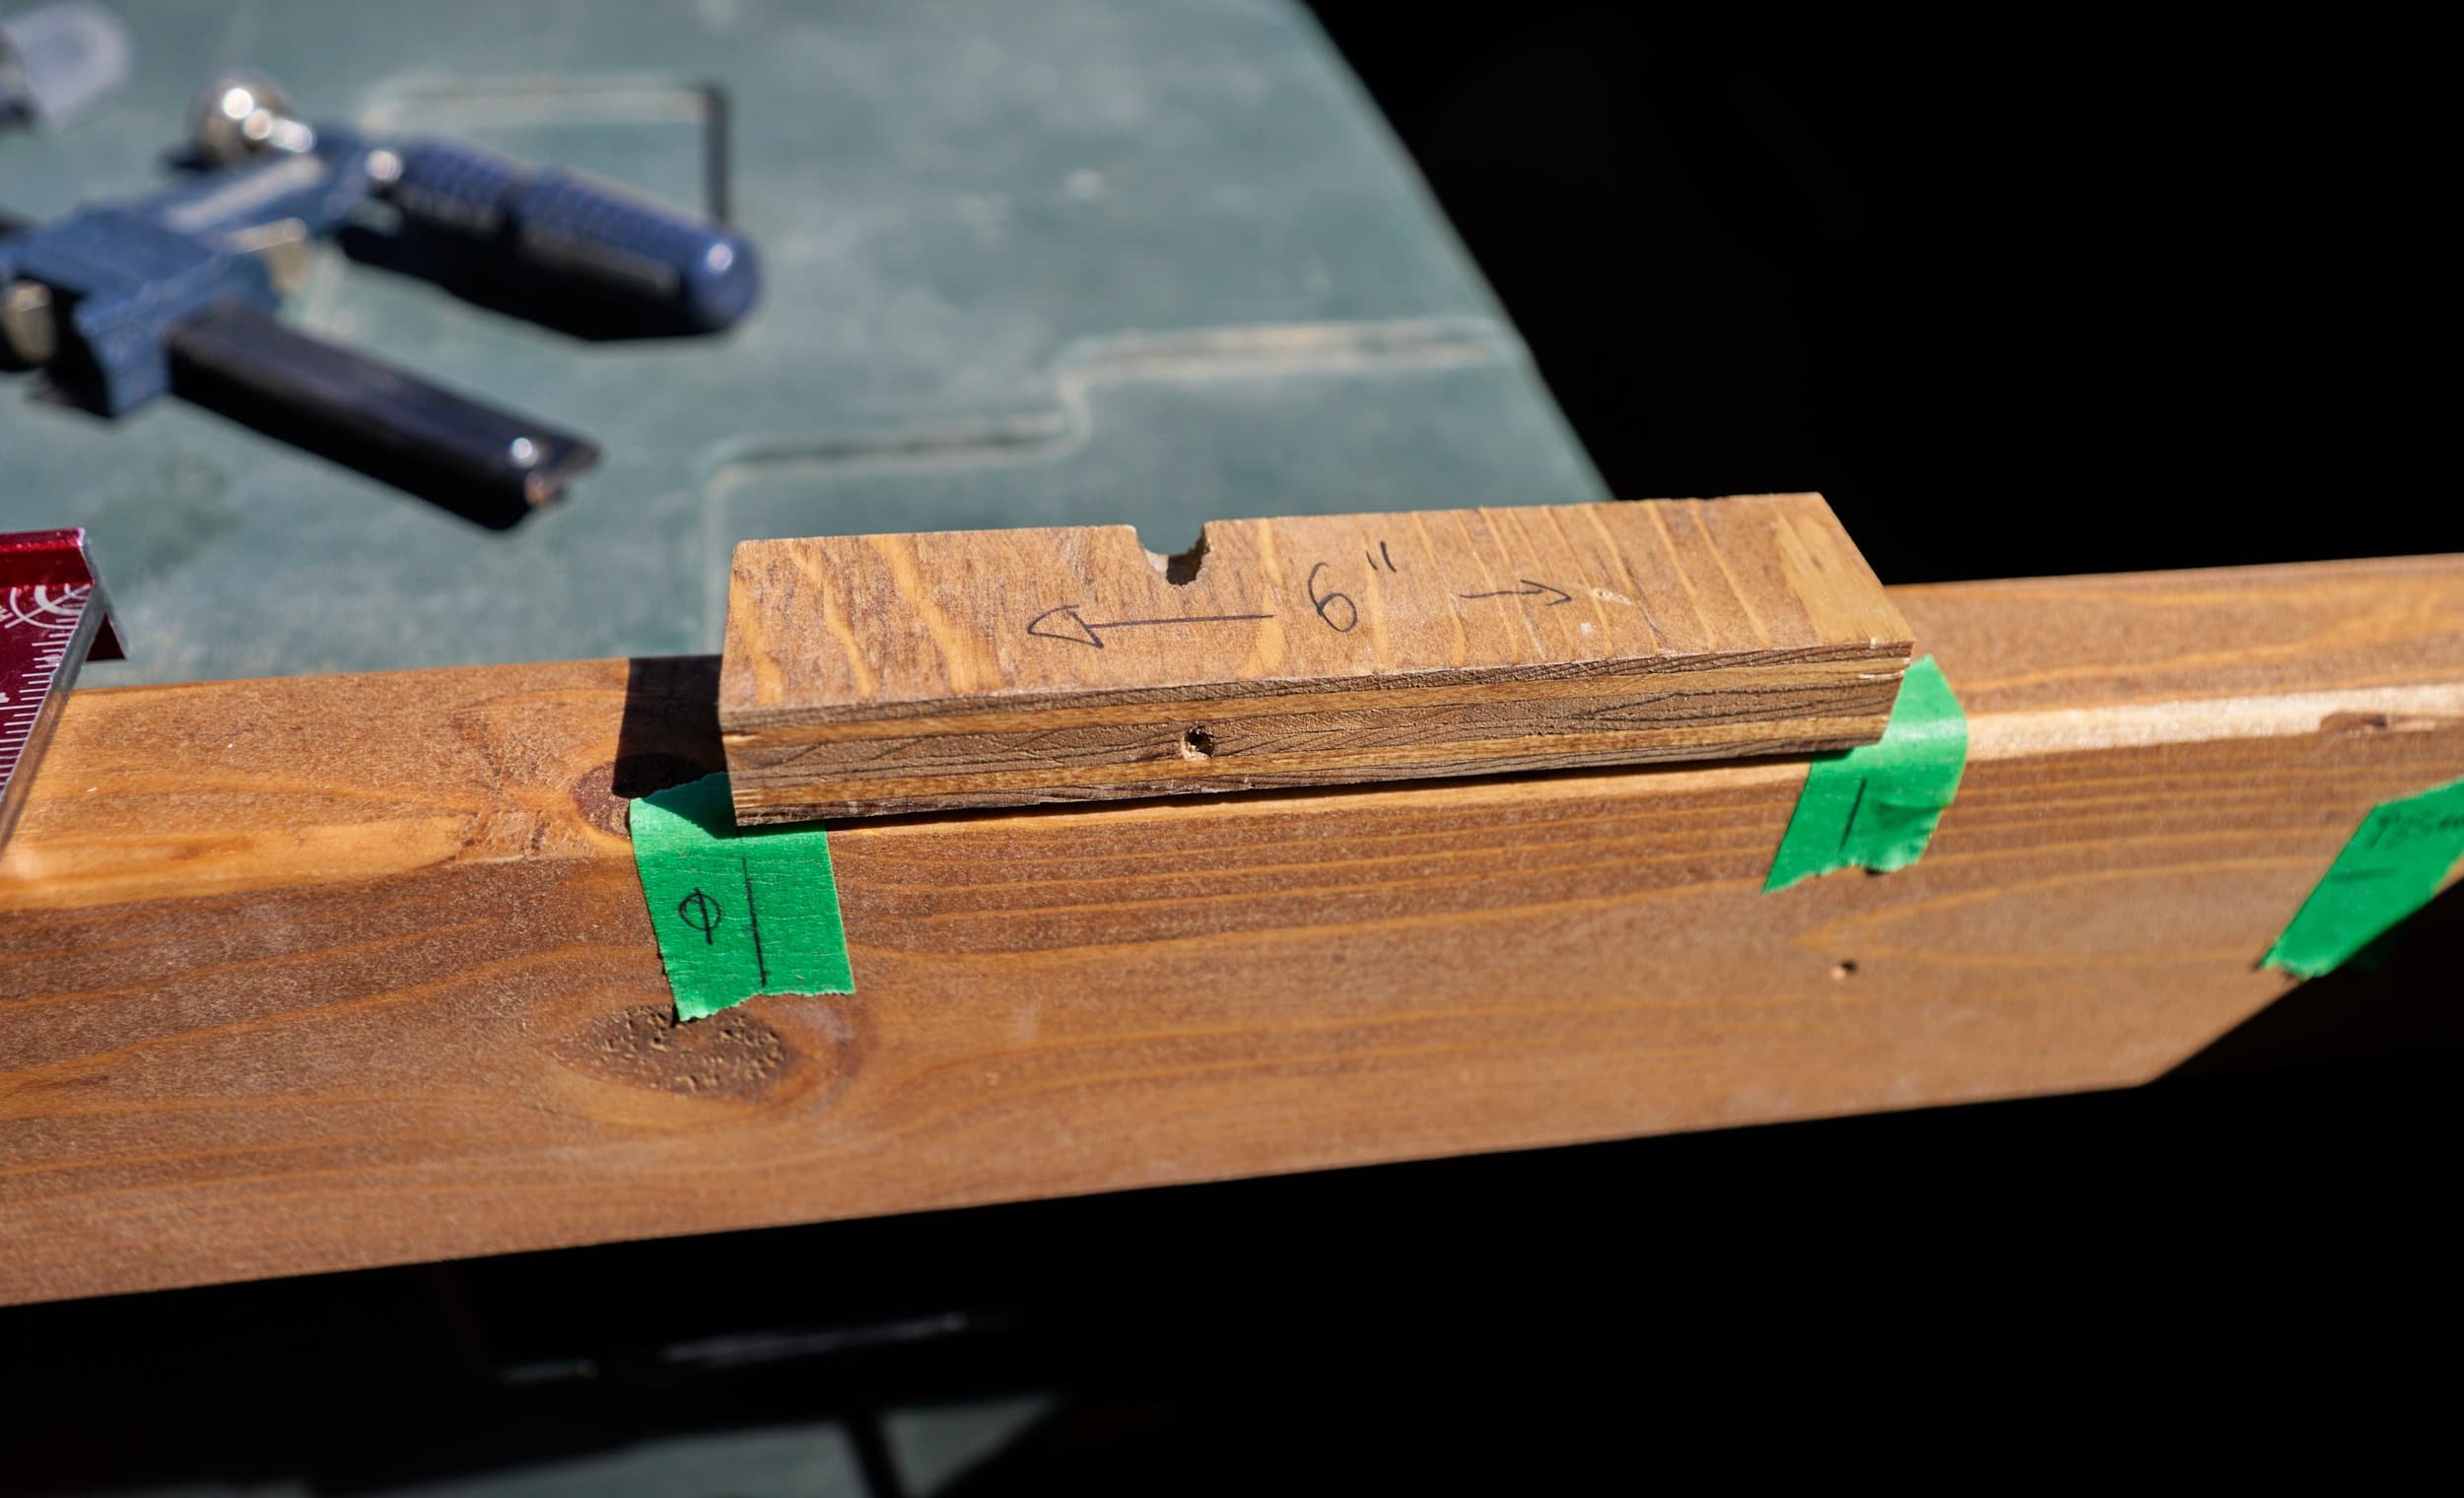


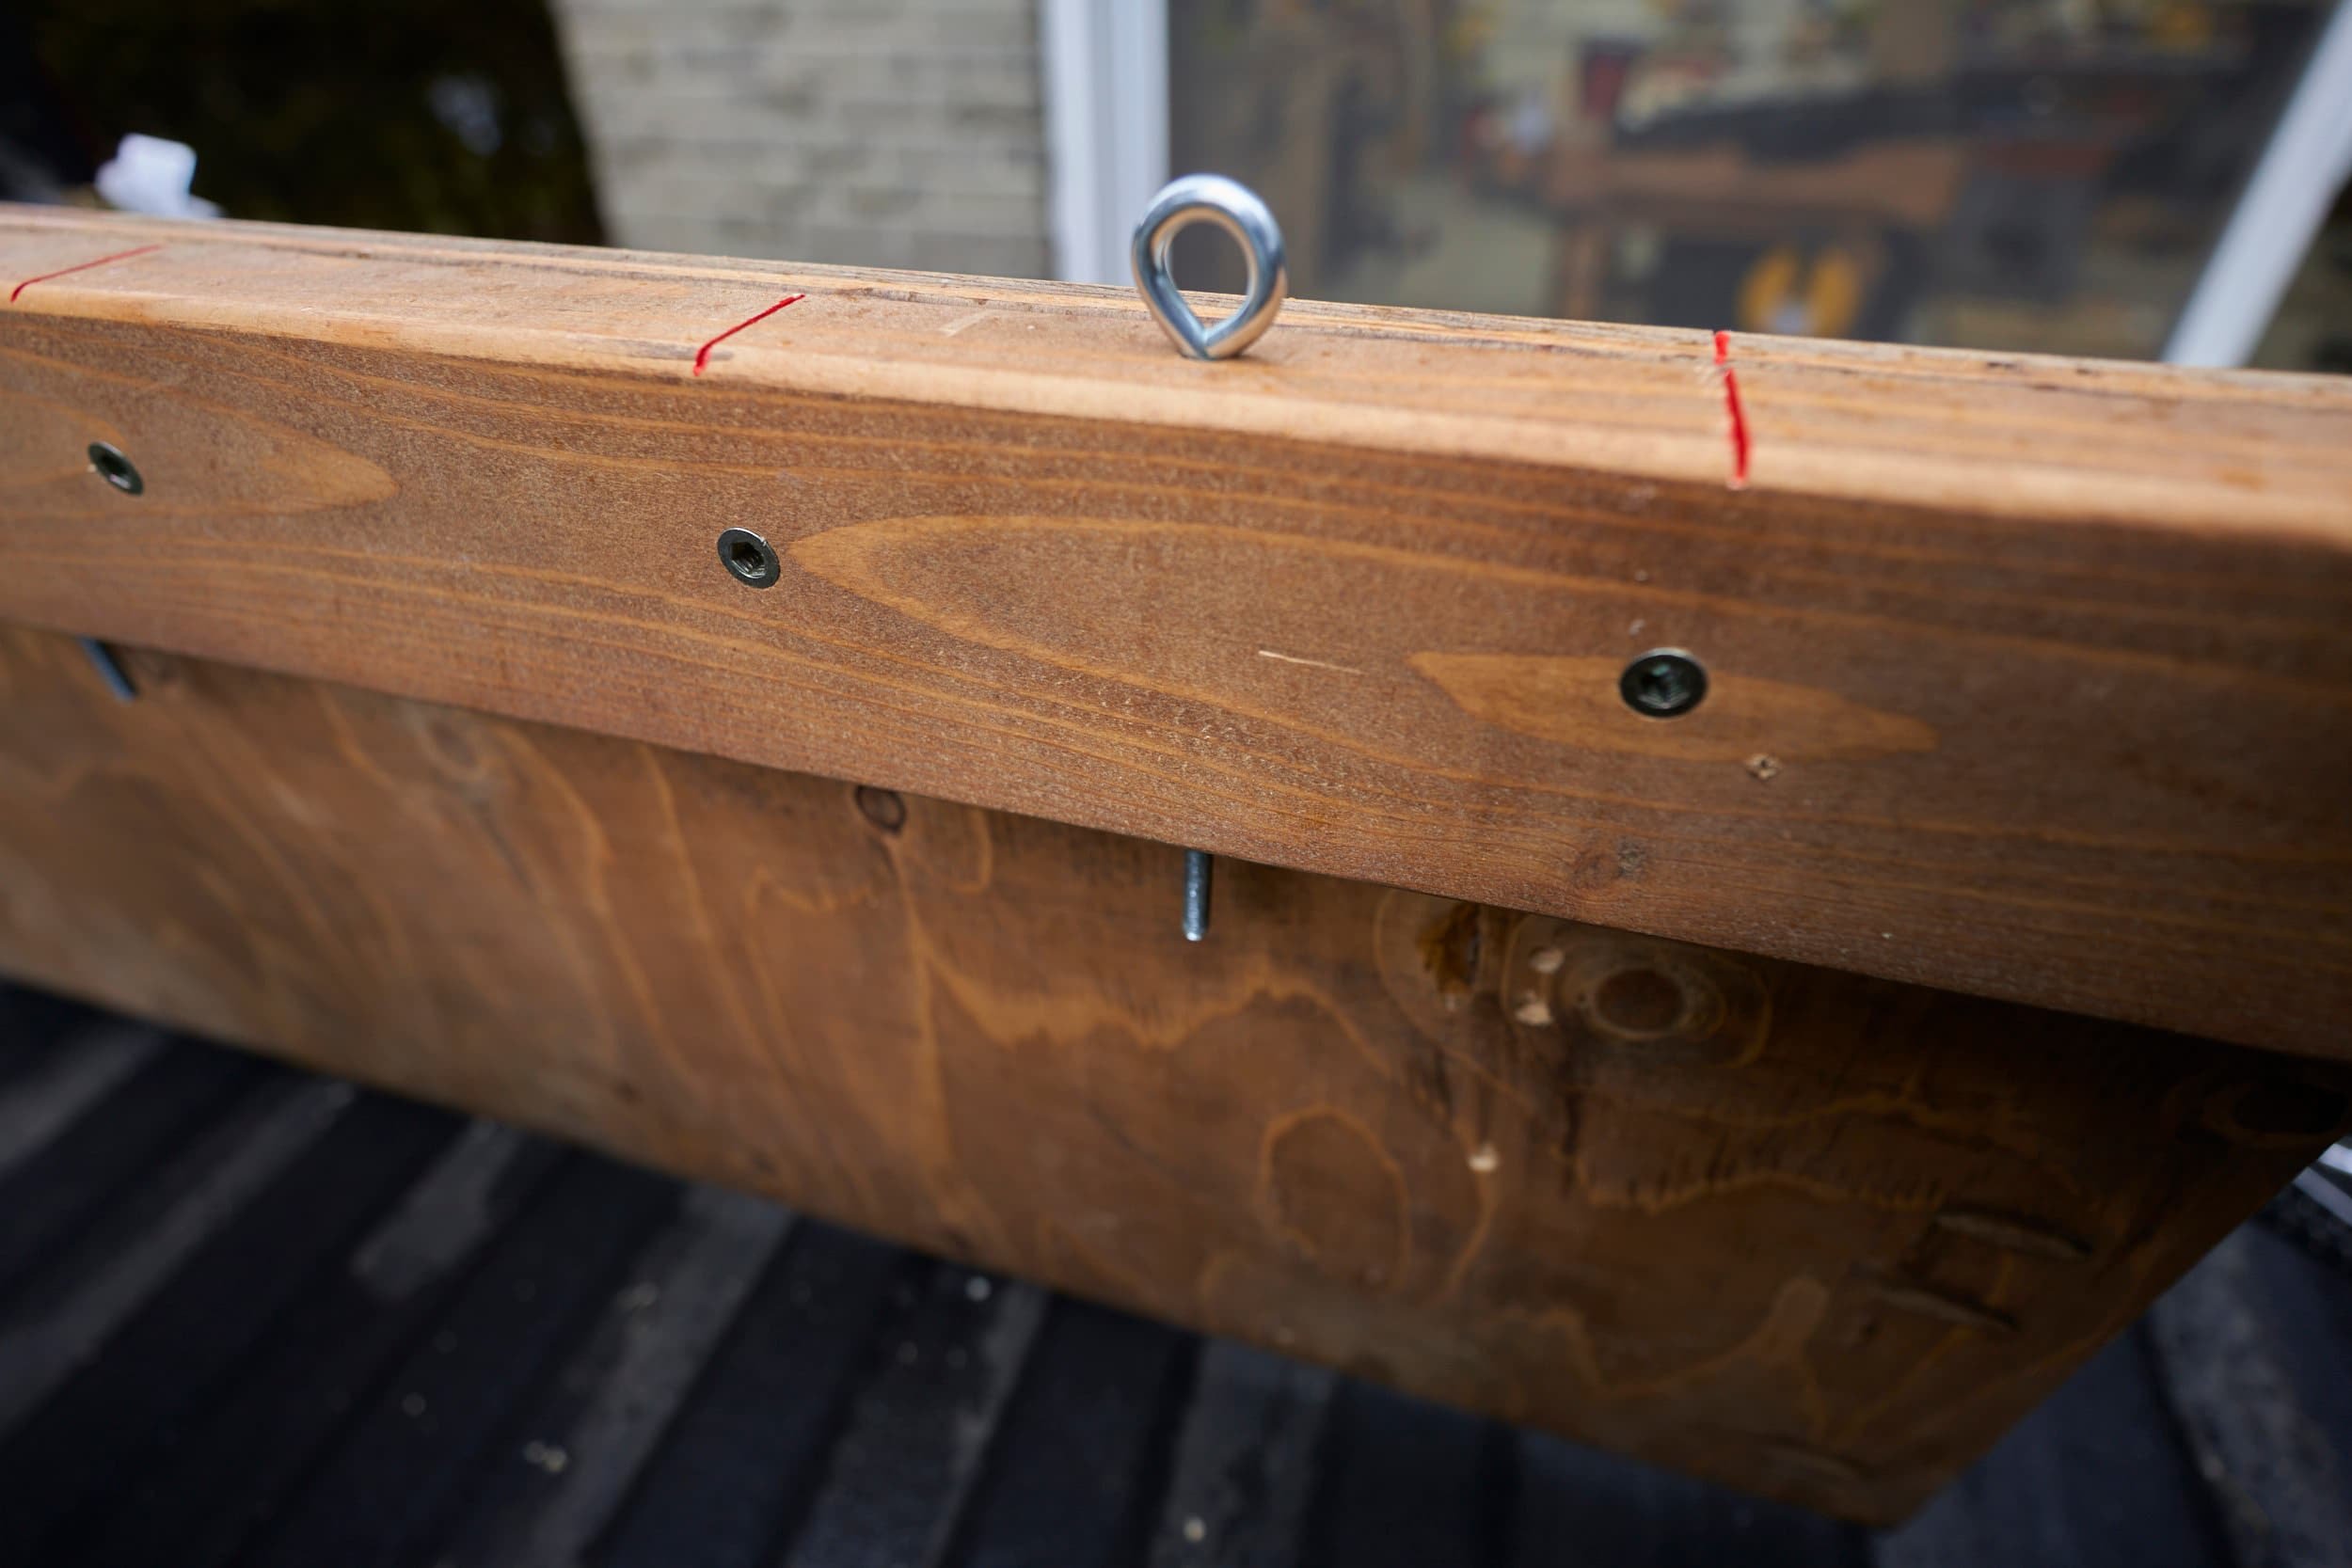
Step 3: Pin hole (optional)
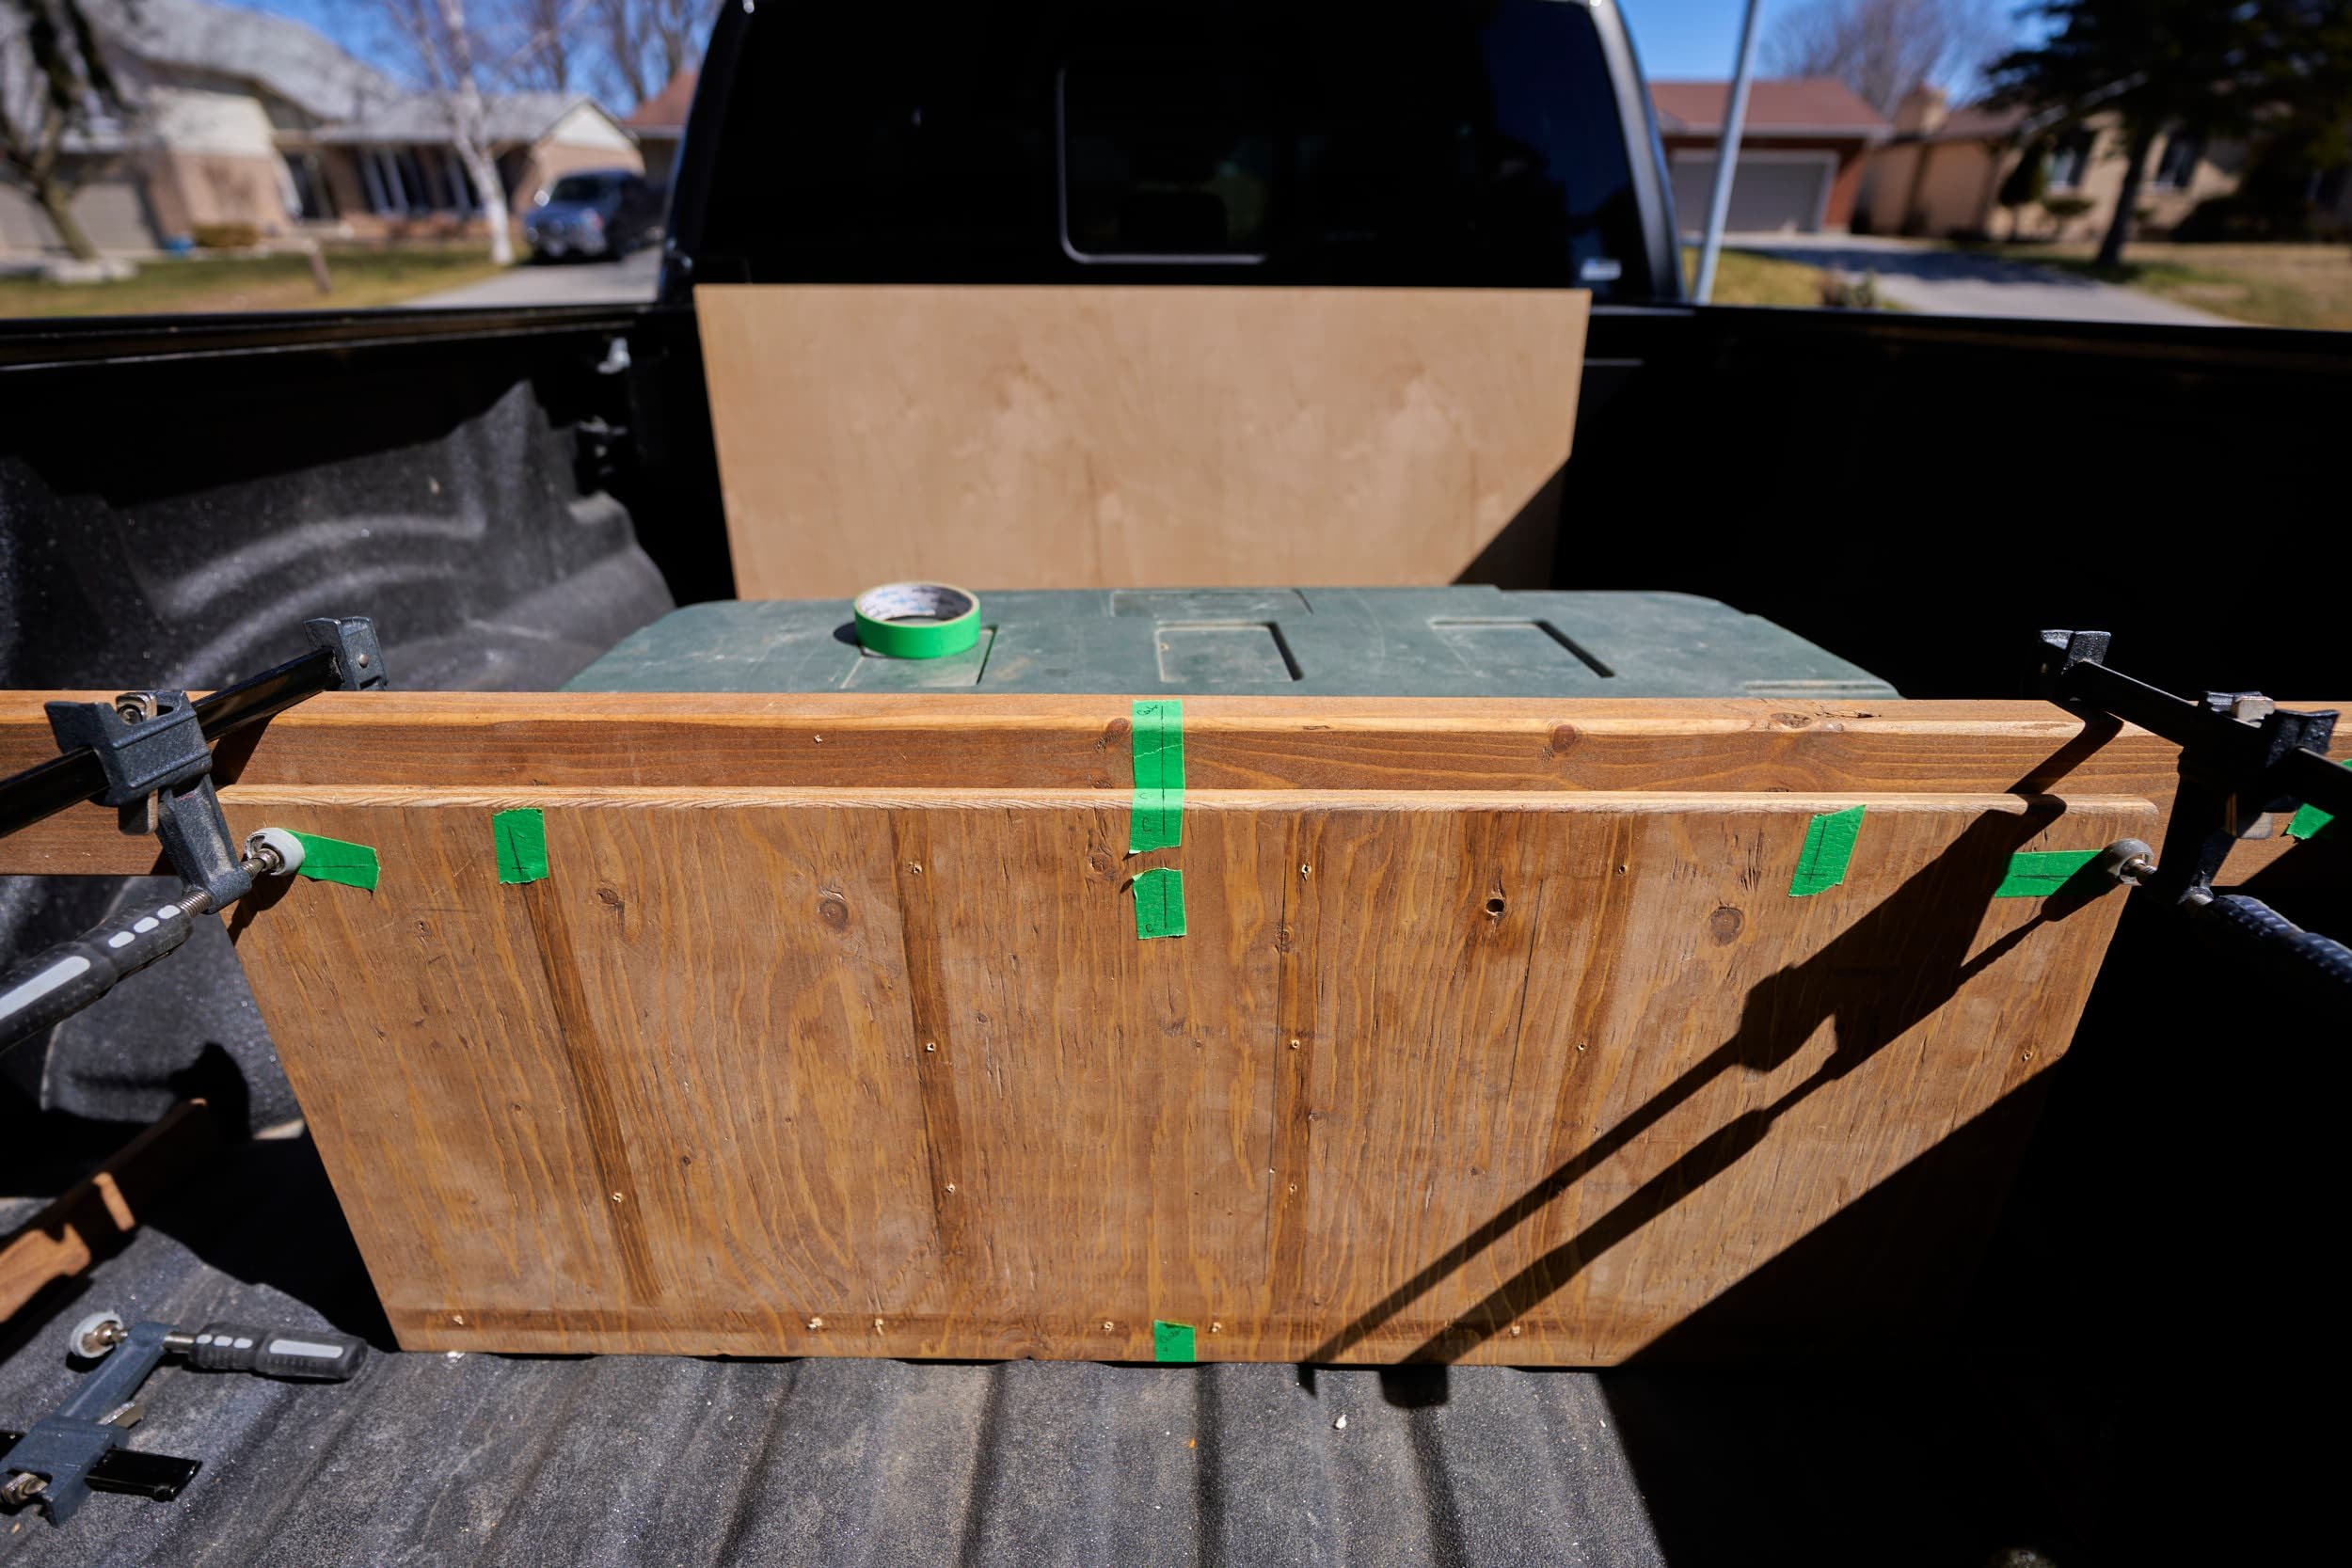
I keep a Plano storage tote in the bed of the truck and I wanted to find a way to keep it from sliding around. In my original divider, I simply strapped the trunk to the back side of the divider — but this [probably] would have required me to add a panel on the back side and I really didn’t want to do that because I wanted to keep this light — and I didn’t have another suitably sized scrap of plywood handy.
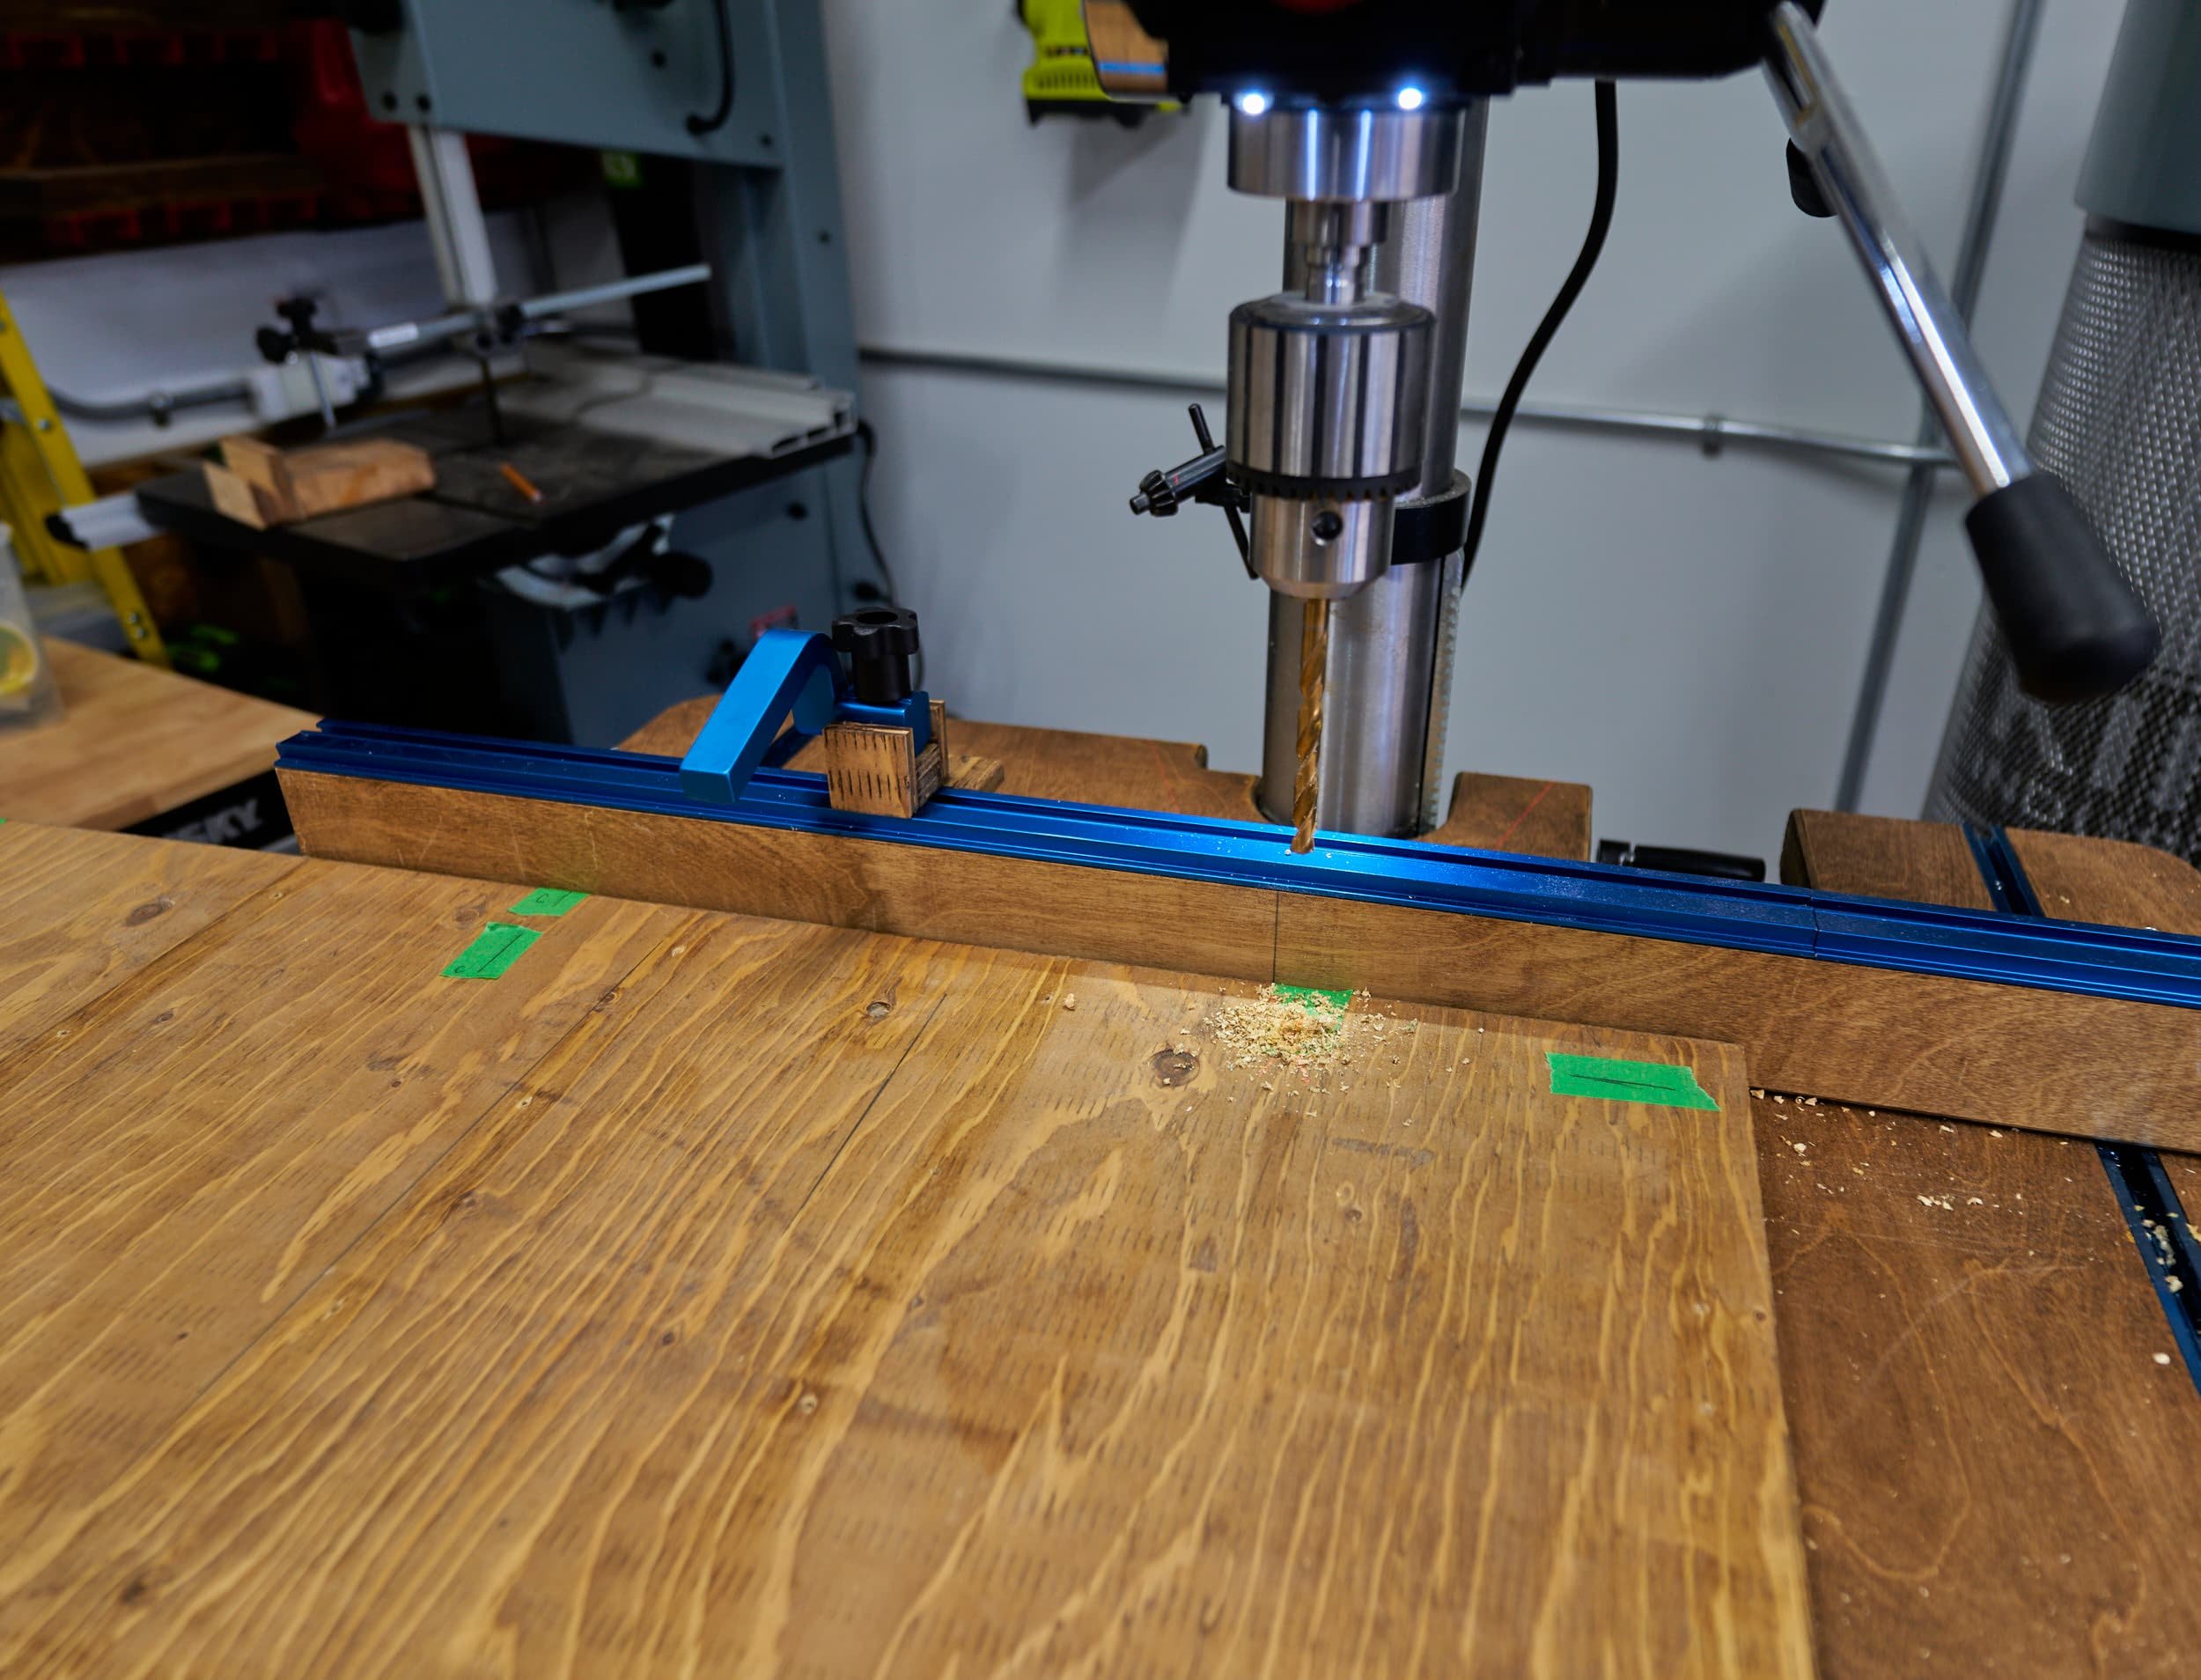
I did notice that the tote has locking holes — what if I could run a pin or something through those holes to keep it fixed in place? In theory, you could pin the tote to the divider this way — assuming you’re not heavily loading the tote and/or driving erratically because the weight of the tote is now being held by those holes. Since I have a drill press, it was easy enough for me to at least test this out.


More on this in a bit, but for now, this seems like a neat option at least.
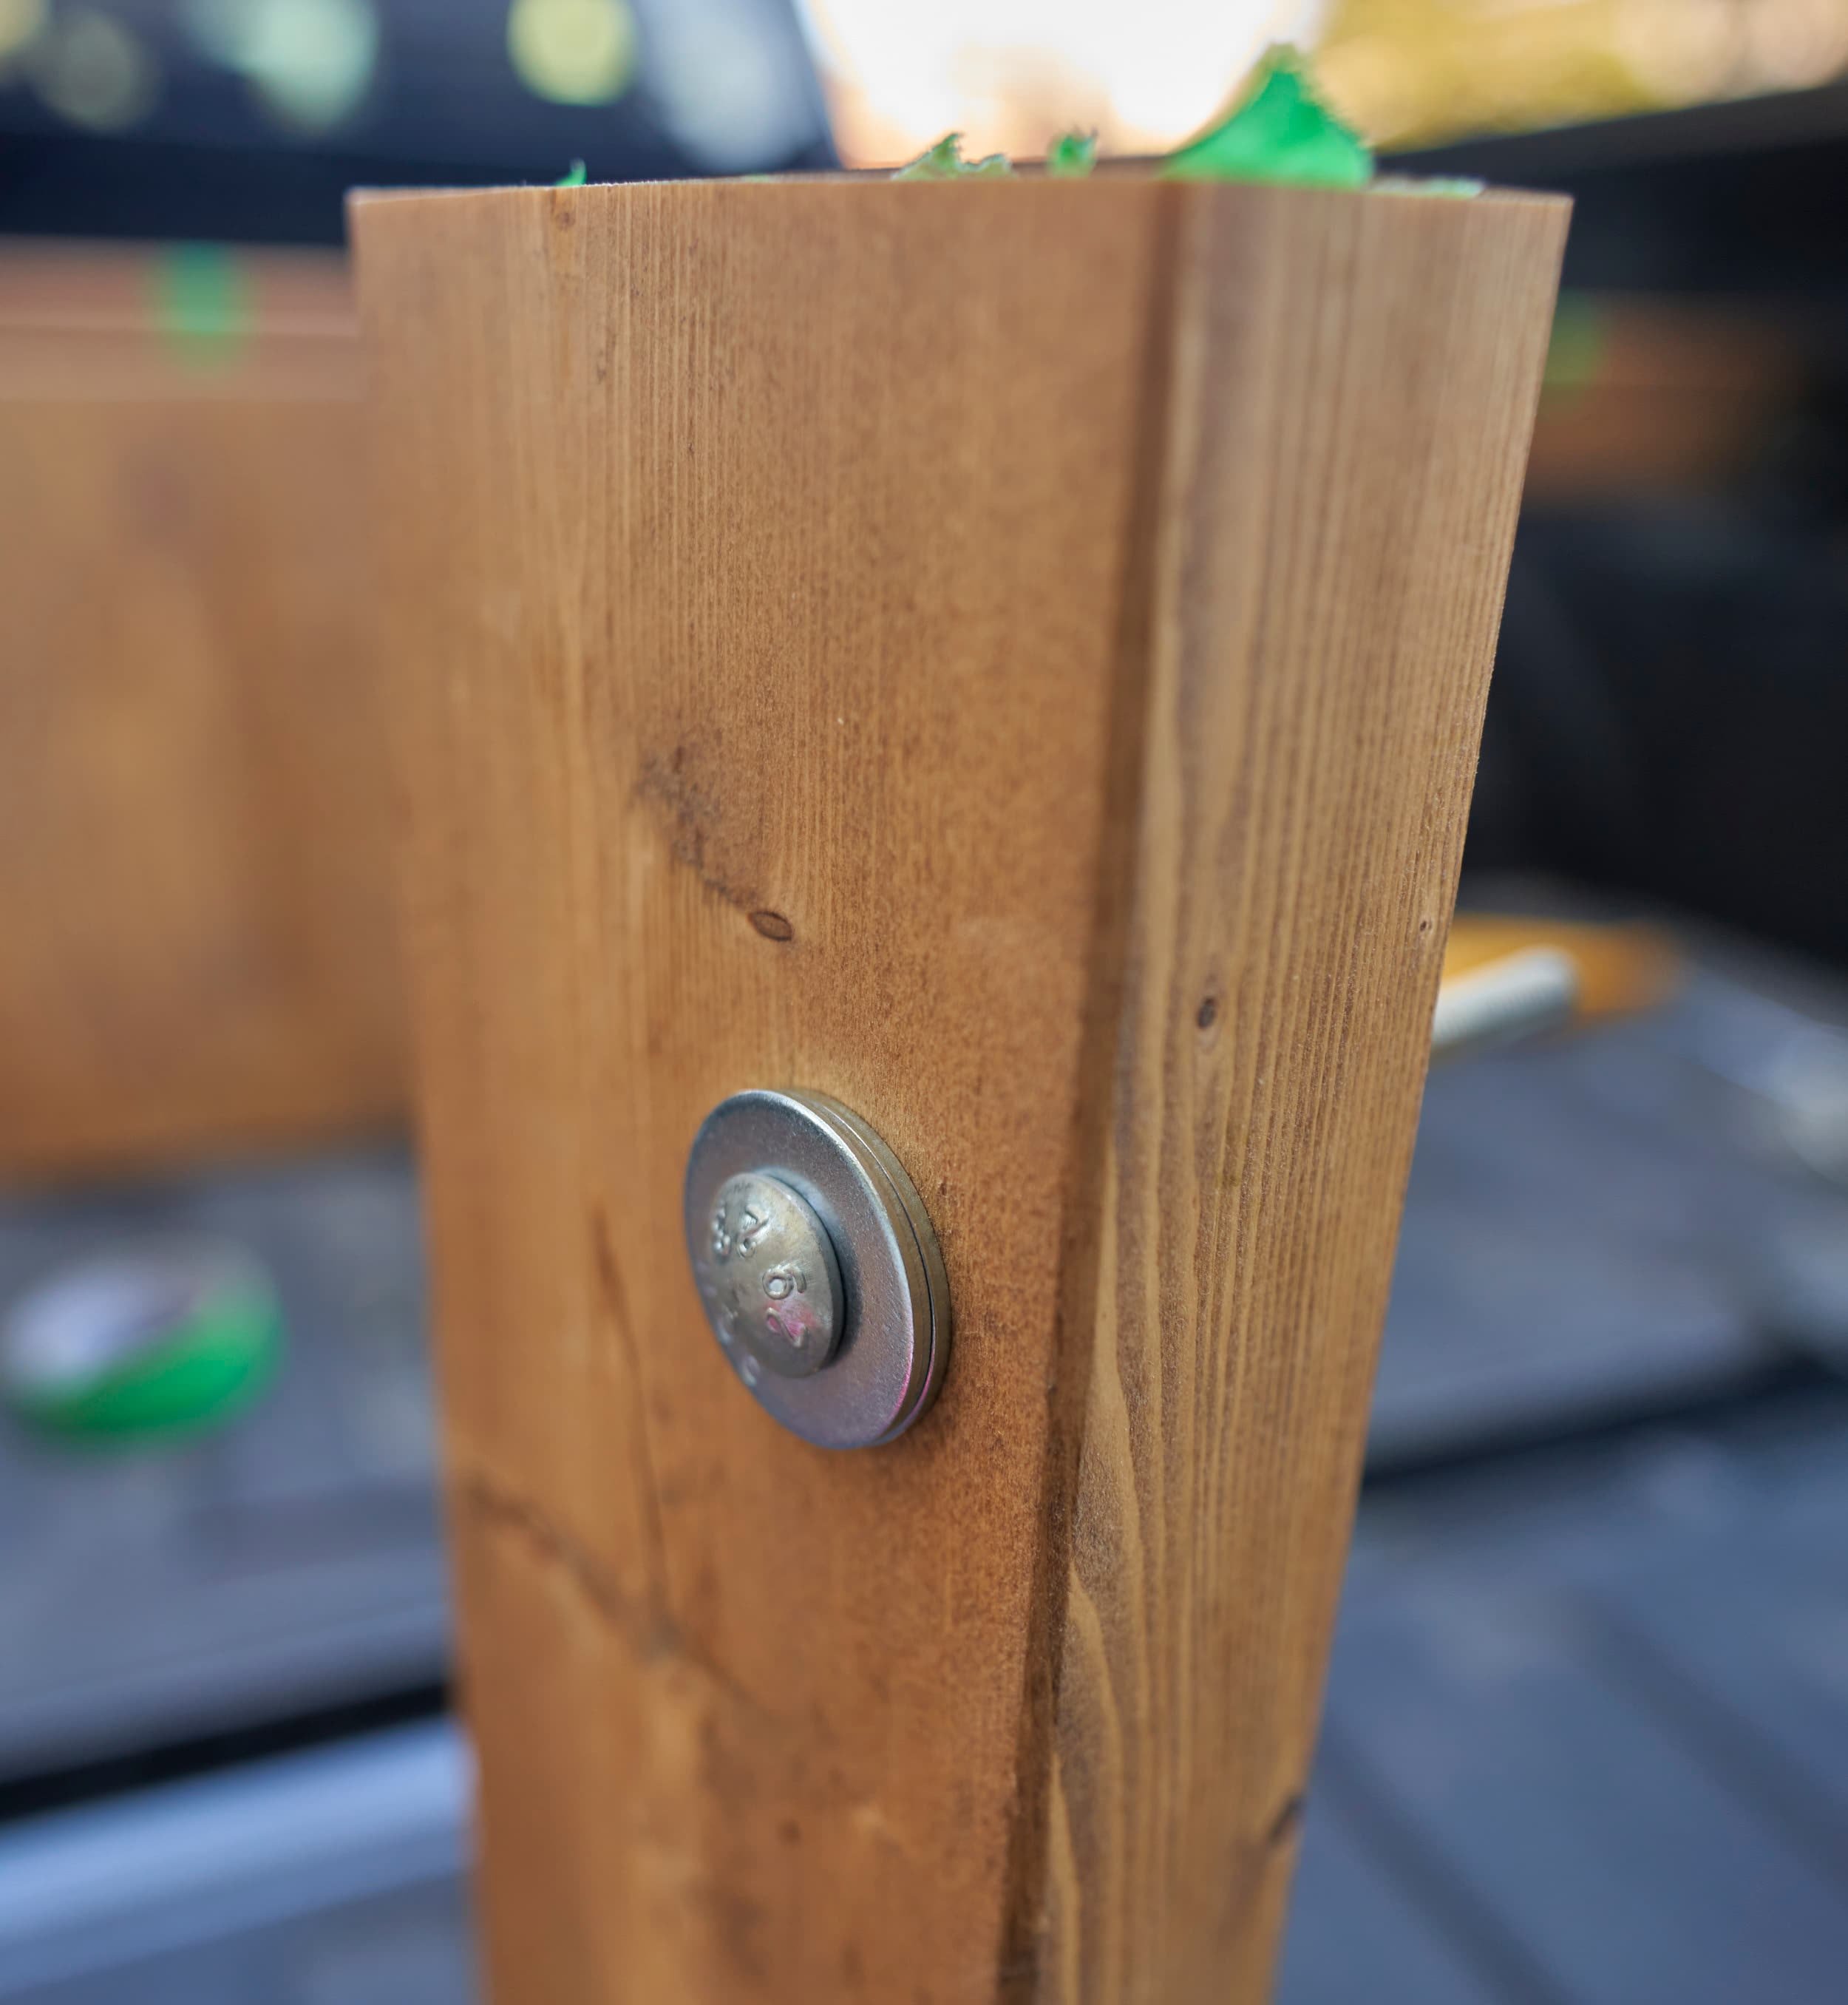
Step 4: Knobs
I wanted to run bolts/machine-screws through the front side of the panel to the threaded inserts (on the back side of the beam) and while I do keep a screwdriver/socket with me, it would be so much nicer if I could just do this tools-free…
I went with stainless steel 3-1/2” machine screw, although a 3-1/2” (or even better 4”) carriage bolt would work as well — the extra length may be needed on the carriage bolt, depending on how well it seats into the star knob — I brought the star knob and some scraps (a 2x4 with a threaded insert and a scrap of 3/4 ply) with me to the store to actually test right there, before buying.


So at this point, I have a beam (which a bunch of holes in it), a panel (with a couple of holes in it) and a pair of knobbed-bolts that I can use to attach the panel to the beam at a few points:
I can move the divider plate left to right in case I have something long I want to stuff in there.
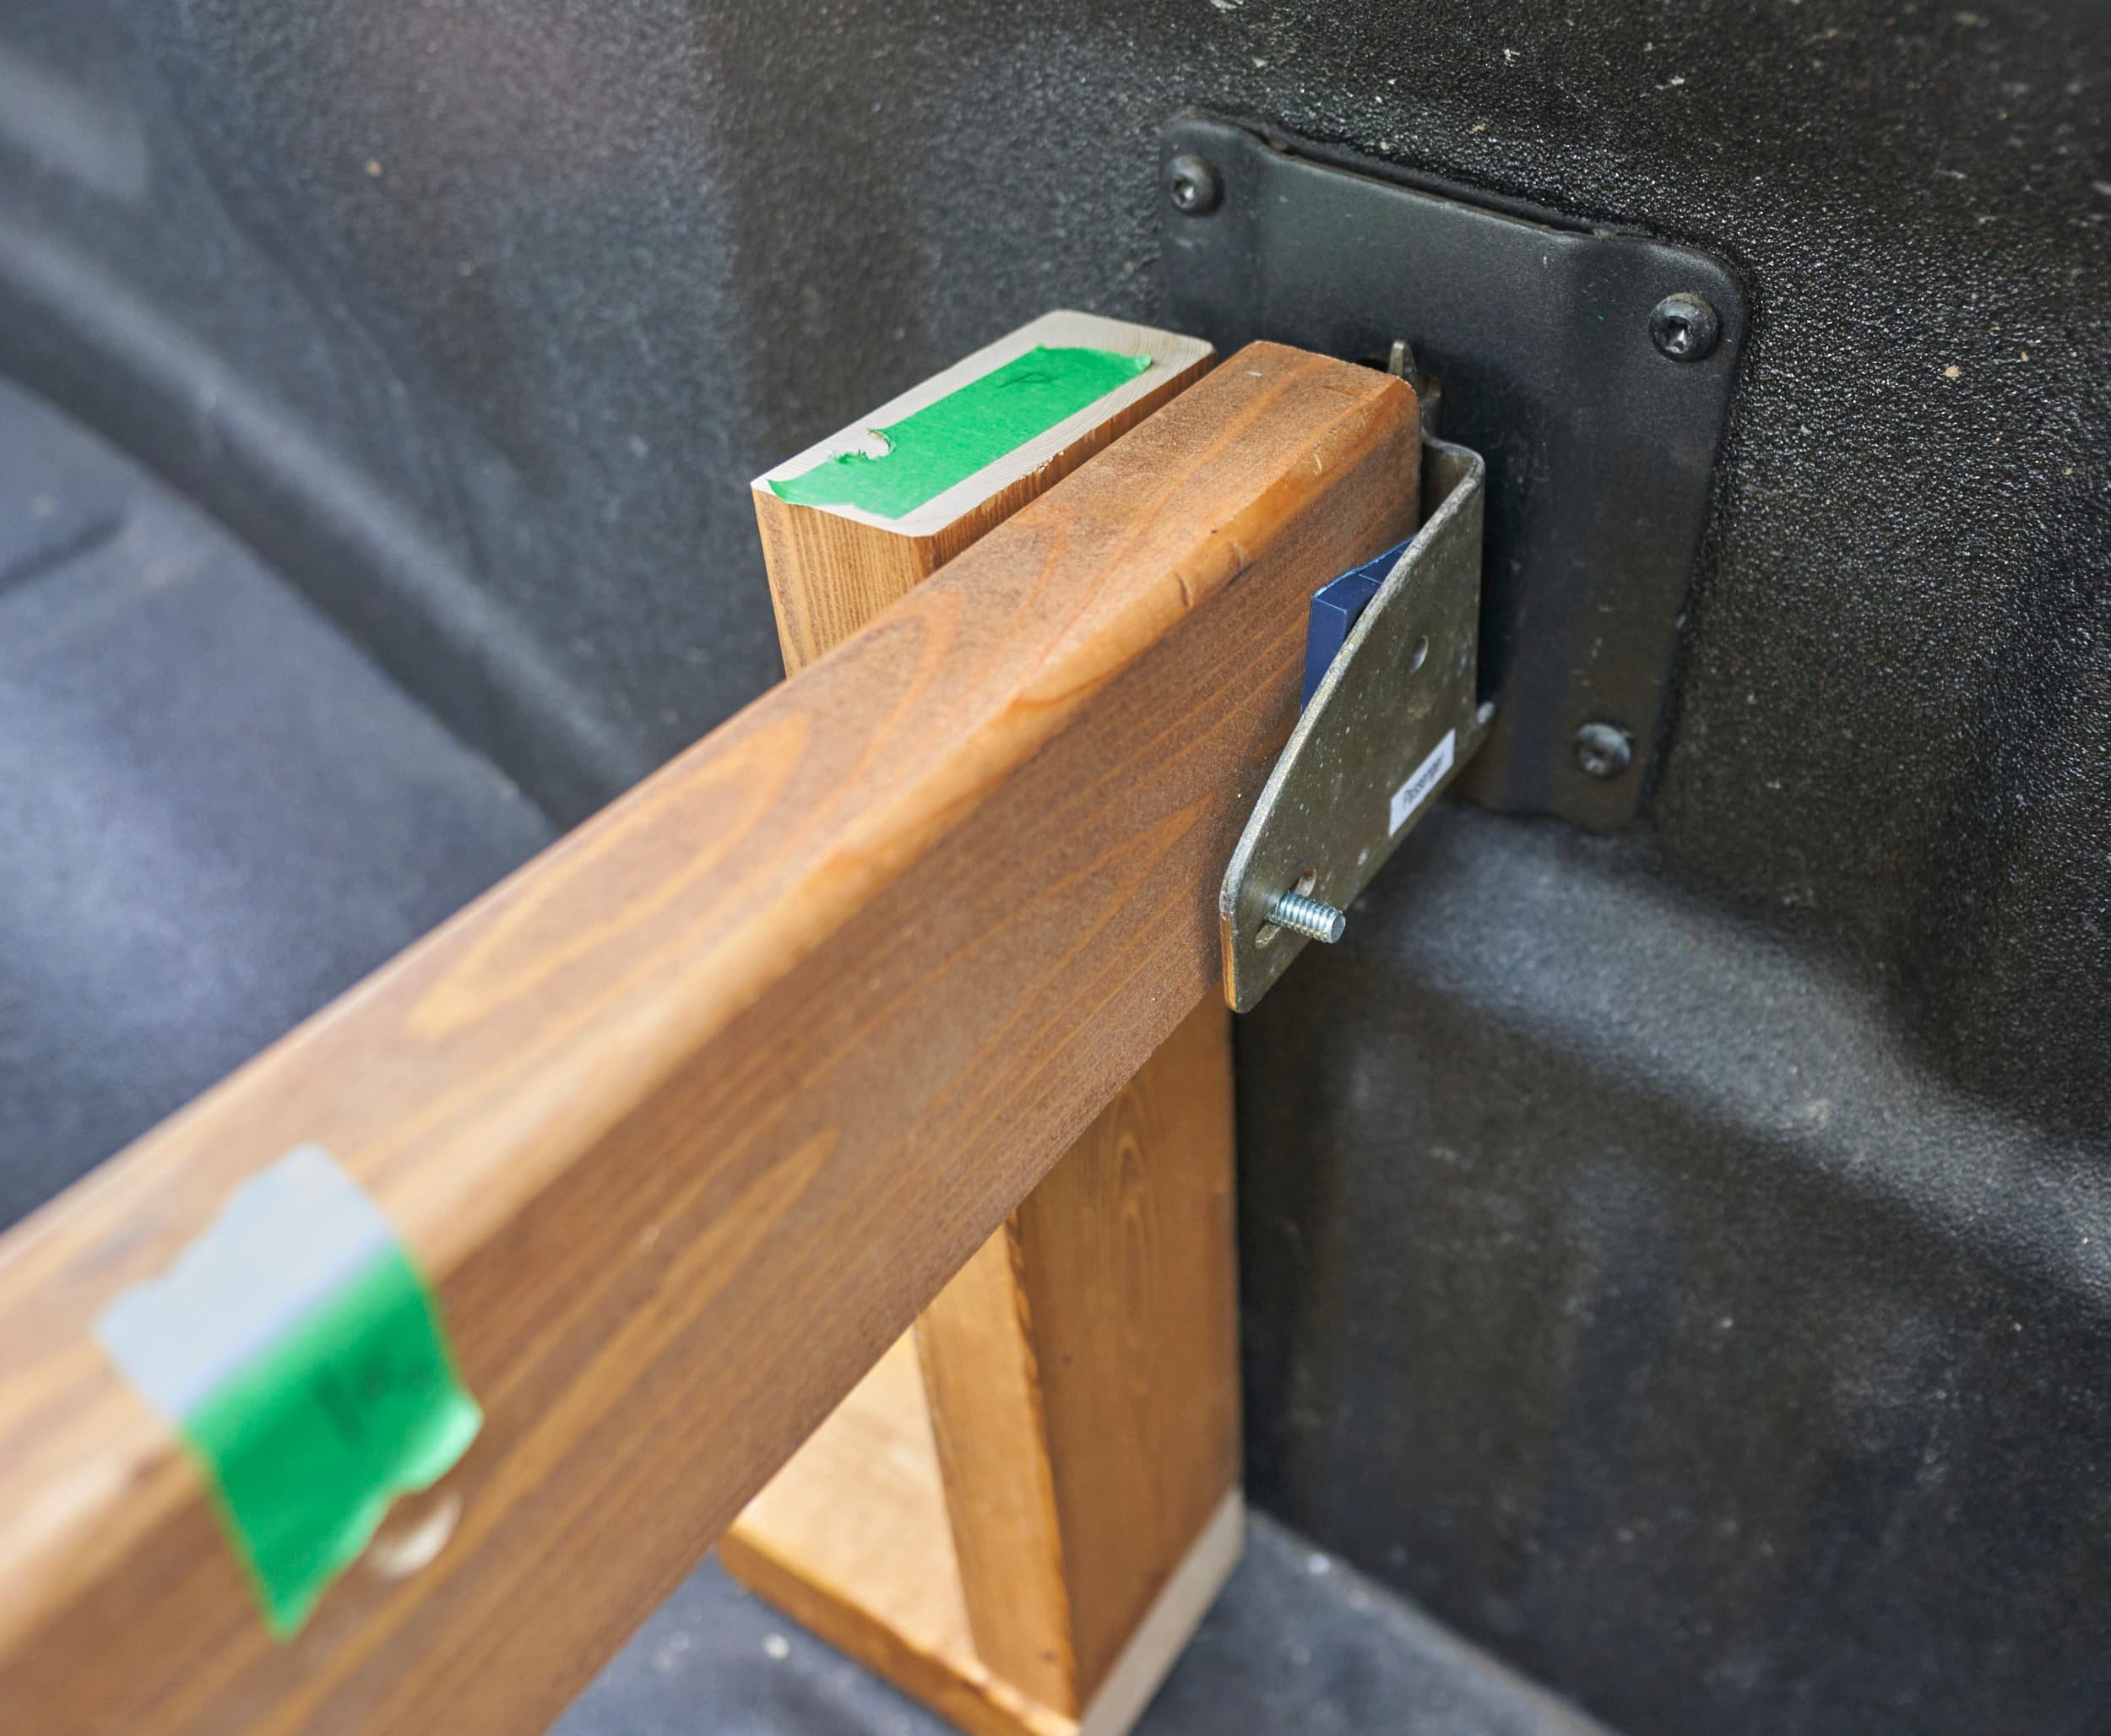
Step 5: Legs
One thing to know about BoxLink is that the connector plate (the female portion) is much looser-fitting (versus E-track) — my beam with a panel on it swings back and forth a bunch. I normally keep a toolbox in the truck (between the tailgate the this divider) so there usually isn’t an opportunity for the divider to swing towards the tailgate, but there’s definitely an opportunity for it to swing back (towards the wheel well).
Quick demo of how E-track will pivot inside of BoxLink
In my original design, I added a flip-down ‘foot’ that was an attempt to stuff the space between the divider and the wheel well, but this was hella stupid. The foot constantly got in the way, it never stayed up when I wanted it up, and never flipped down when I wanted it down so there was no way I was going to do that again. Also, it depended on having a beam running across the bottom, which I no longer have…


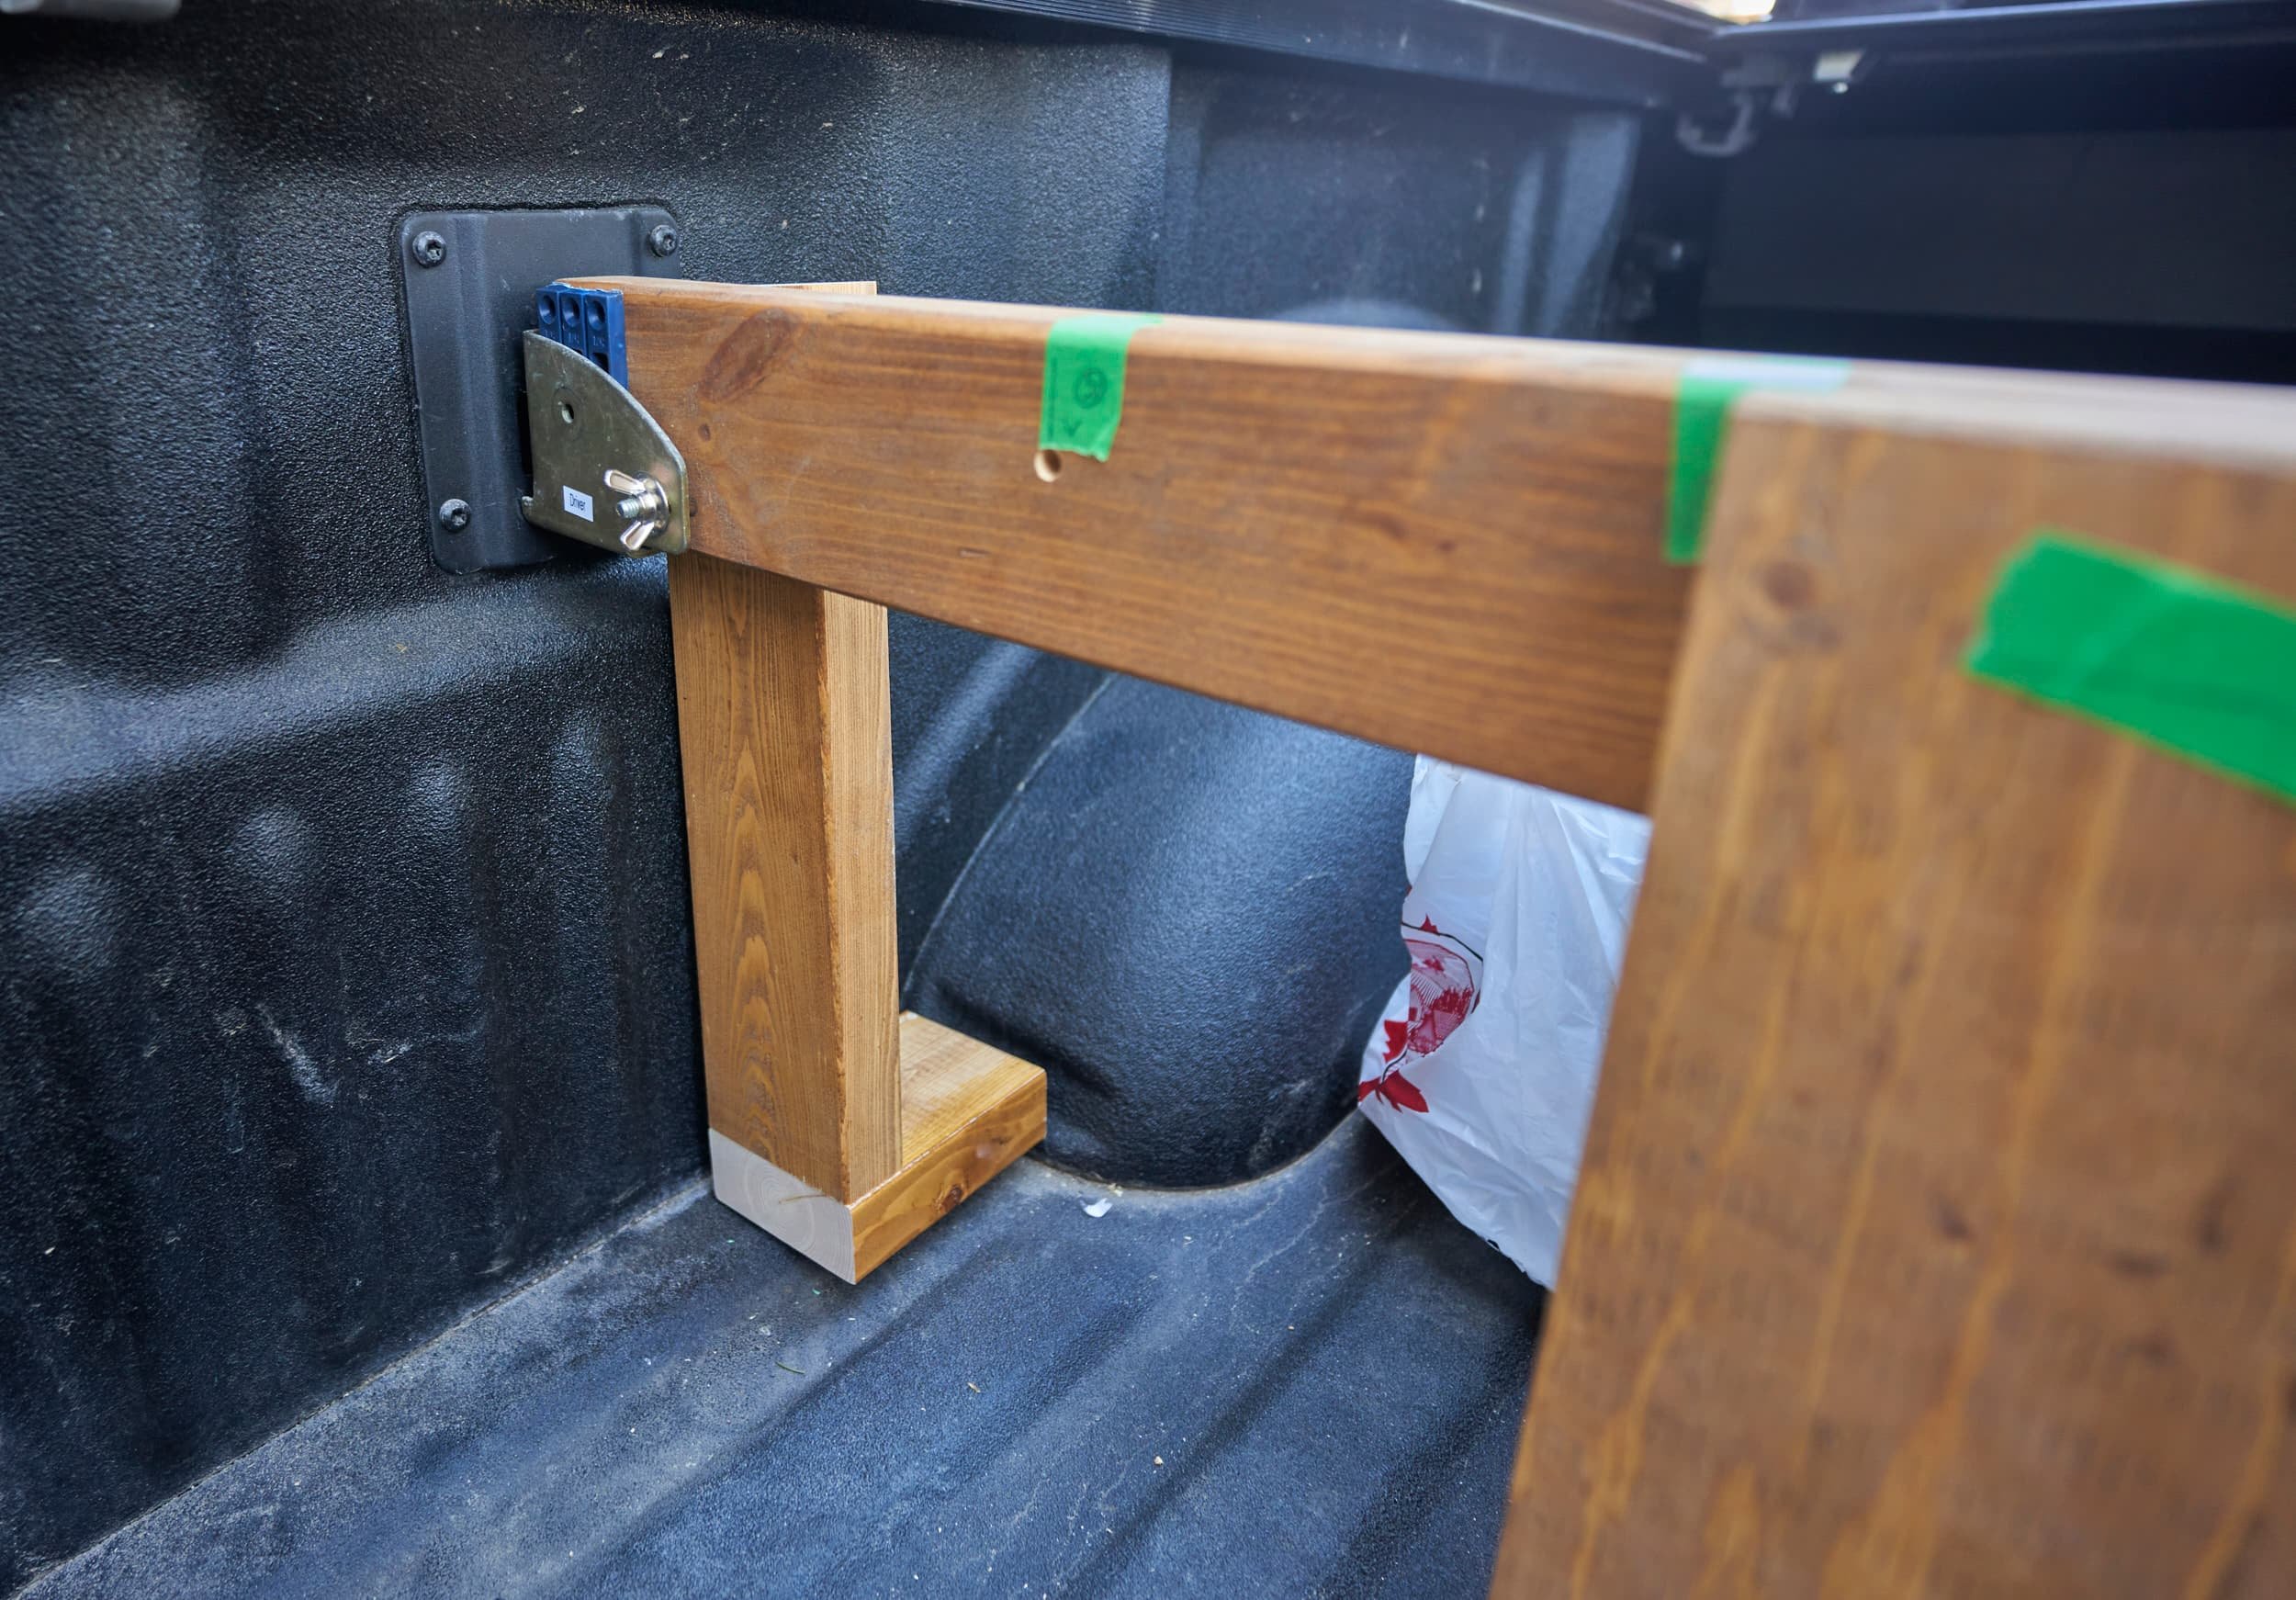


So at this point, I have a pair of feet that can be installed into the existing beam. It’s just a matter of finagling the bolt through the hole and capping it with a knob or wingnut.


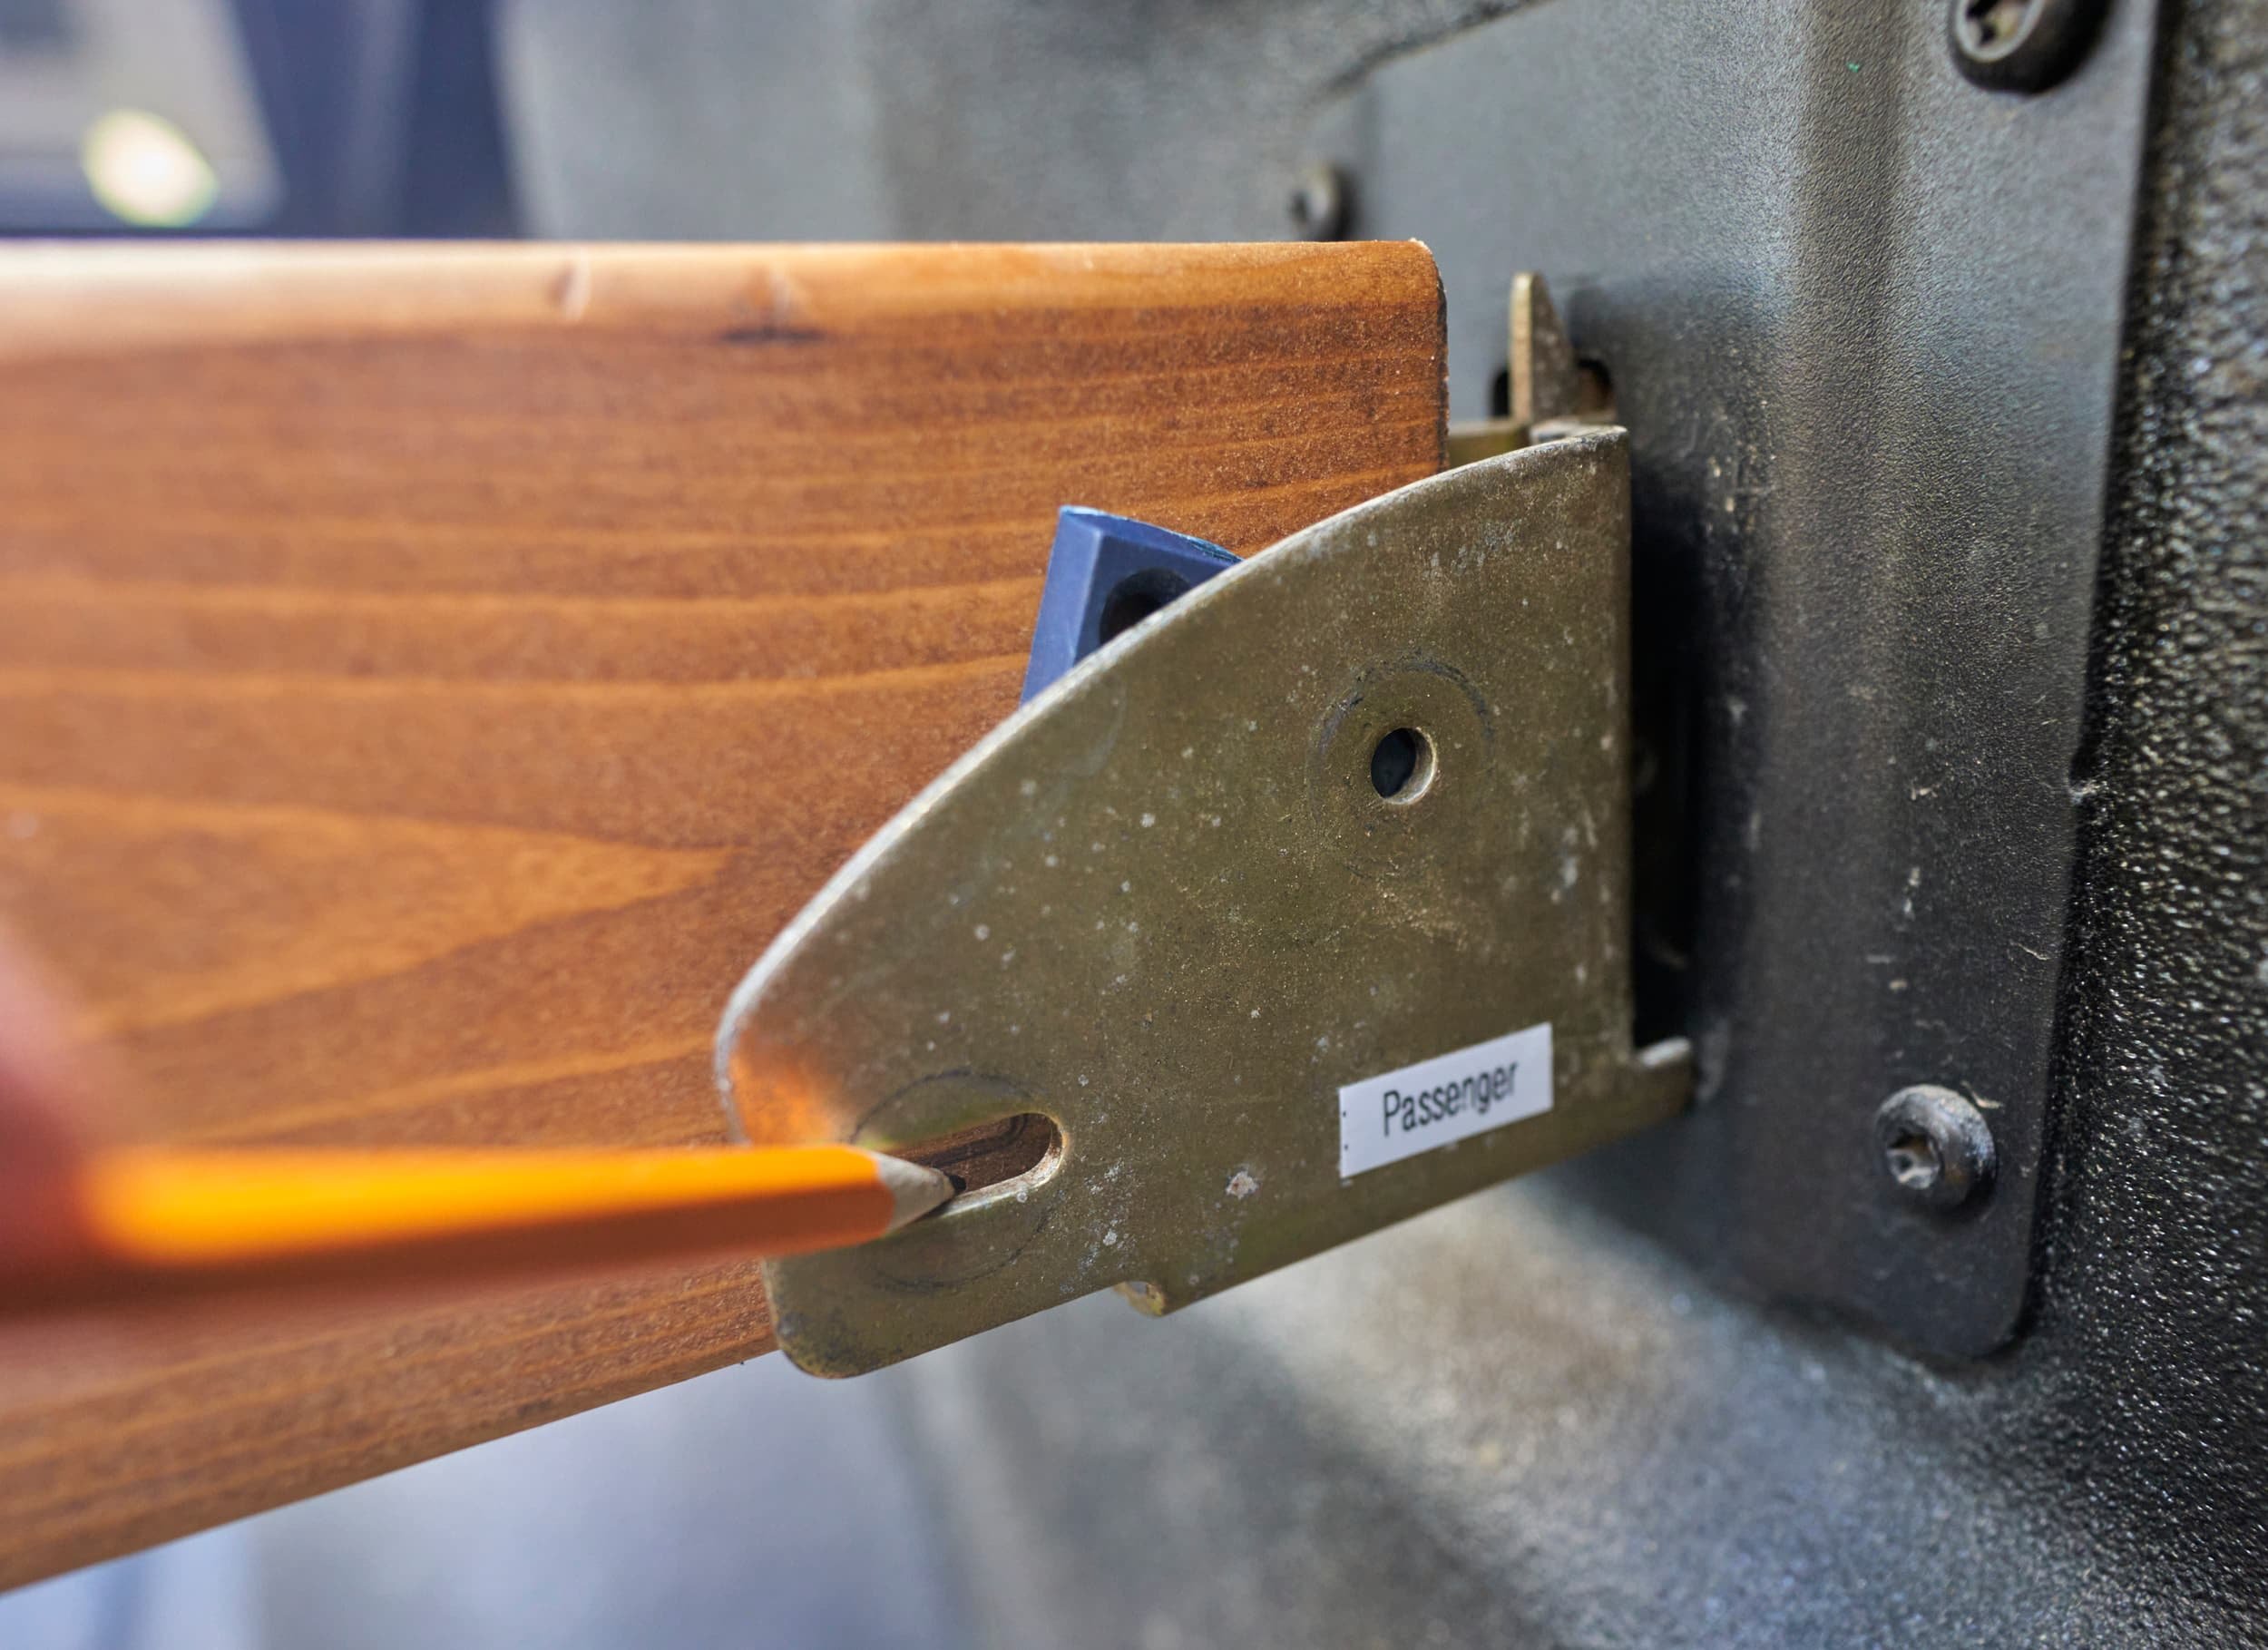
Step 6: Additional heights
Since my panel can move left-right to accommodate longer items, what about moving it up and down? Since there is no bottom-beam, this would mean that I could potentially slide plywood and lumber under the panel! I opted to make two additional heights.


A tip from future me
Get a section of E-track rail and lay it down over the initial (top) set of holes — use the E-track rail to locate the next set of holes! Individual E-track rails may vary in the spacing (the rails I happened to use have holes 4-1/2” apart).
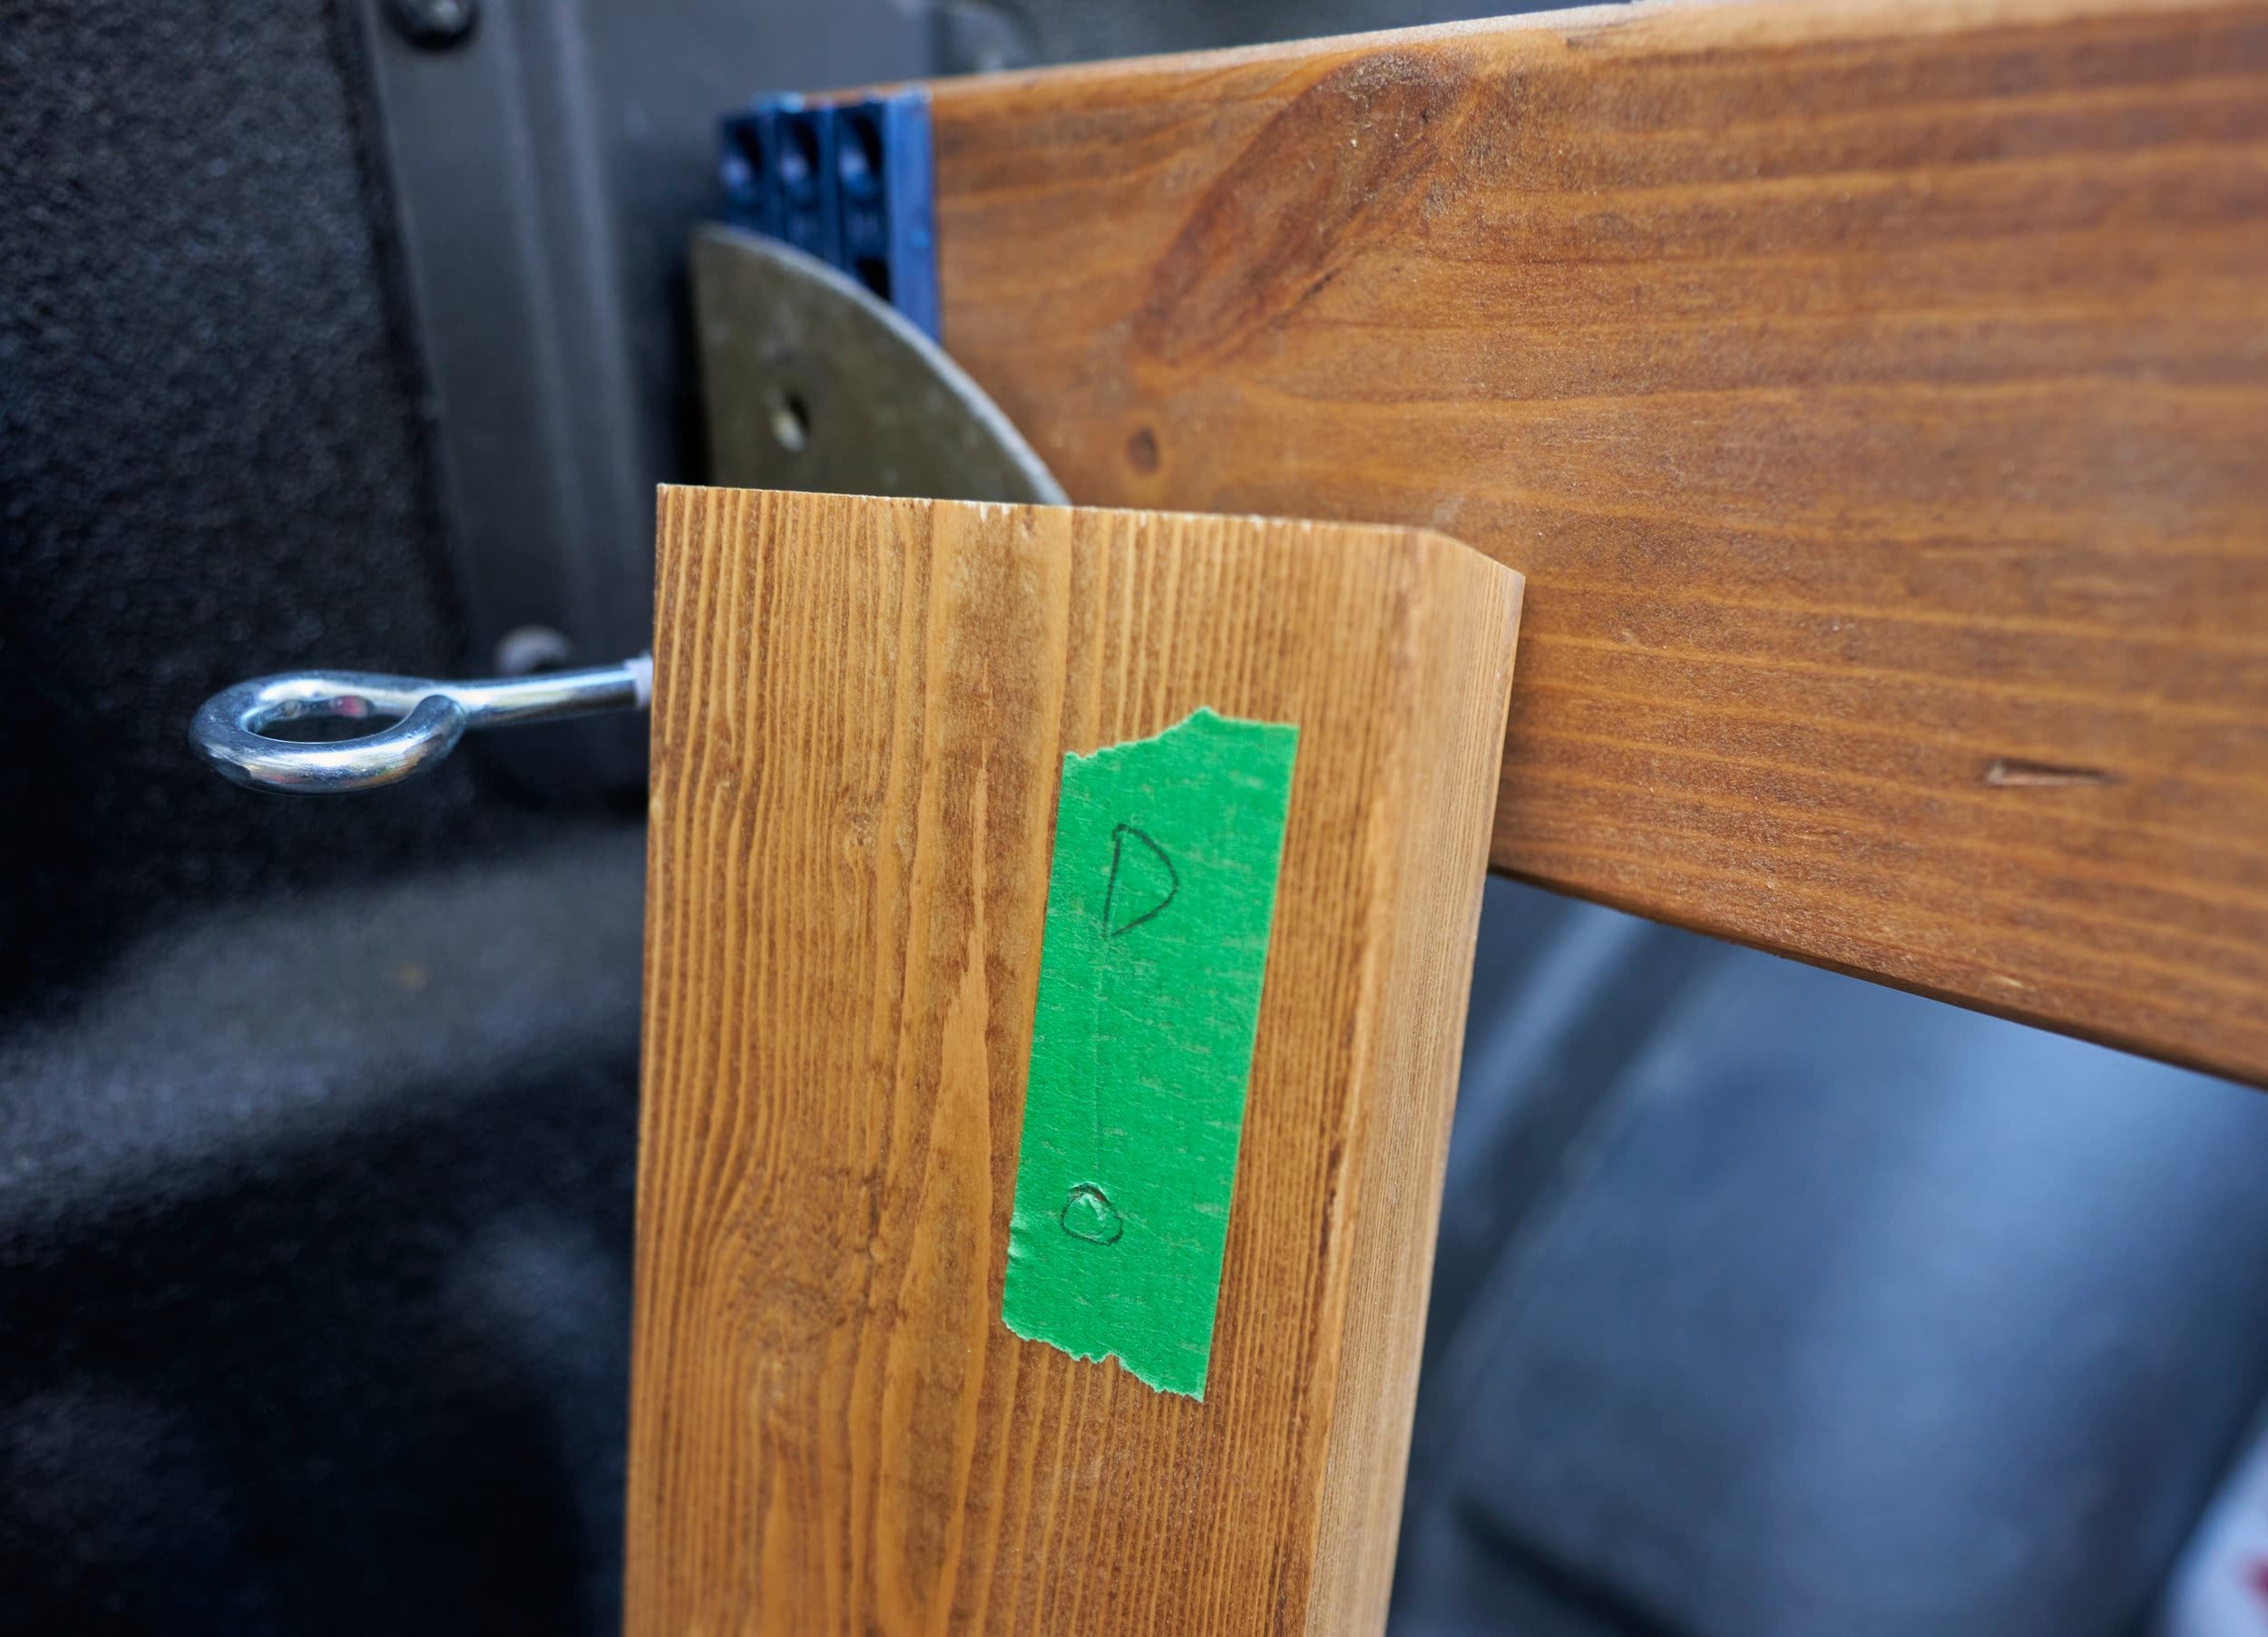
Step 7: Paint
So the panel can slide left to right but it’s not super obvious where the alignment points are — I wanted to add a splash of color to make it stand out a bit better.

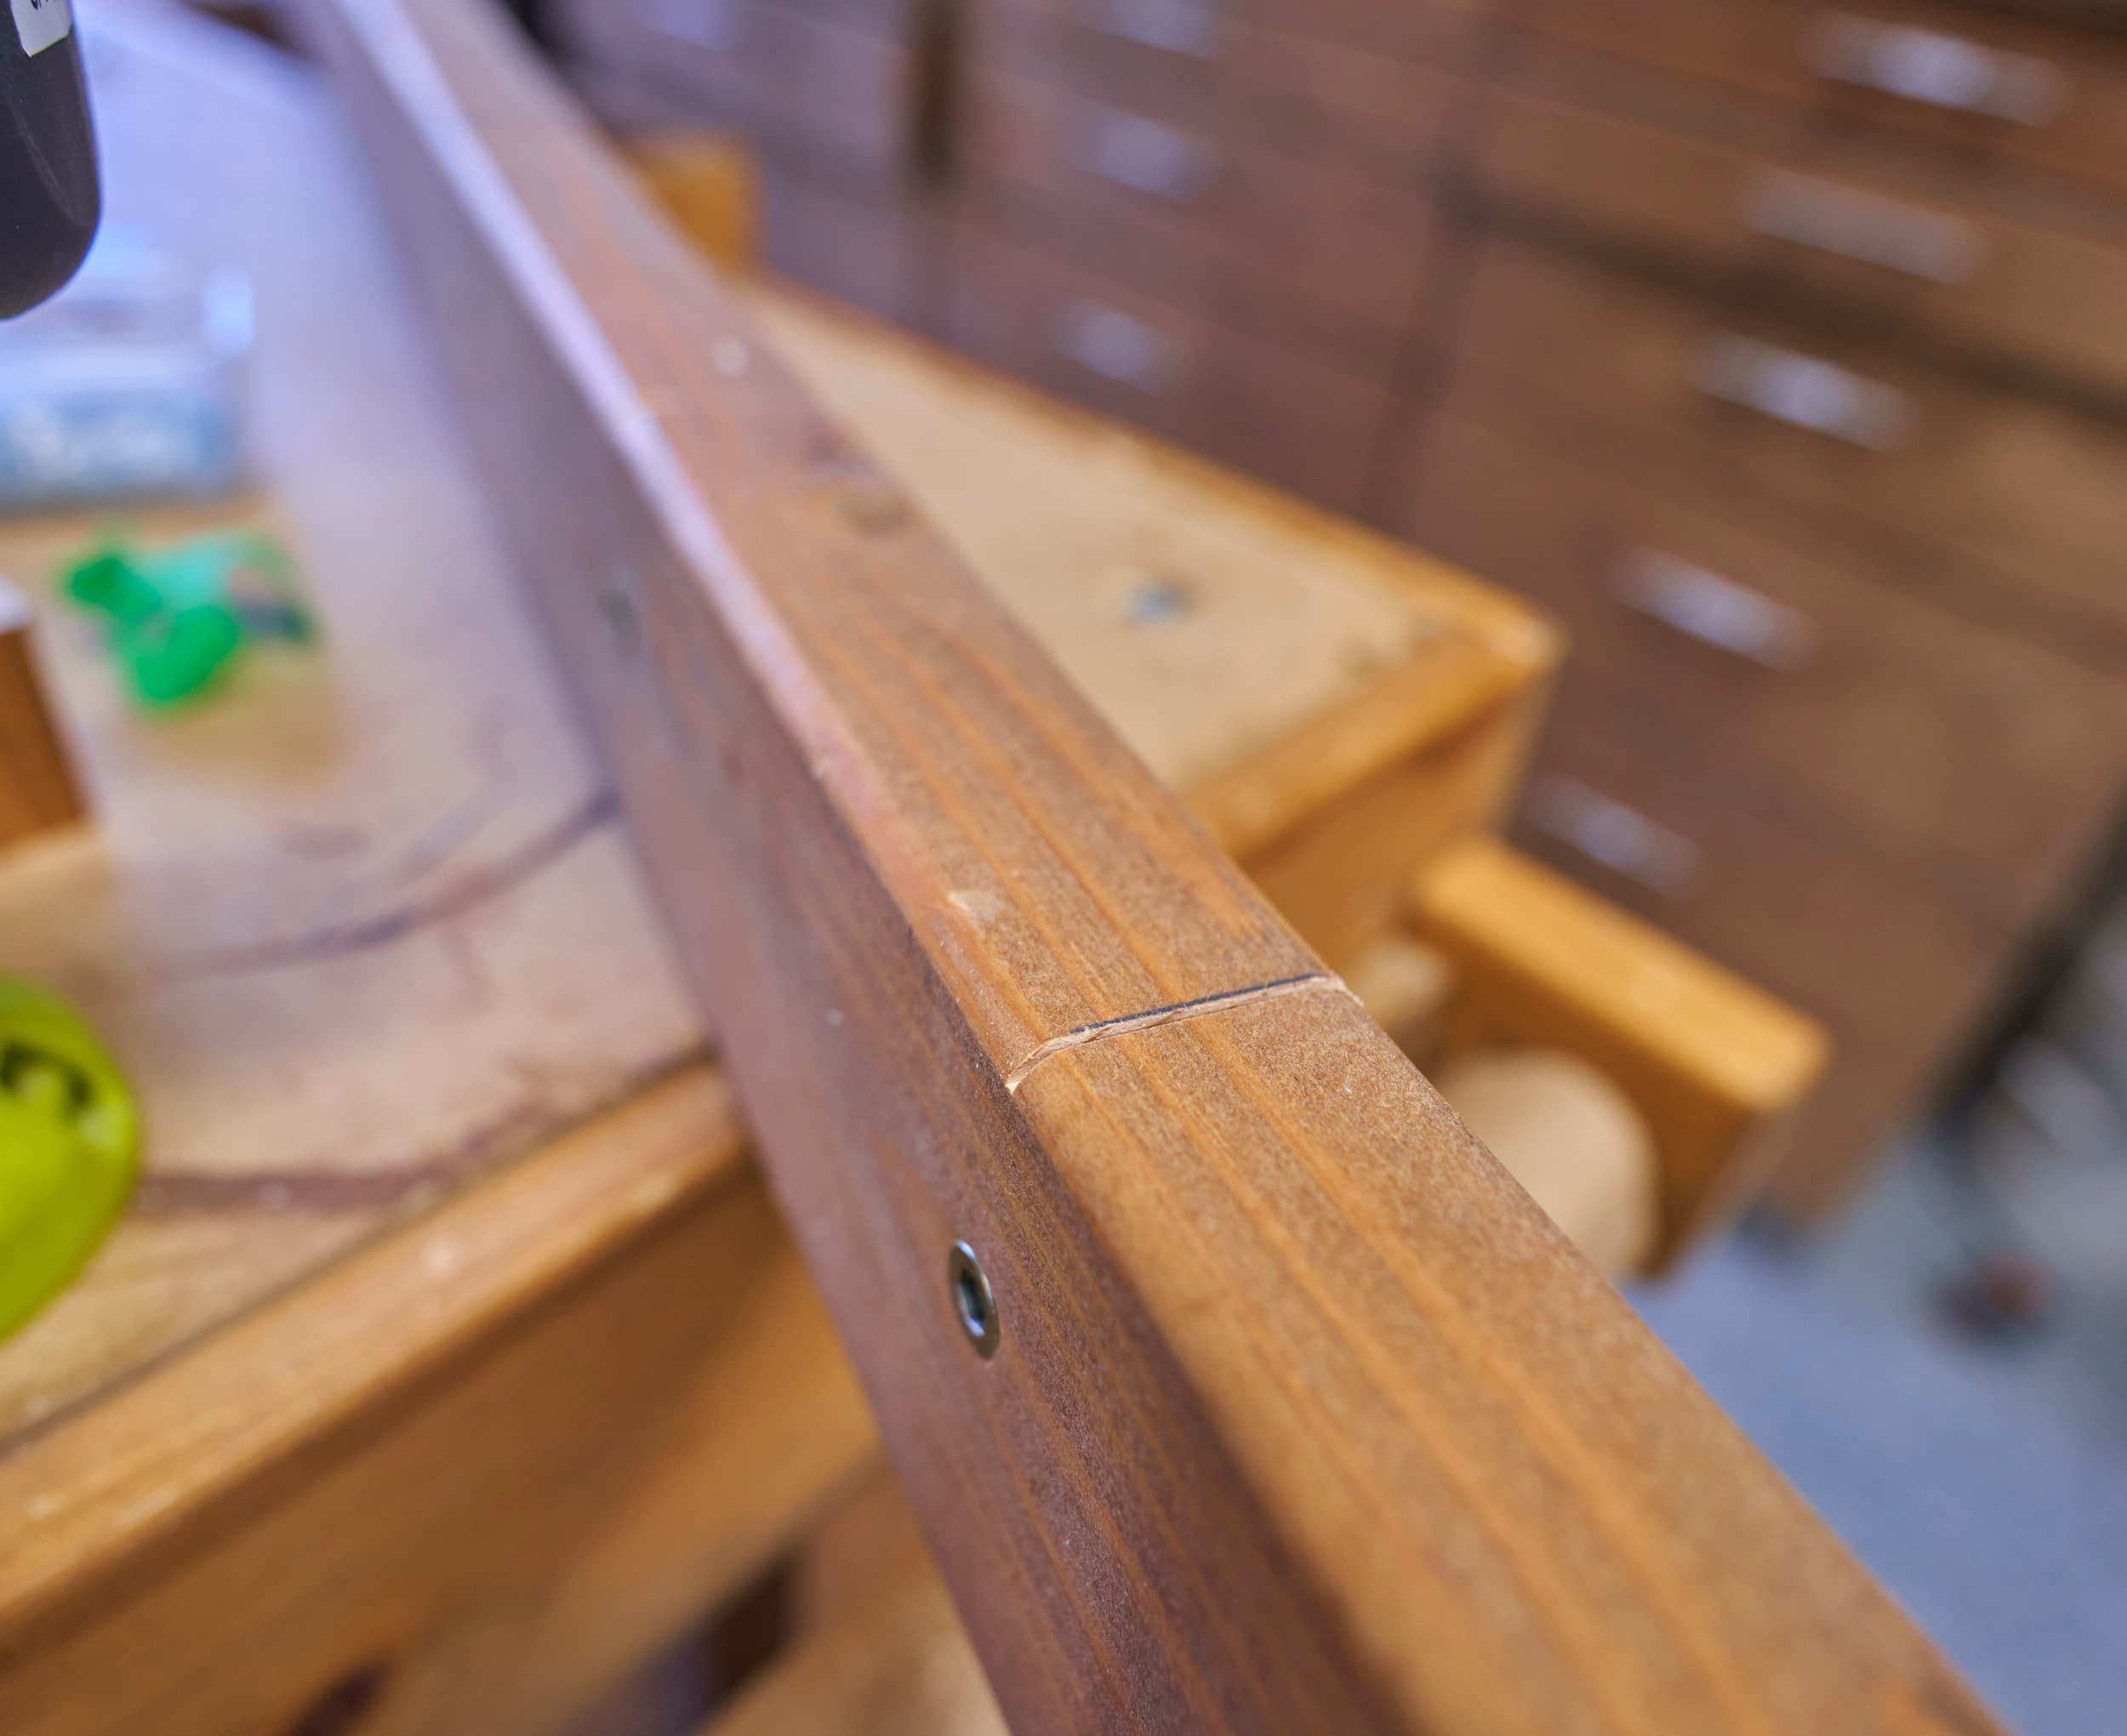

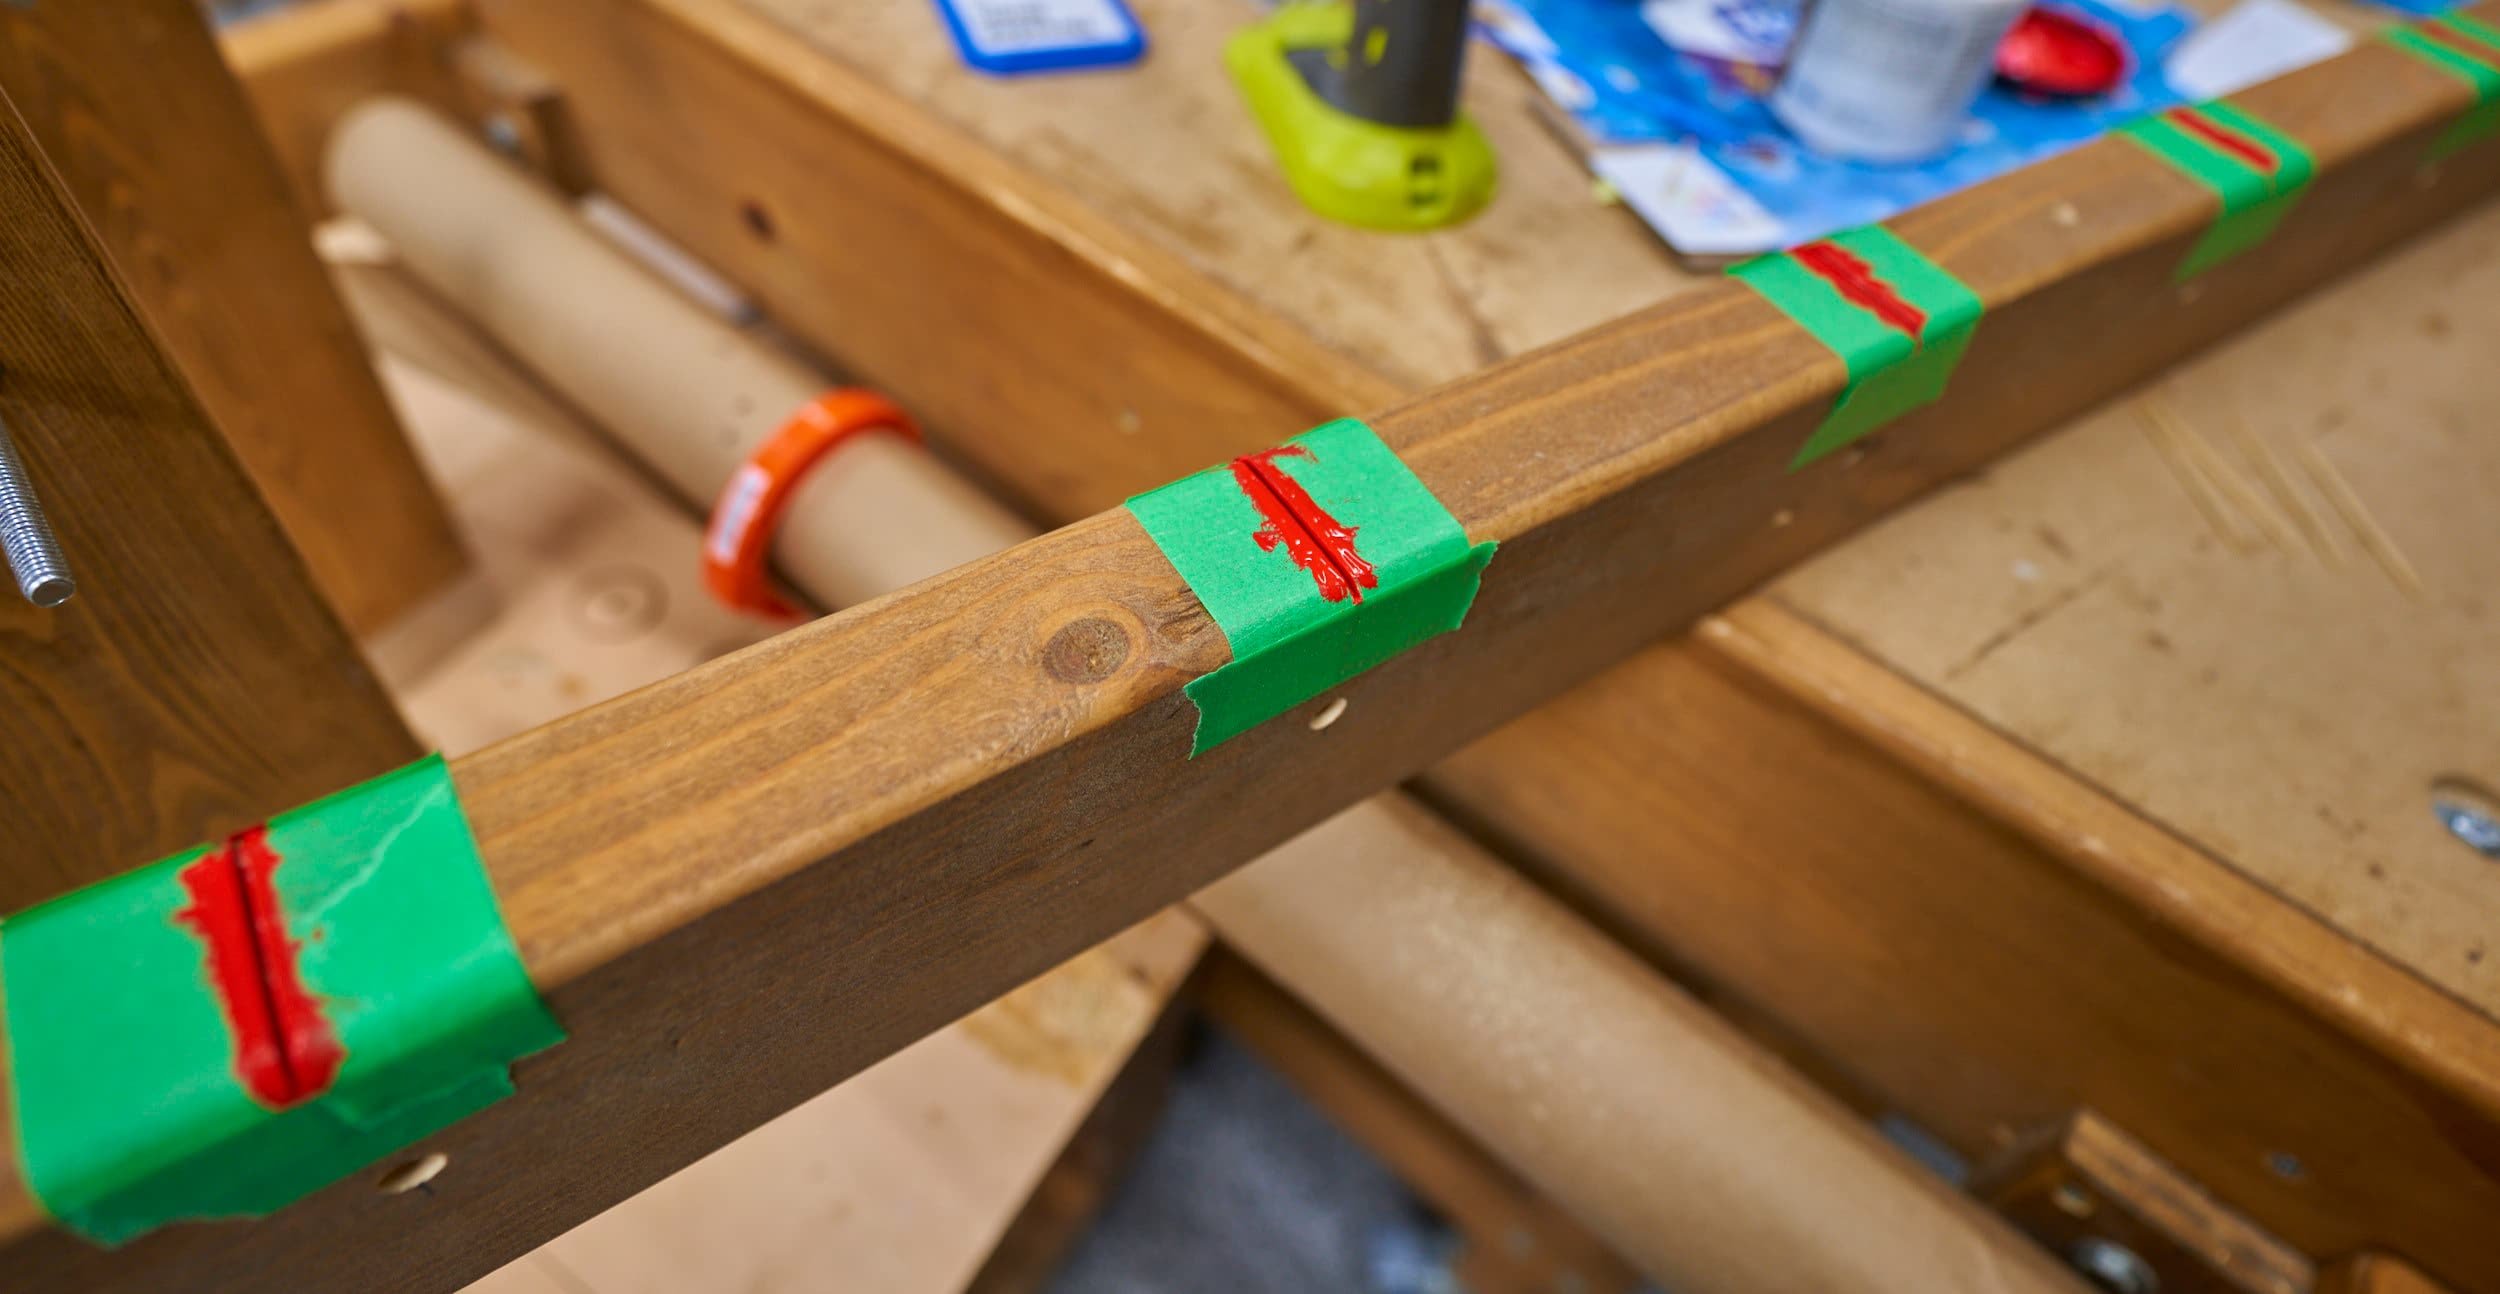

I also added a couple slits on the panel where the holes are as well; hopefully this helps make aligning the holes a bit easier.
Step 8: Frontside E-track
Finally! The end is almost in sight. This is pretty straightforward, just attaching the e-track rail from my original divider to the new one. I got super lucky that the holes I drilled in the panel happened to line up with the holes on E-track. I did have to cut one slot off the rail because this panel is slightly smaller than the previous one and the alignment did not sit well with my OCD.


Step 9: Backside E-track
Generally speaking, I’ll be using this to secure the my Plano tote to the back side of the divider, but this could be used to secure something else, if needed. Here, I opted to use individual E-track mounts.


Step 10: Installation!
By this point in the process, I’ve installed and uninstalled the various bits and bobs of the divider at least 30 times so it comes together super easily. This was the first time that I’ve actually assembled everything with the tonneau cover actually closed though (simulating a totally frozen tonneau).
I do have the assumption/requirement that the tailgate not be frozen though… which I think is fair — if the tailgate and the cover are frozen shut, you’re not loading anything in the truck, period. That being said, generally, I’ve not had the tailgate be thoroughly frozen (knock on wood).
Comes together easily, even with the cover fully in place.
Installing the divider
![[1] E-track lumber holders](https://images.squarespace-cdn.com/content/v1/6020ac0b21a9b86f0577e29e/1679959189075-PQYC5WDW4WALH4O5C1WM/DPN02471_squooshed.jpg)
![[2] Sliding the beam in place](https://images.squarespace-cdn.com/content/v1/6020ac0b21a9b86f0577e29e/1679959189738-ZUEUZSB029LBZ47VP3AK/DPN02472_squooshed.jpg)
![[3] Installing one leg](https://images.squarespace-cdn.com/content/v1/6020ac0b21a9b86f0577e29e/1679959189851-98YVM6MYZPZ674T05OH1/DPN02473_squooshed.jpg)
![[4] And then the other](https://images.squarespace-cdn.com/content/v1/6020ac0b21a9b86f0577e29e/1679959190468-O0Q4RC5RLH2U21BL4TUW/DPN02474_squooshed.jpg)
![[5] Attaching the panel](https://images.squarespace-cdn.com/content/v1/6020ac0b21a9b86f0577e29e/1679959190598-7TDGLTJTFD6RK33HAKZN/DPN02475_squooshed.jpg)
![[6] And we're done](https://images.squarespace-cdn.com/content/v1/6020ac0b21a9b86f0577e29e/1679959191283-PNY48Z1K8SVB9CPFPDQF/DPN02476_squooshed.jpg)
Securing the tote
I opted to do this section with the tonneau open because [a] it’s easier and [b] it’s a more realistic scenario of how I use my divider. If the tonneau is frozen shut — I’m only screwed (say, for getting lumber), if I can’t get something out of the bed. I’m not likely to be in a situation where the cover is frozen and I’m trying to load the tote back into the bed.
That being said, it’s certainly possible to install the tote into the bed with the tonneau frozen shut — you’d have to slide the tote in first, slip a strap back there, install the divider and then clip the strap in. Doable, but a pain in the butt.


Step 11: Fix one thing
So back in Step 3, I drilled a hole through the beam to allow me to run a bolt into the tote’s locking holes… but I wasn’t able to use it because I made a small mistake when attaching the rear E-track…


Milestone
When I set out to rebuild my divider, I had two major requirements: that it be substantially lighter (or less unwieldy) and that I could install or remove it while the tonneau cover was in place and this project was a success. Doubly so that it was a quick afternoon project!


Compared to the original, this new bed divider is a lot simpler — I found I just wasn’t using all of tiedown options. I usually work with plywood and board-lumber so with this redesign I can
Raise the panel up (while keeping the beam in place) and slide plywood under it, through the middle or
If I still want to carry other things (like the toolbox) - I can lean plywood or lumber directly on the beam — there’s no knobby E-track connectors there to dent the wood (I may still add some tiedown points off to the side to help with this, down the road)
For boards, I can opt to move the panel left-right to fit boards along the length of the bed - I don’t have to work around having a bottom beam getting in the way
If you want to make something like this, you’ll need:
[E-Track] A vehicle with BoxLink (or the ability to add E-track to your vehicle). I had a lot of luck visiting a Princess Auto store to get everything
E-track lumber holders — this is what makes everything come together
Individual E-track tie-downs — I used these on the back side
E-track tie-down rail — I used these on the front side
I use a retractable E-track ratchet strap to hold the tote
[Hardware] I tried to use stainless parts where possible since this still will be sitting outside (protected, sure, but if I can make it last longer, I will). I had a lot of luck visiting a local Tractor Supply Store and just going through the hardware aisle
Some kind of tool-free knob: star knobs and/or washer wingnuts
Some kind of 1/4-20 threaded insert
3/16 fender washer (optional) — for cinching down the backside E-track
1/2” #8 panhead screws (for the bulk of the screws attaching the frontside E-track)
1” #8 panhead screws (for attaching the backside E-track)
1/4-20 nuts - you can likely pick up a handful at your big box store
3-1/2” to 4” carriage bolt/machine screw — this is for making the hand knobs (you’ll need to go through 1-1/2” + 3/4”, have enough padding for a nut and whatever length you lose going through the star knob)
6” (or longer if you can find it) eye-bolt or j-hook — this is for running through the locking hole on the tote (if you opt to use it); honestly, a thin tent-stake might work here too
[Storage]
Plano Sportsman 108Q — this is the tote I keep in the back
Stanley/FATMAX 28” toolbox — this is the toolbox I keep in the truck; I specifically chose it to avoid rust

DIY Truck Bed Divider (original)
The first truck bed divider I built — it worked well enough but had some flaws I wanted to iron out with this redesign
Product links may be affiliate links: MinMaxGeek may earn a commission on any purchases made via said links without any additional cost to you.