

Build Log: Floating King Bed Frame
We recently got a new mattress, making the move from a queen to a king and our (previous) bed setup has been moved to the guest room. I could have retrofit the previous bed frame to support a king mattress - but then I would have had to build a new frame for the guest bed anyways. As such, this was a good opportunity to build a new frame for the king bed and address the minor gripes with the outgoing frame.
Quick Links
Starting Point
At our previous house, I built a floating bed frame for a queen bed over a weekend and it’s been an awesome bed: it looks great, was fairly sturdy, was modular enough to be moved and reassembled and has some ‘cool factor’ elements. By leveraging pocket-hole joinery and dimensional lumber, it was super easy to build — I was able to sleep on it on the first night.
Now that we have a home, Nicole got us a fancy king bed so this was a good opportunity for a ‘Mk II’ bed frame. After living with the previous bed frame for a few years, there were a few things I wanted to improve upon:
I made the subframe on the original a bit too short: the majority of the time, nothing would happen but every so often, it' would be possible to cantilever the bed a bit: by making the subframe longer, we can virtually eliminate this
I wanted to have a cleaner power, lighting, cables and USB setup — the previous bed had lights around the base and running up the back of the headboard which looks great but if you ever had to disassemble it, it was a huge pain. While I don’t plan on moving/disassembling this, I’d like to do a better job of this. Also, I wanted to switch to individually addressable RGB strips just because
Being built entirely with pocket hole joinery and bolts, the previous bed was susceptible to creaking, I wanted to try using more thoughtful joinery and hopefully by using glue, the creaking can be minimized
Nicole has a special ability of being able to bump into the corner of the bed hurting herself so I wanted to find a way to reduce that
I wanted some form of floating nightstands
Rough Design
The Mk II floating bed would very much follow the basic design of the original: the mattress would sit on a frame which in turn would be attached to a smaller subframe. By making the subframe smaller, the frame/bed has a floating effect. The headboard would use two pillars and slats and I would wing-it when it came to the night tables. At a glance, this was the original bed frame
The Original: 2x10 subframe, 2x4 frame (with a 2x8 perimeter skirt), 2x6 for the headboard-verticals, 1x4s for the slats
To support the nightstands, I would plan on having a 2x4 or similar run the span at the back and attach the night stands to that. The biggest challenge was trying to work with the materials I had on hand (or minimal lumber purchases) given the crazy prices of lumber in 2021.
This bedframe would still be largely built with dimensional lumber so I had to work backwards a bit: I wanted to target a specific height-off-the-ground of 25”. The mattress we bought (Endy King) was 10” thick and I knew I wanted to have a layer of plywood to provide 100% support (and strengthen the frame) which meant that I had a 14¼” to work with to get the height I wanted.
Using dimensional lumber, realistically, my options were:
2x12 for the base (11¼ actual) + 2x4 (3½ actual) for the frame for a total of 14¾
2x12 for the base (11¼ actual) + 2x3 (2½ actual) for the frame for a total of 13¾
2x10 for the base (9¼ actual) + 2x6 (5½ actual) for the frame for a total of 14¾
2x8 for the base and the frame (7¼ actual) for a total of 14½
I didn’t want the main frame to be too visually ‘thick’ so I was realistically looking at 2x3s or 2x4s for the main frame so this made the elimination process easier. I went with 2x4s since that’s what I had on hand anyways.
At a high level this is roughly what I started with four distinct blocks
Frame + subframe
Headboard base + main stretcher
Headboard verticals & slats
Nightstands
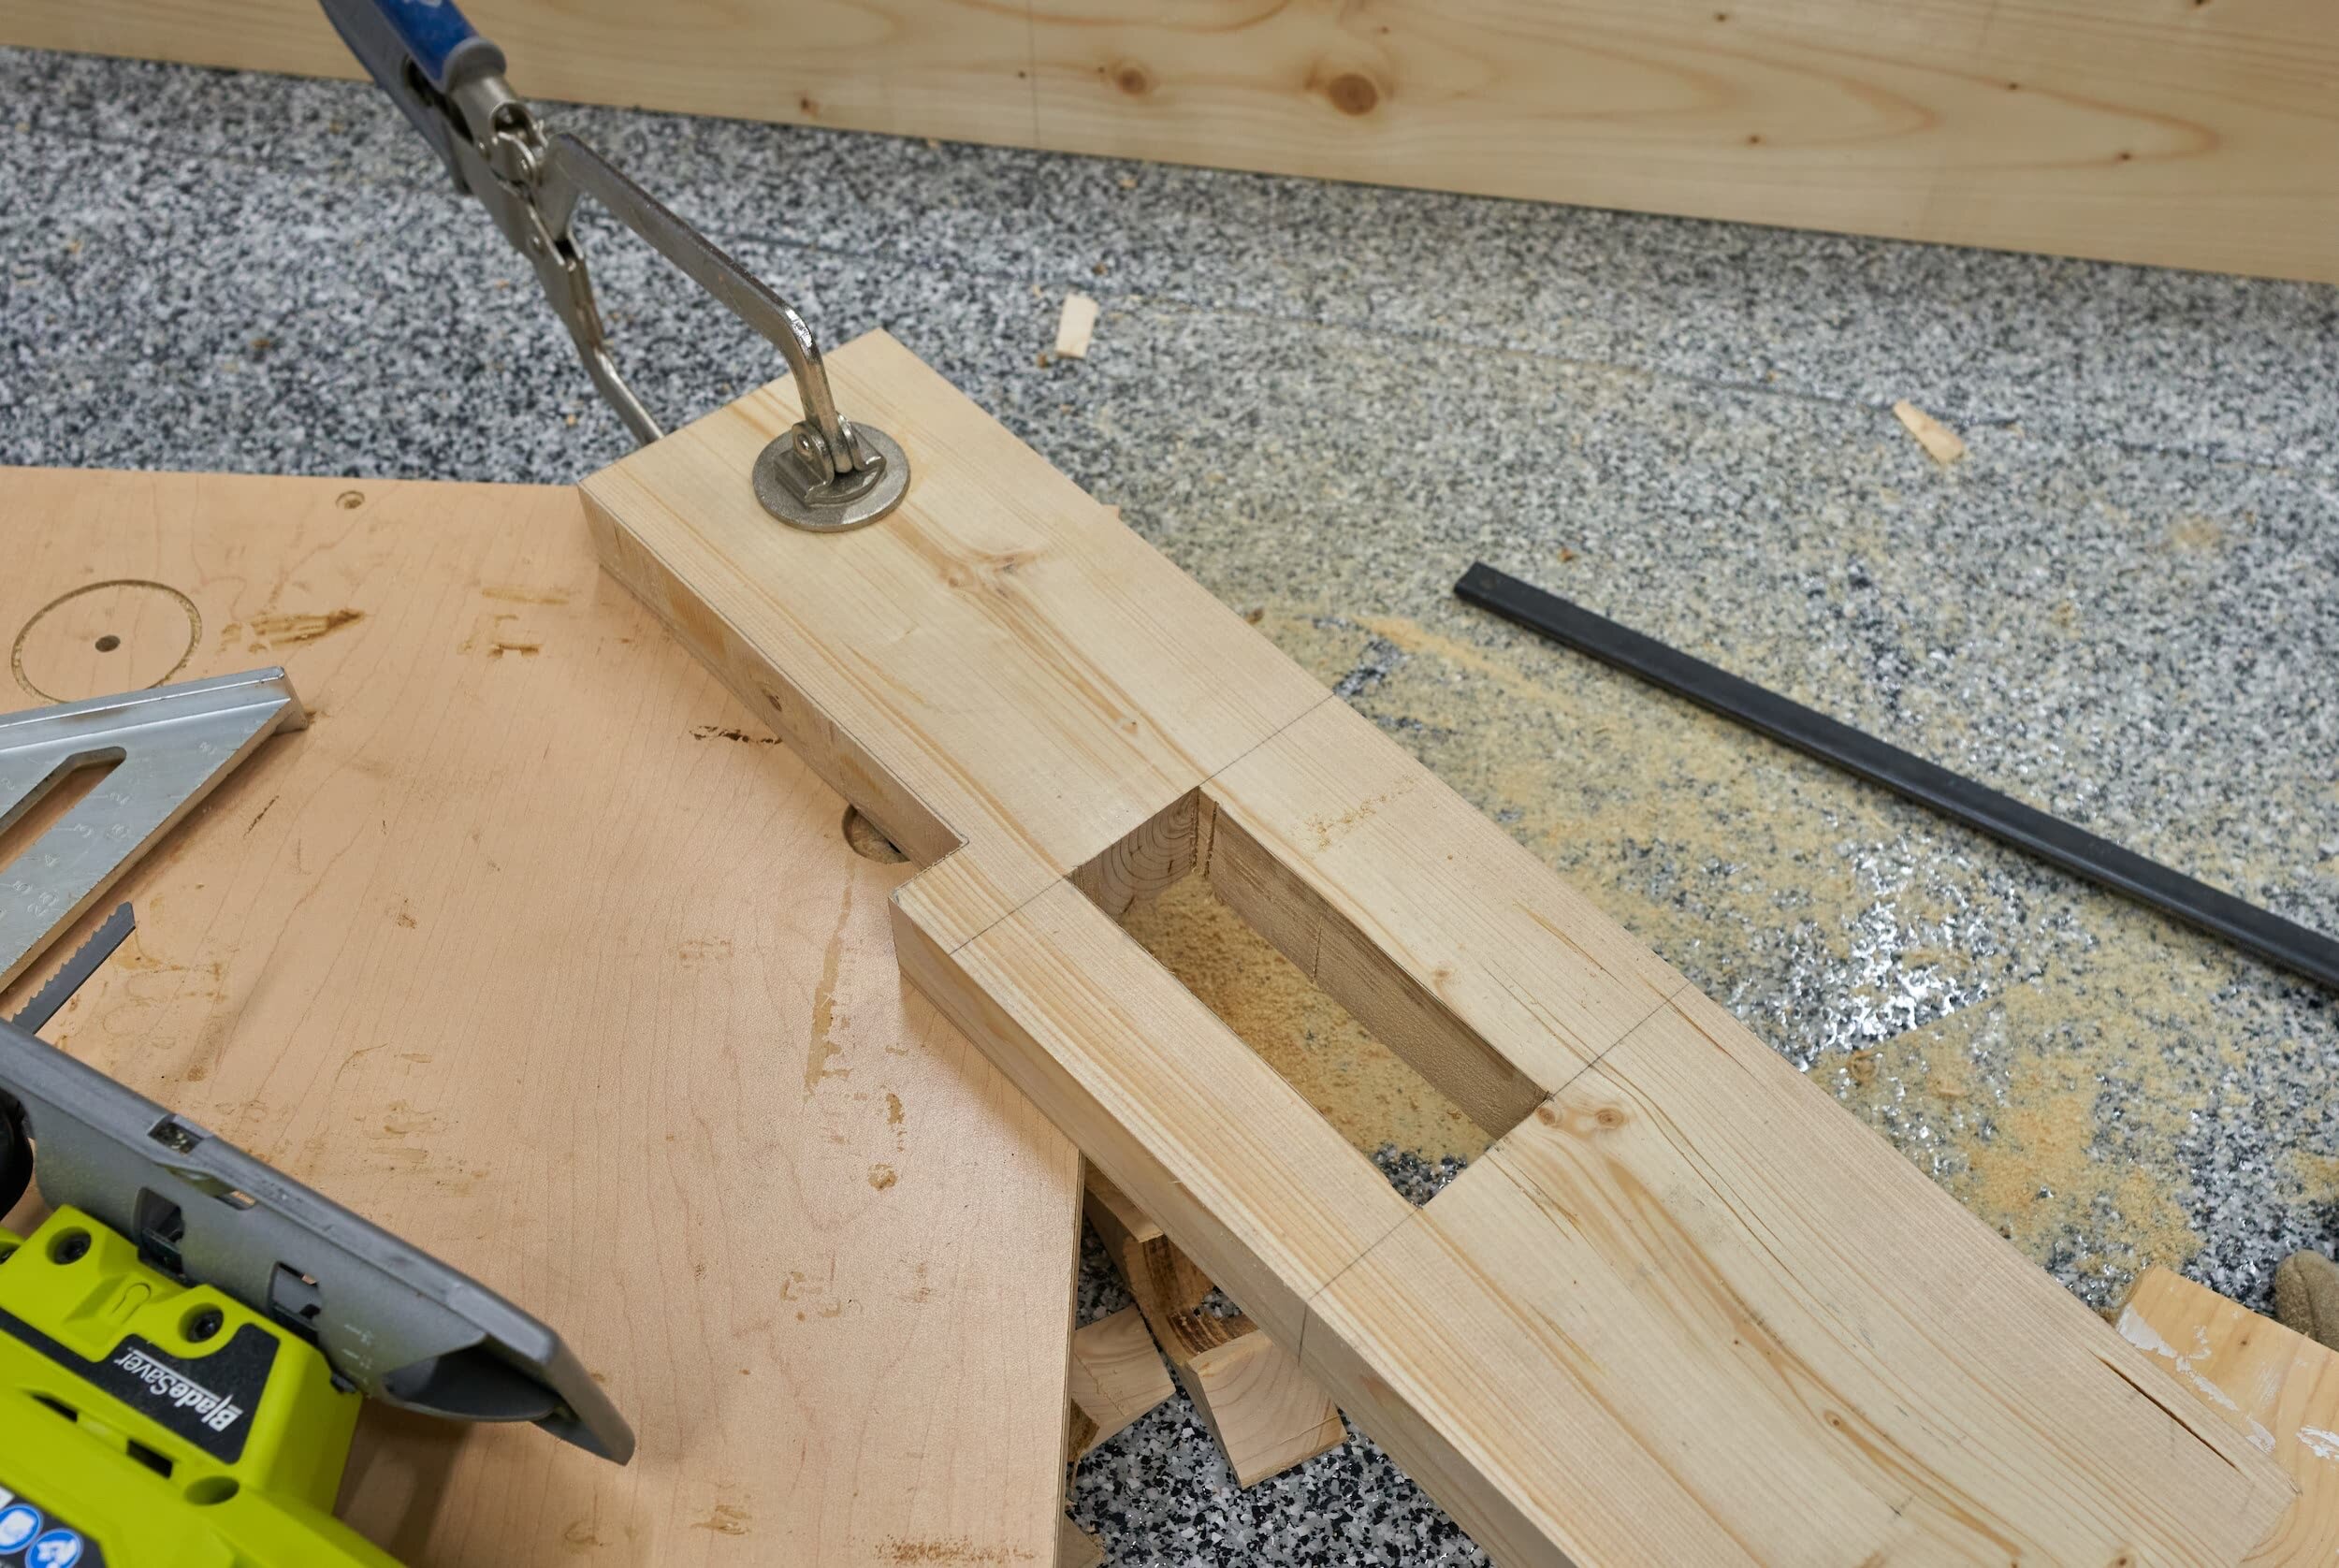
Step 1 - Subframe
I made the subframe 56x67; the king mattress was 76x80 so there is a bit of overhang without being tippy. This is one of the simpler pieces so I took the time to use glue on all the joints and paid attention to how weight would be transferred to the floor.
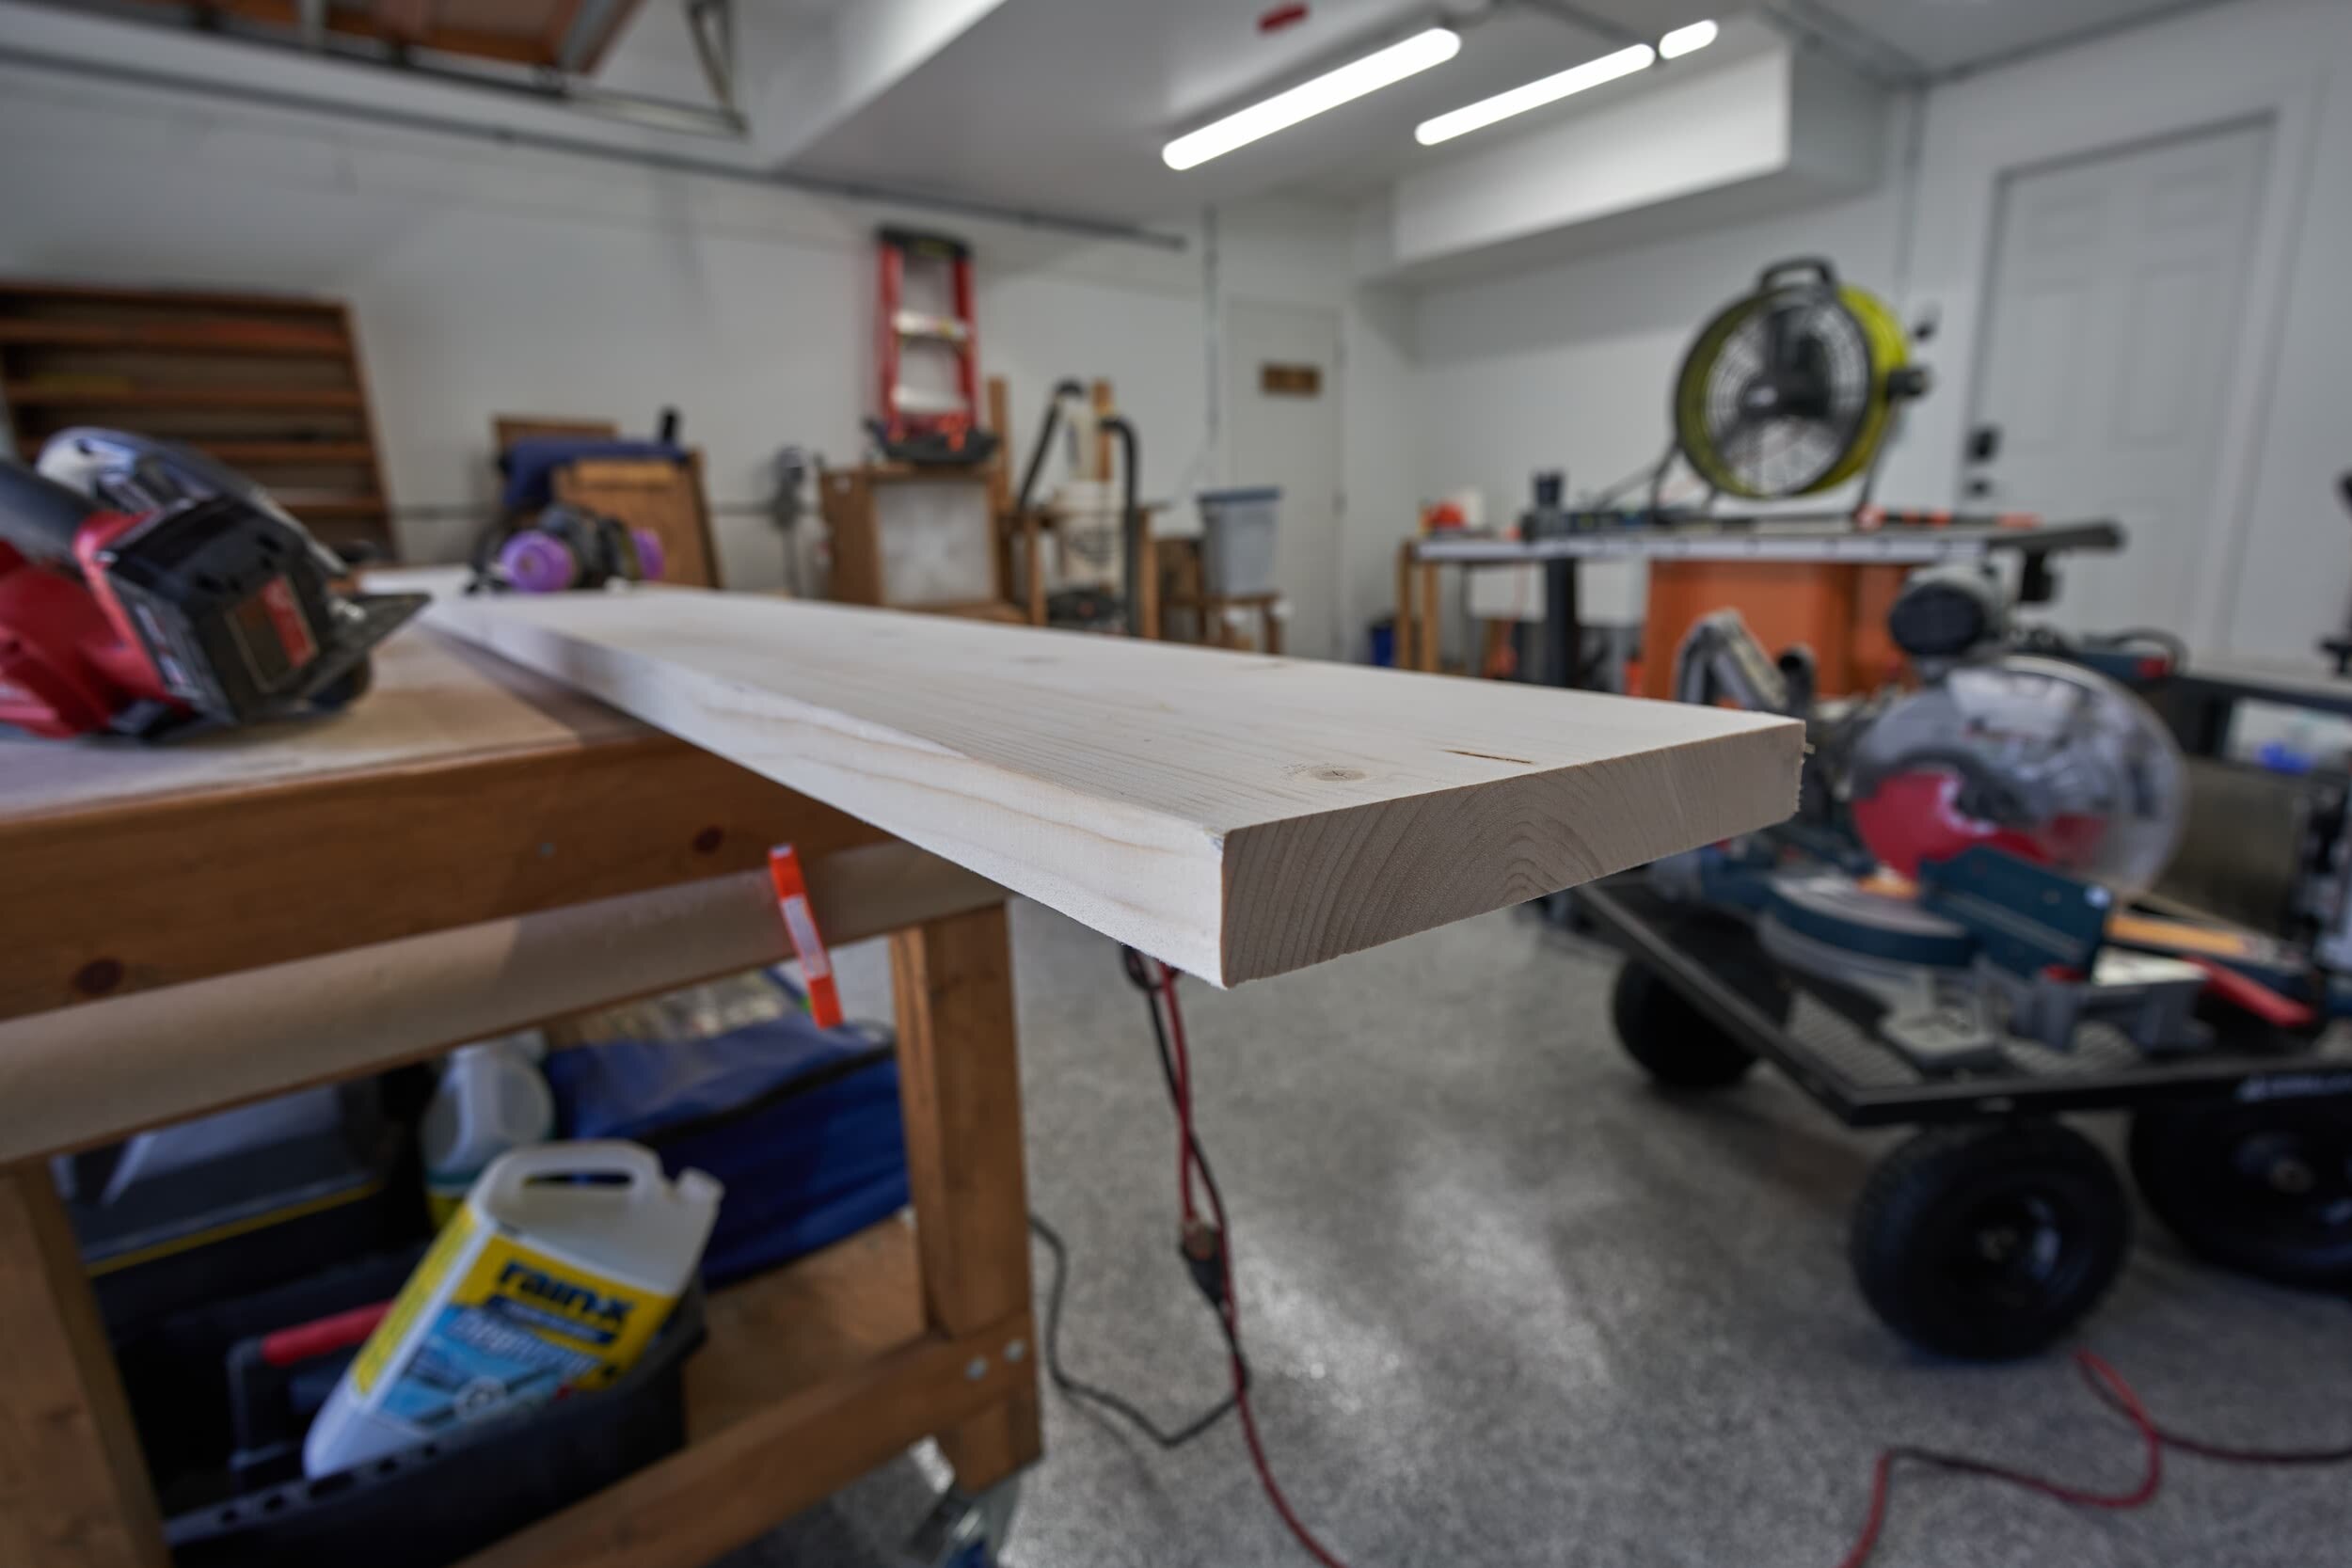


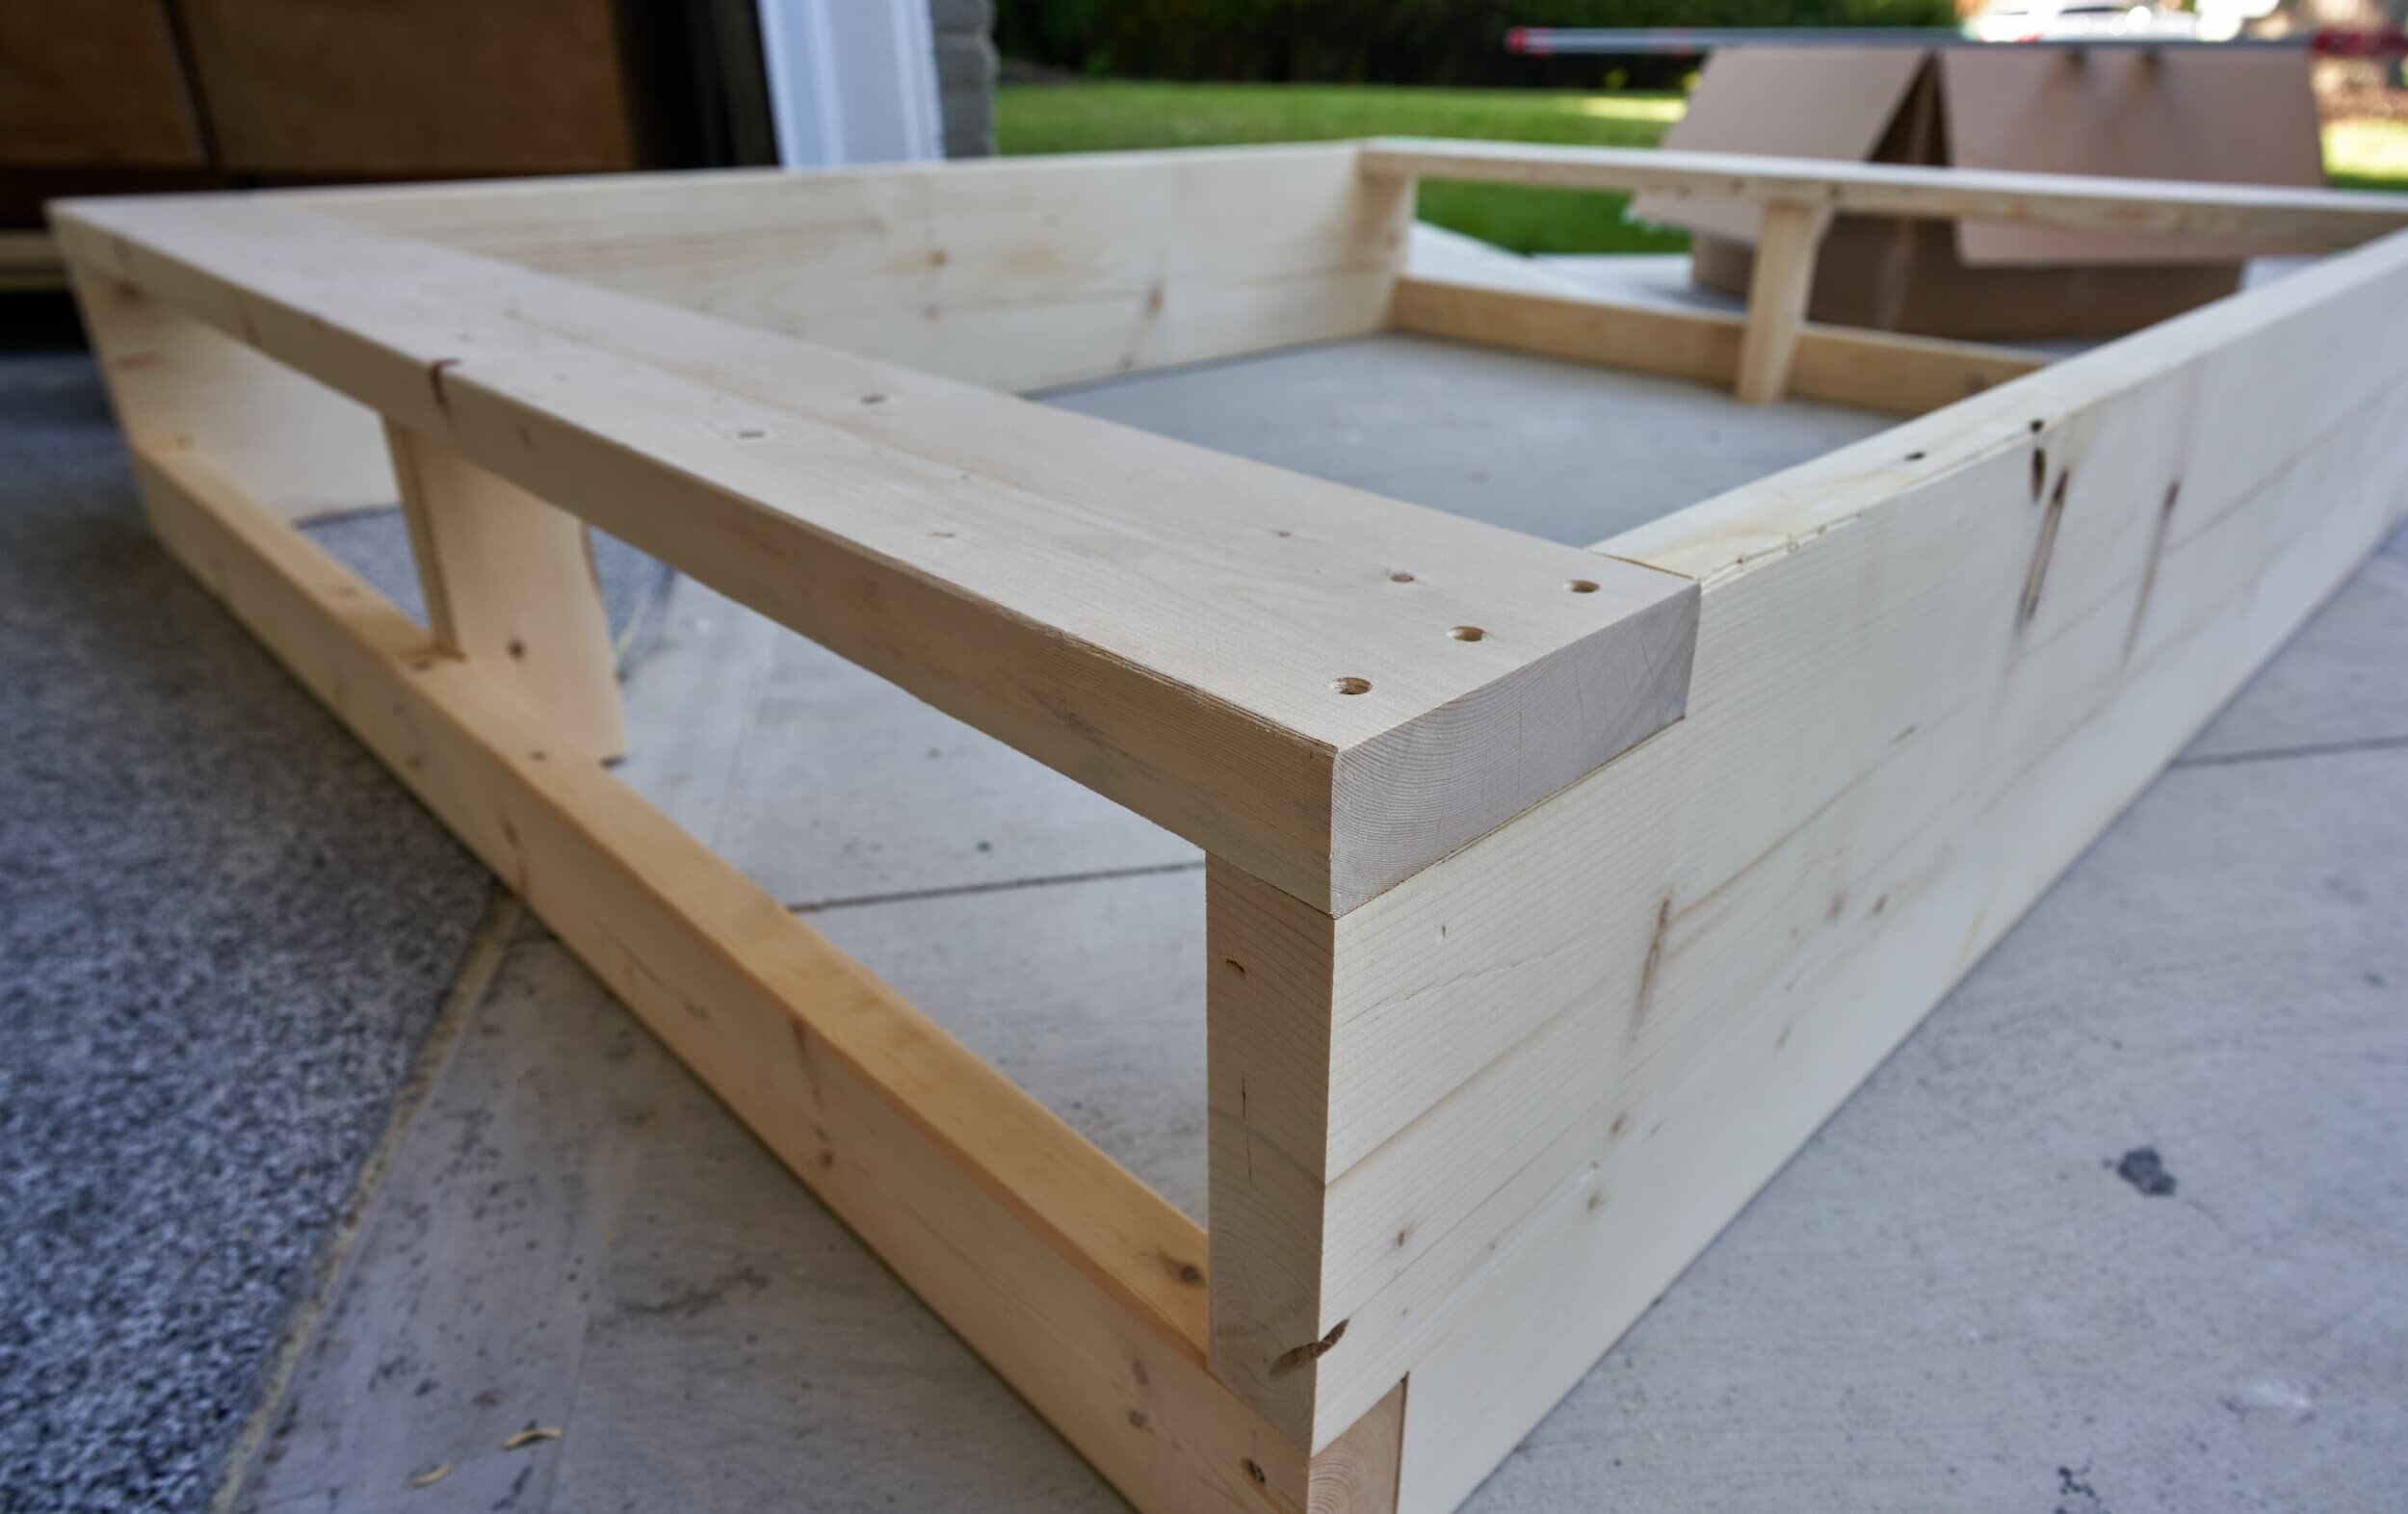
Step 2 - Frame
Originally, I tried to be clever and size the main frame to be able to wrap around the mattress but this was a huge waste of time — it’s also a huge waste of time to try and truly measure the dimensions of a mattress — I just ended up going with the dimensions provided by the manufacturer (76x80), although you could make it a tiny bit larger (maybe 77x81) to make your life a bit easier down the road. Since we were working with smaller dimensional lumber, I put the wood through the milling process and sanded everything to a nice smooth touch.
I really debated doing box joints and/or cutting slots for the 2x4s to sit into or something fancy but I think that would have been a huge waste of time. I happened to have a Kreg HD set so I used the HD pocket holes. I didn’t have any metal angles so I ended up making some from scrap plywood I had lying around.
I also cut the skirt trim pieces that will go on the perimeter to hold the mattress in place - we won’t install that until near the end. (since it means I wouldn’t easily be able to remove the mattress to work on the bed).


Step 3 - Headboard
This was, by far, the trickiest part of the build. I wanted to make a slatted headboard which extended past the mattress (and even possibly, extending past the night stands!) in a continuous way, without any seams. The problem is that king mattresses are so wide (80 inches!); when you add on the night stands, you’re easily going past the 96” that I had available from ripping down plywood slats.
To work around this, I had a few options:
Buy solid-wood strips (say 1x4x10 or something) - I didn’t really want to buy any additional lumber for this
Design the headboard in a way that intentionally has a visible break on the slats so that I could use the 96” of plywood. By intentionally having an aesthetic where the strips are broken up, that would eliminate the issue of grain gaps. The only downside is I didn’t have (wide-enough) contrasting hardwood to use as a break
Switch away from slats — farmhouse or herringbone etc. - I just didn’t like this
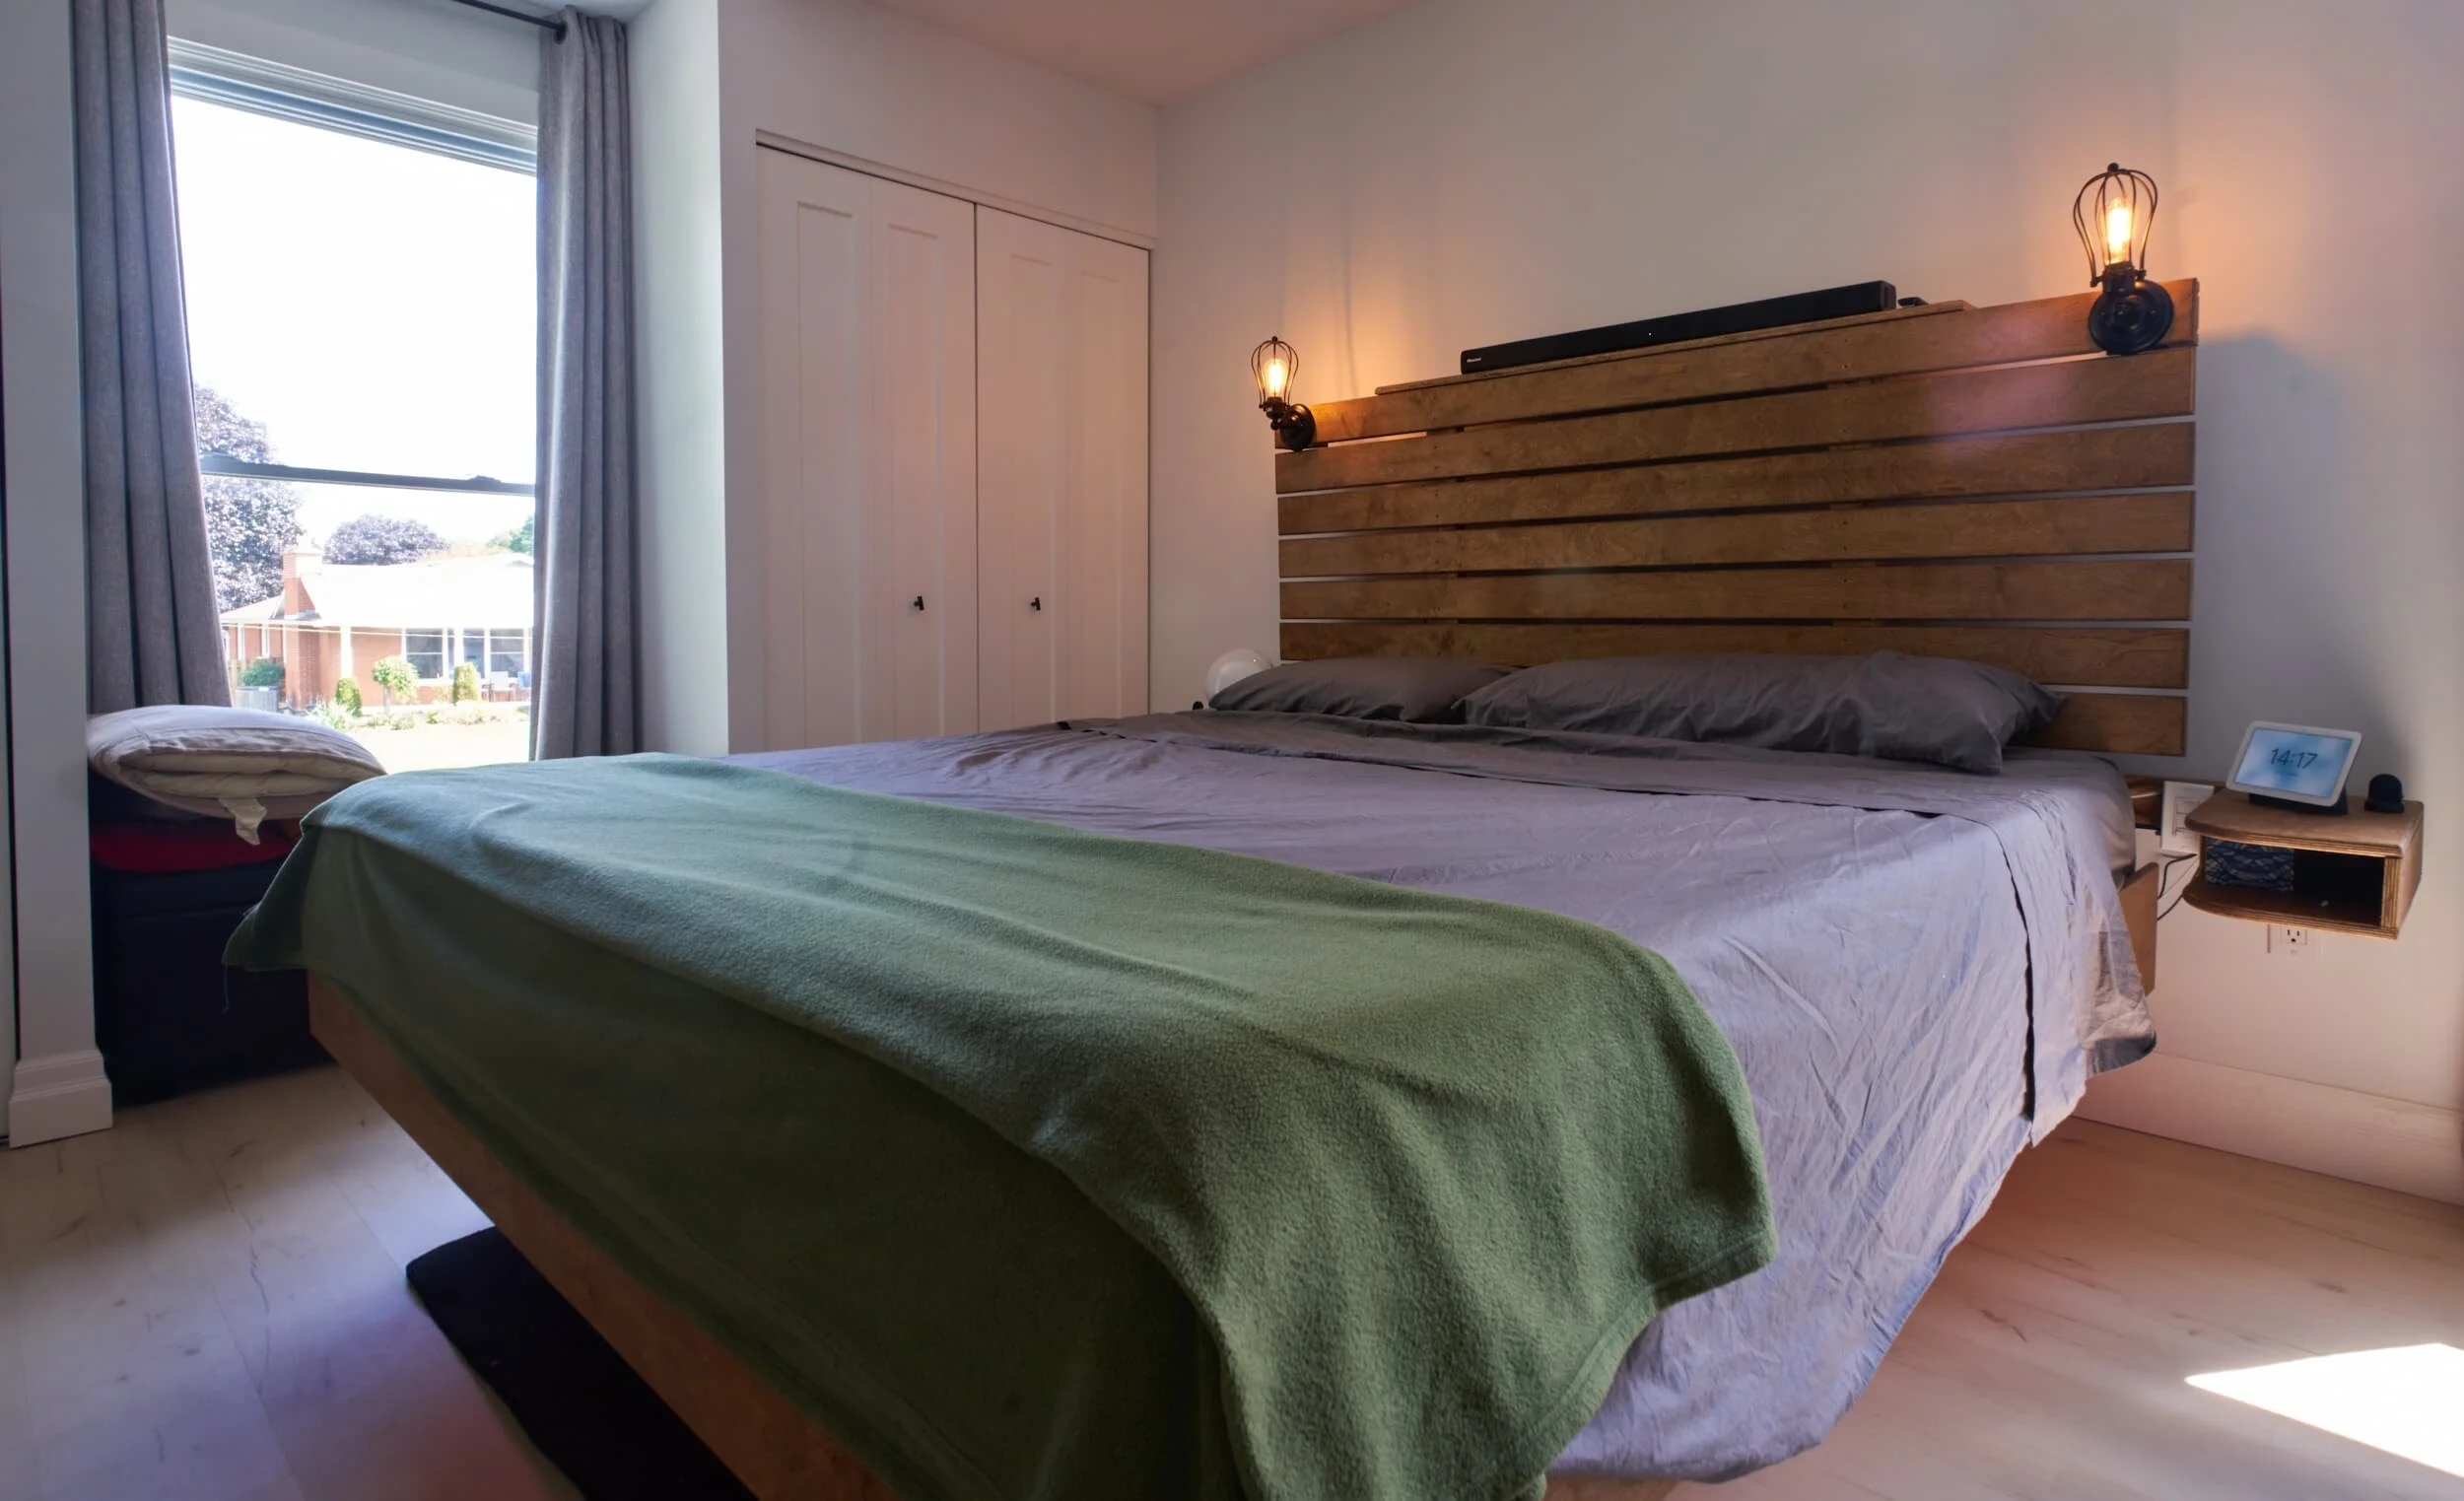
I briefly looked around on YouTube for some ideas and the overwhelming number of headboards built around queen-sized mattresses or smaller or went for the solid/slab/panel style. In the end, I settled on having the slats not extend to cover the nightstands and worked with the existing plywood I had on hand.


Step 4 - Extra Touches
Now that the structure of the headboard was done, I could finally put the mattress back onto the frame for (hopefully) the last time and hold everything in place by securing the perimeter trim skirt. Now with the bed mostly complete, we can turn our attention over to adding dimmable reading lights.


Step 5 - Floating Night Stands
One of the big things I wanted for the Mk II frame was to get some kind of floating night stand; by going with a floating night stand setup, there are two substantial benefits:
Stuff is kept off the floor so it’s much easier to keep tidy and
Since there is power already integrated within the frame, by incorporating the nightstands into the frame, everything can now be permanently placed relative to each other — so when I move the main frame, the night stands will come with it
I knew I wanted to have something small, but had enough of a footprint to put a wakeup light and Google Nest Hub on it comfortably; I also wanted to bring the gentle-arc design that I used on the skirting to the night stand as well - also to reduce bump injuries. Beyond that, this was very much a ‘what materials do I have available’ addon.


Step 6 - Tablet Holder
For the previous bed, I built a rolling table that originally was made for breakfast in bed — and we could clip a cheap tablet holder to it and watch the occasional thing in bed (we had made a decision to not have a TV in the bedroom).
This was my original design - as a tablet mount, this was so-so: there was a lot of wobble and sitting up/lying down was prone to bumping the cart.

For the Mk II, I wanted to use a suspension-arm holder and have that mounted overhead (in a manner similar to how I have my microphone mounted at my desk). This was a relatively simple addon — the tablet holder comes with a generic clamp system which I could easily clamp onto the left/right side of the headboard top-plate, however there wasn’t enough reach to position the tablet in the middle of the bed, so I raided the scrap parts bin to put something together.


Milestone
The Mk II is finally done! When I set out to make this frame, I wanted to have a clean design that had a reduced bump-factor and reduced the amount of wood-creaking from the original and so far, it’s been a success! There were a few definite wins:
I had originally wanted to put the light switch in/on the cubby but by attaching them to the headboard frame itself, if we ever have to move this, the headboard bits all move together
Same idea with the RGB strips - the strips are glued and clipped onto the subframe, but around the back side, I just used clips so that if I ever have to move it, it’s much easier to manage
When building the nightstands, I got super lucky with my sizing (was just working with leftover plywood) - I wasn’t sure if i could fit a tissue box in there. Tip: if you have something you’d like to fit in the cubby, have it on hand!
Having the rug was a lifesaver for moving this bed around!
Mixups, Surprises and Lessons Learned
One ‘fun’ bit of drama was actually the main frame of the bed — at 76x80 it was just a bit too big to clear the ceiling coming up the stairs (guess who’s gonna raise that down the road). Ended up having to split the frame in half and reassemble it upstairs.
Other than that unfortunate incident, the fundamentals of the frame were fairly straightforward, all of the tricky bits started with the headboard and then the nightstands and were attributed to working with the lumber I had on hand and winging it for the nightstands. If I were to revisit this again, I’d address these two areas:
Instead of 2x4s as the verticals for the slats, I would use 2x6s — this would give me a lot more meat to work with
I ran into an issue where the thickness of the slats (¾”) pushed my mattress down enough that I couldn’t easily secure the bottom skirt; knowing this, I’d totally build the base frame an extra inch
The beam that I have the night stands mounted to is a 2x4 — I would definitely bump this to a 2x6 or (even 2x8) to give more surface area for the night stands to attach to. I would also definitely mill this piece so that there isn’t as much twist. I would even consider cutting laps into the headboard base stand so that could be securely attached to minimize any twist/movement
Since the nightstands were an afterthought (and I was working with a 2x4 to mount it to) I opted to built out a shelflet (below, in yellow) to better support the nightstands. This additional plywood pulled the bedframe away from the wall by that distance — and I had already cut my headboard top plate to butt up against the wall, not counting for that. Whoops!
If you want to take this design to the next level, I think milling the dimensional lumber would be a great way to make the build come together so much more predictably. It might also be cool to integrate something like an access panel into the side of the 2x12 to get to the UPS without having to pull the entire bed away from the wall.
Tools and Materials
Materials
Dimensional lumber: [1x] 2x12x12, [8x approx] 2x4x8, [2x] 2x6x8 — although I would swap some of the 2x4s for 2x6s for the headboard
Sheet goods: the better part of 2 sheets of paint-grade ply
Fasteners: 1¼” (plywood-to-plywood), 1¾” (plywood-to-2x), 2” and 2¼” #8 wood screws and Kreg HD pocket screws
Wood glue (a small bottle would have been plenty)
For the stain, I used Varathane Classic Early American (I believe this is a stand-in replacement for Minwax Early American)
Tools
With a drill, circular saw, a sander, a measuring tape and some clamps (6” and 24”) you can put this together
→ Adding a combination square, speed square and automatic punch make the marking and layout process so much simpler
→ Adding a jigsaw would let you cut the cutouts on the subframe and the arcs on the trim much easier
→ Adding a router (with flush-trim and roundover bits) would let you better cut the gentle arcs and give all of the boards a nice edge profile
→ Adding some kind of pocket hole jig would allow you to (obviously) make pocket holes more easily (you could just butt-screw everything)
→ Having a self-leveling laser make the assembly a bit easier, but nothing you couldn’t also do manually (and/or with a basic level)
→ Using a countersink bit is a nice luxury that makes driving the screws a much nicer experience
As far as luxuries go:
→ Having access to a table saw would make cutting out rabbits/dados easier/safer. If you have a helper, it can make ripping the slats much easier
→ Having access to a pin-nailer or brad-nailer would make solo-clamping so much less frustrating; this can be alleviated if you have a helper
→ Having access to a track saw would make ripping the slats by yourself easier
Other Equipment & Parts
Bedding: we have an Endy mattress which has been pretty great
Media
Tablet: Amazon Fire HD8 - we use this exclusively as an Amazon Prime-Video tablet and the size is good for travel if we need; we have this mounted on a cheapo suspension-arm tablet holder which has been working out great so far
Soundbar: Hisense HS218 - this was one of the cheapest 2.1 soundbars I could find. The sound quality is surprisingly good, but in this application, you’ll want to have a piece of black fabric handy to block the standby light at night!
A note about that soundbar
When the soundbar goes to standby-mode, there is a single white power indicator LED that stays continuously lit. In a bedroom environment that may be super annoying to have a light at night (there is a dimmer control that lets you turn off the LEDs but that only applies when the unit is connected/playing — as soon as it auto-disconnects, it will transition to the always-on LED).
As a workaround, I found that a bit of fabric (like a sock) will block the LED but still allow the remote control to work.
Clocks: for Nicole’s side, I bought a Philips HF3520 wake-up light a long time ago; recently, I picked up a Google Nest Hub for my side
Power & Connectivity
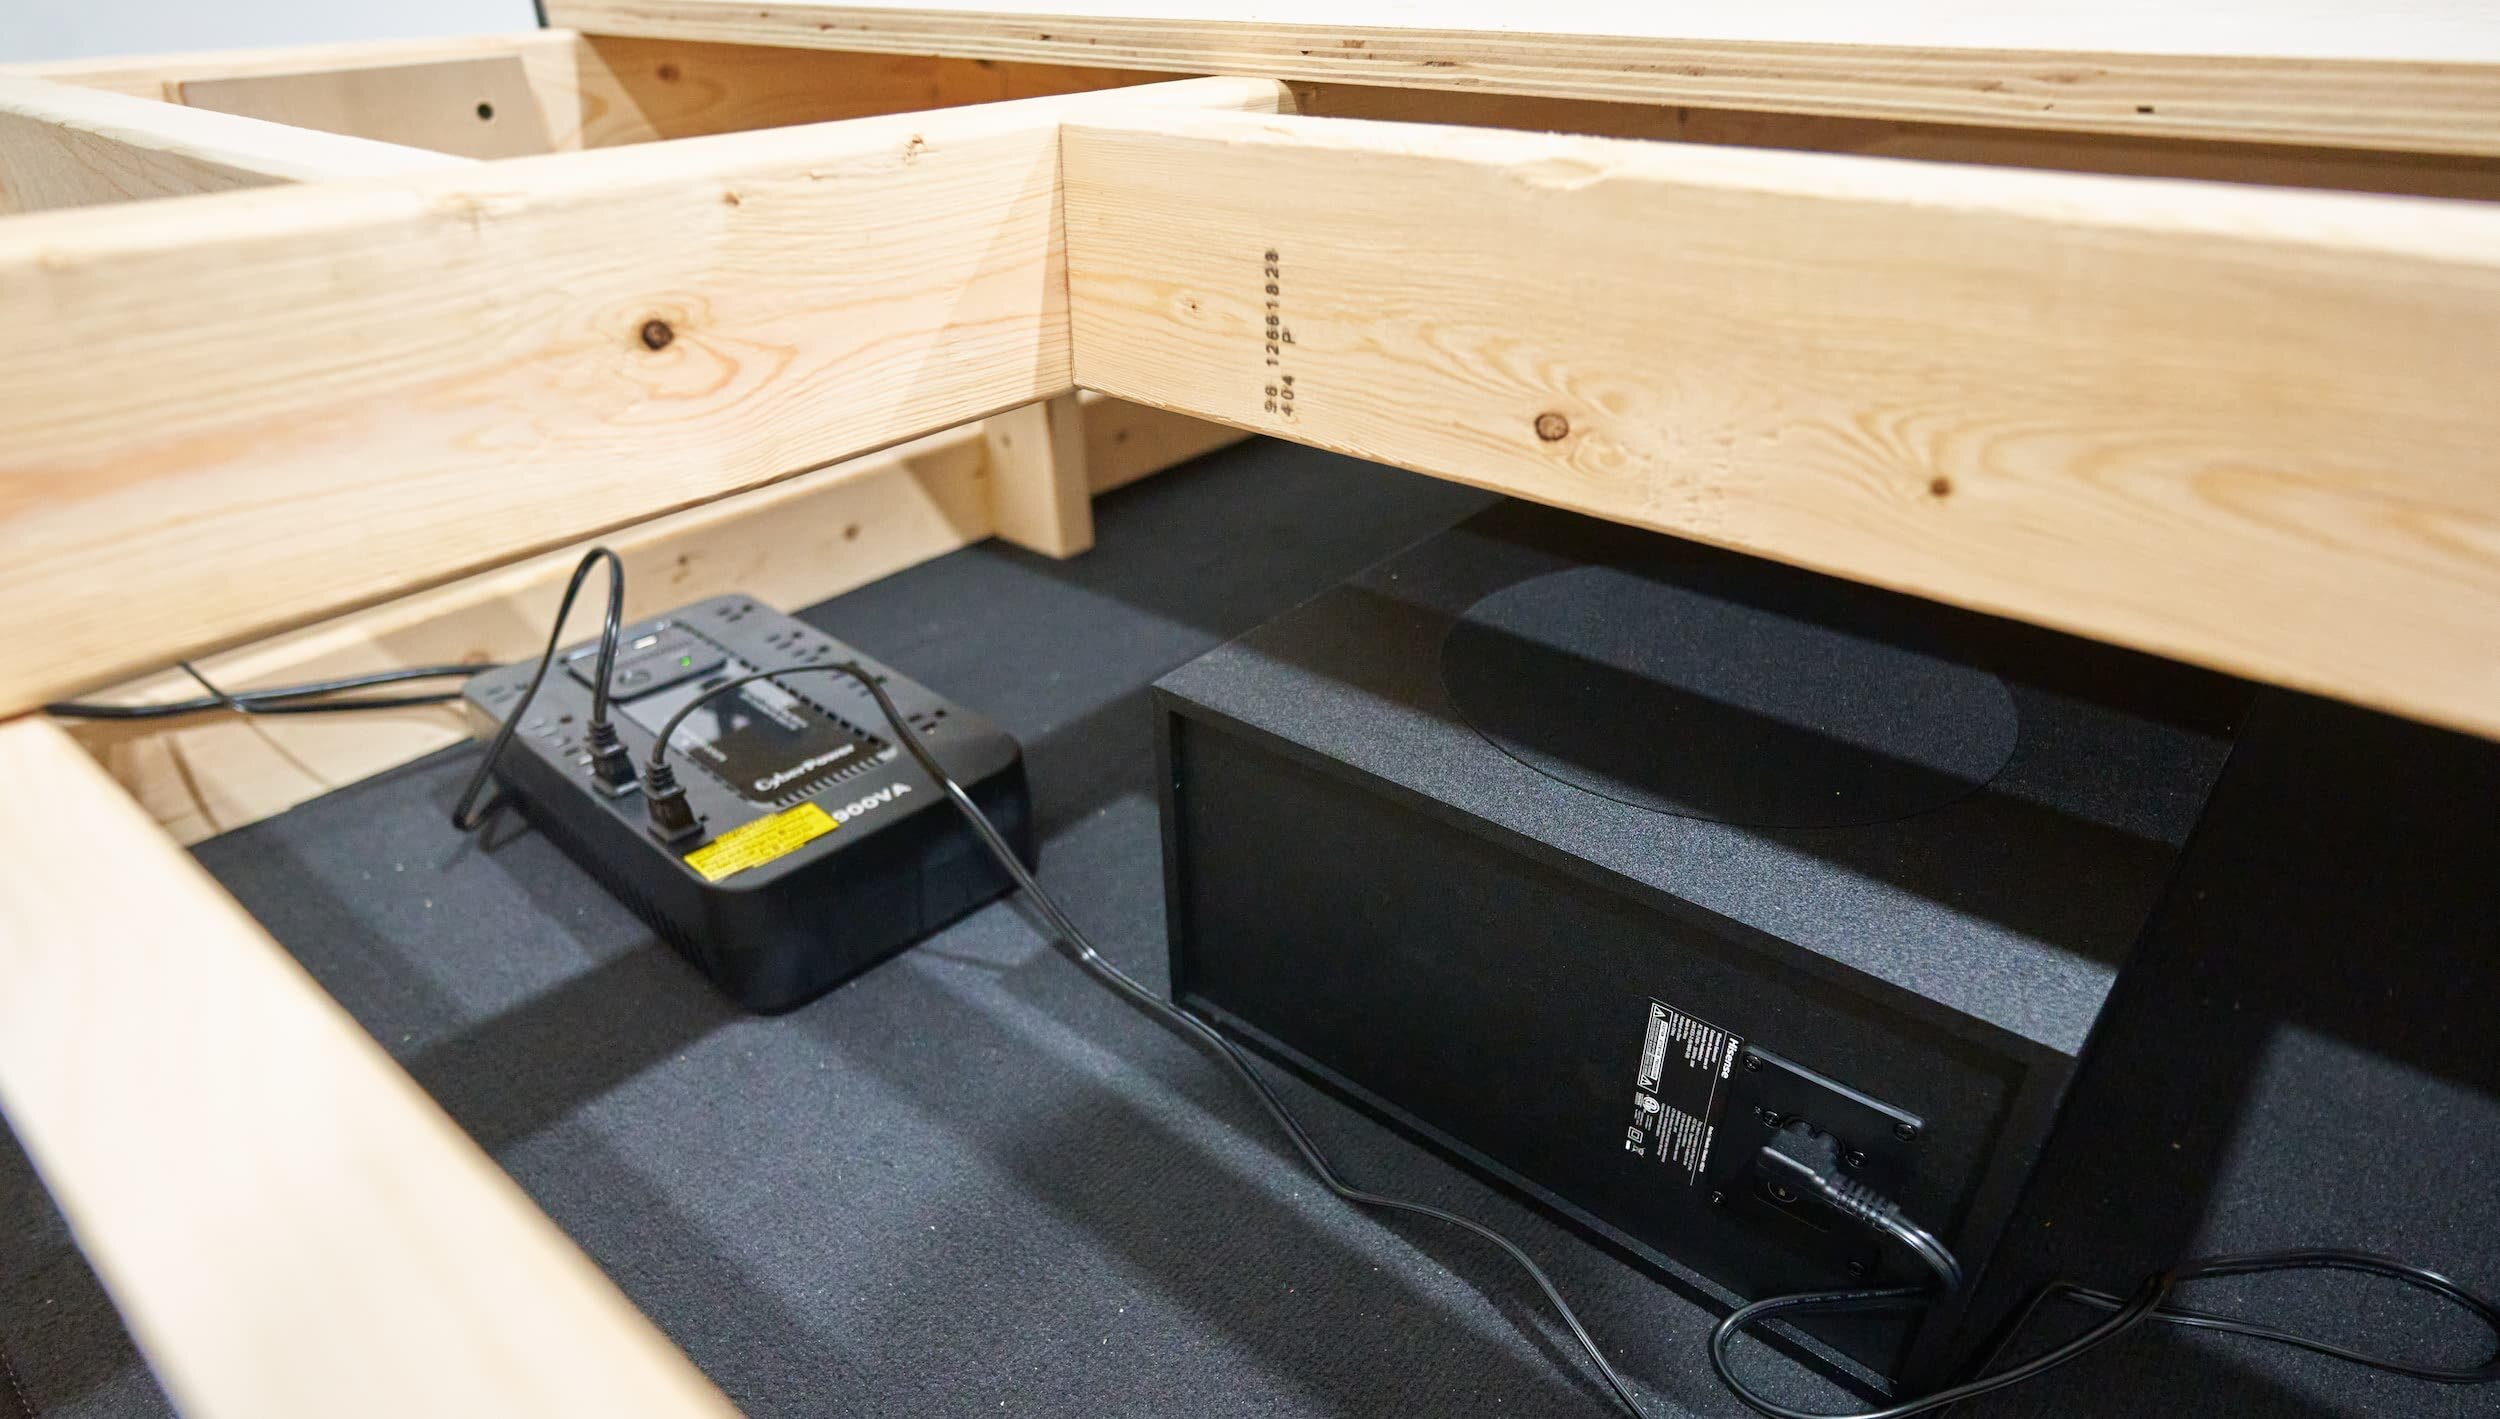
UPS: CyberPower ST900U - there’s always so much price-creep with basic UPS units (read: you probably don’t need this much capacity but make sure the unit you chose has enough outlets for what you want to connect (yes, you could connect a power bar)
Smart switches: everything in the bed is connected to the UPS and the UPS connects to the wall with a a Teckin SP20 smart outlet (discontinued/unavailable, try TP-Link KASA KP125M) - which has built in power usage monitoring; I also use some more basic Teckin SP10 smart outlets (also discontinued/unavailable, try Govee 10A smart plugs) which don’t have power monitoring but are much more cost-effective
Power Passthrough: I originally wanted to use a round-style power passthrough grommet but I didn’t really want to spend the money to buy a 3-1/8” hole saw needed to make the clean cut, so I went with a recessed-power strip design; the cheapo model I have comes with 3-USB ports
USB: although I have USB ports on the UPS, I wasn’t sure if those ports were connected to the battery or if they were just passthrough (easy enough to check I guess); but I also didn’t want to worry down the road if I needed a ‘better’ charger for a future device and I had an extra charger on-hand, so I plugged a charger into the UPS outlet (this way the charger always has power and devices don’t ding when briefly losing power)
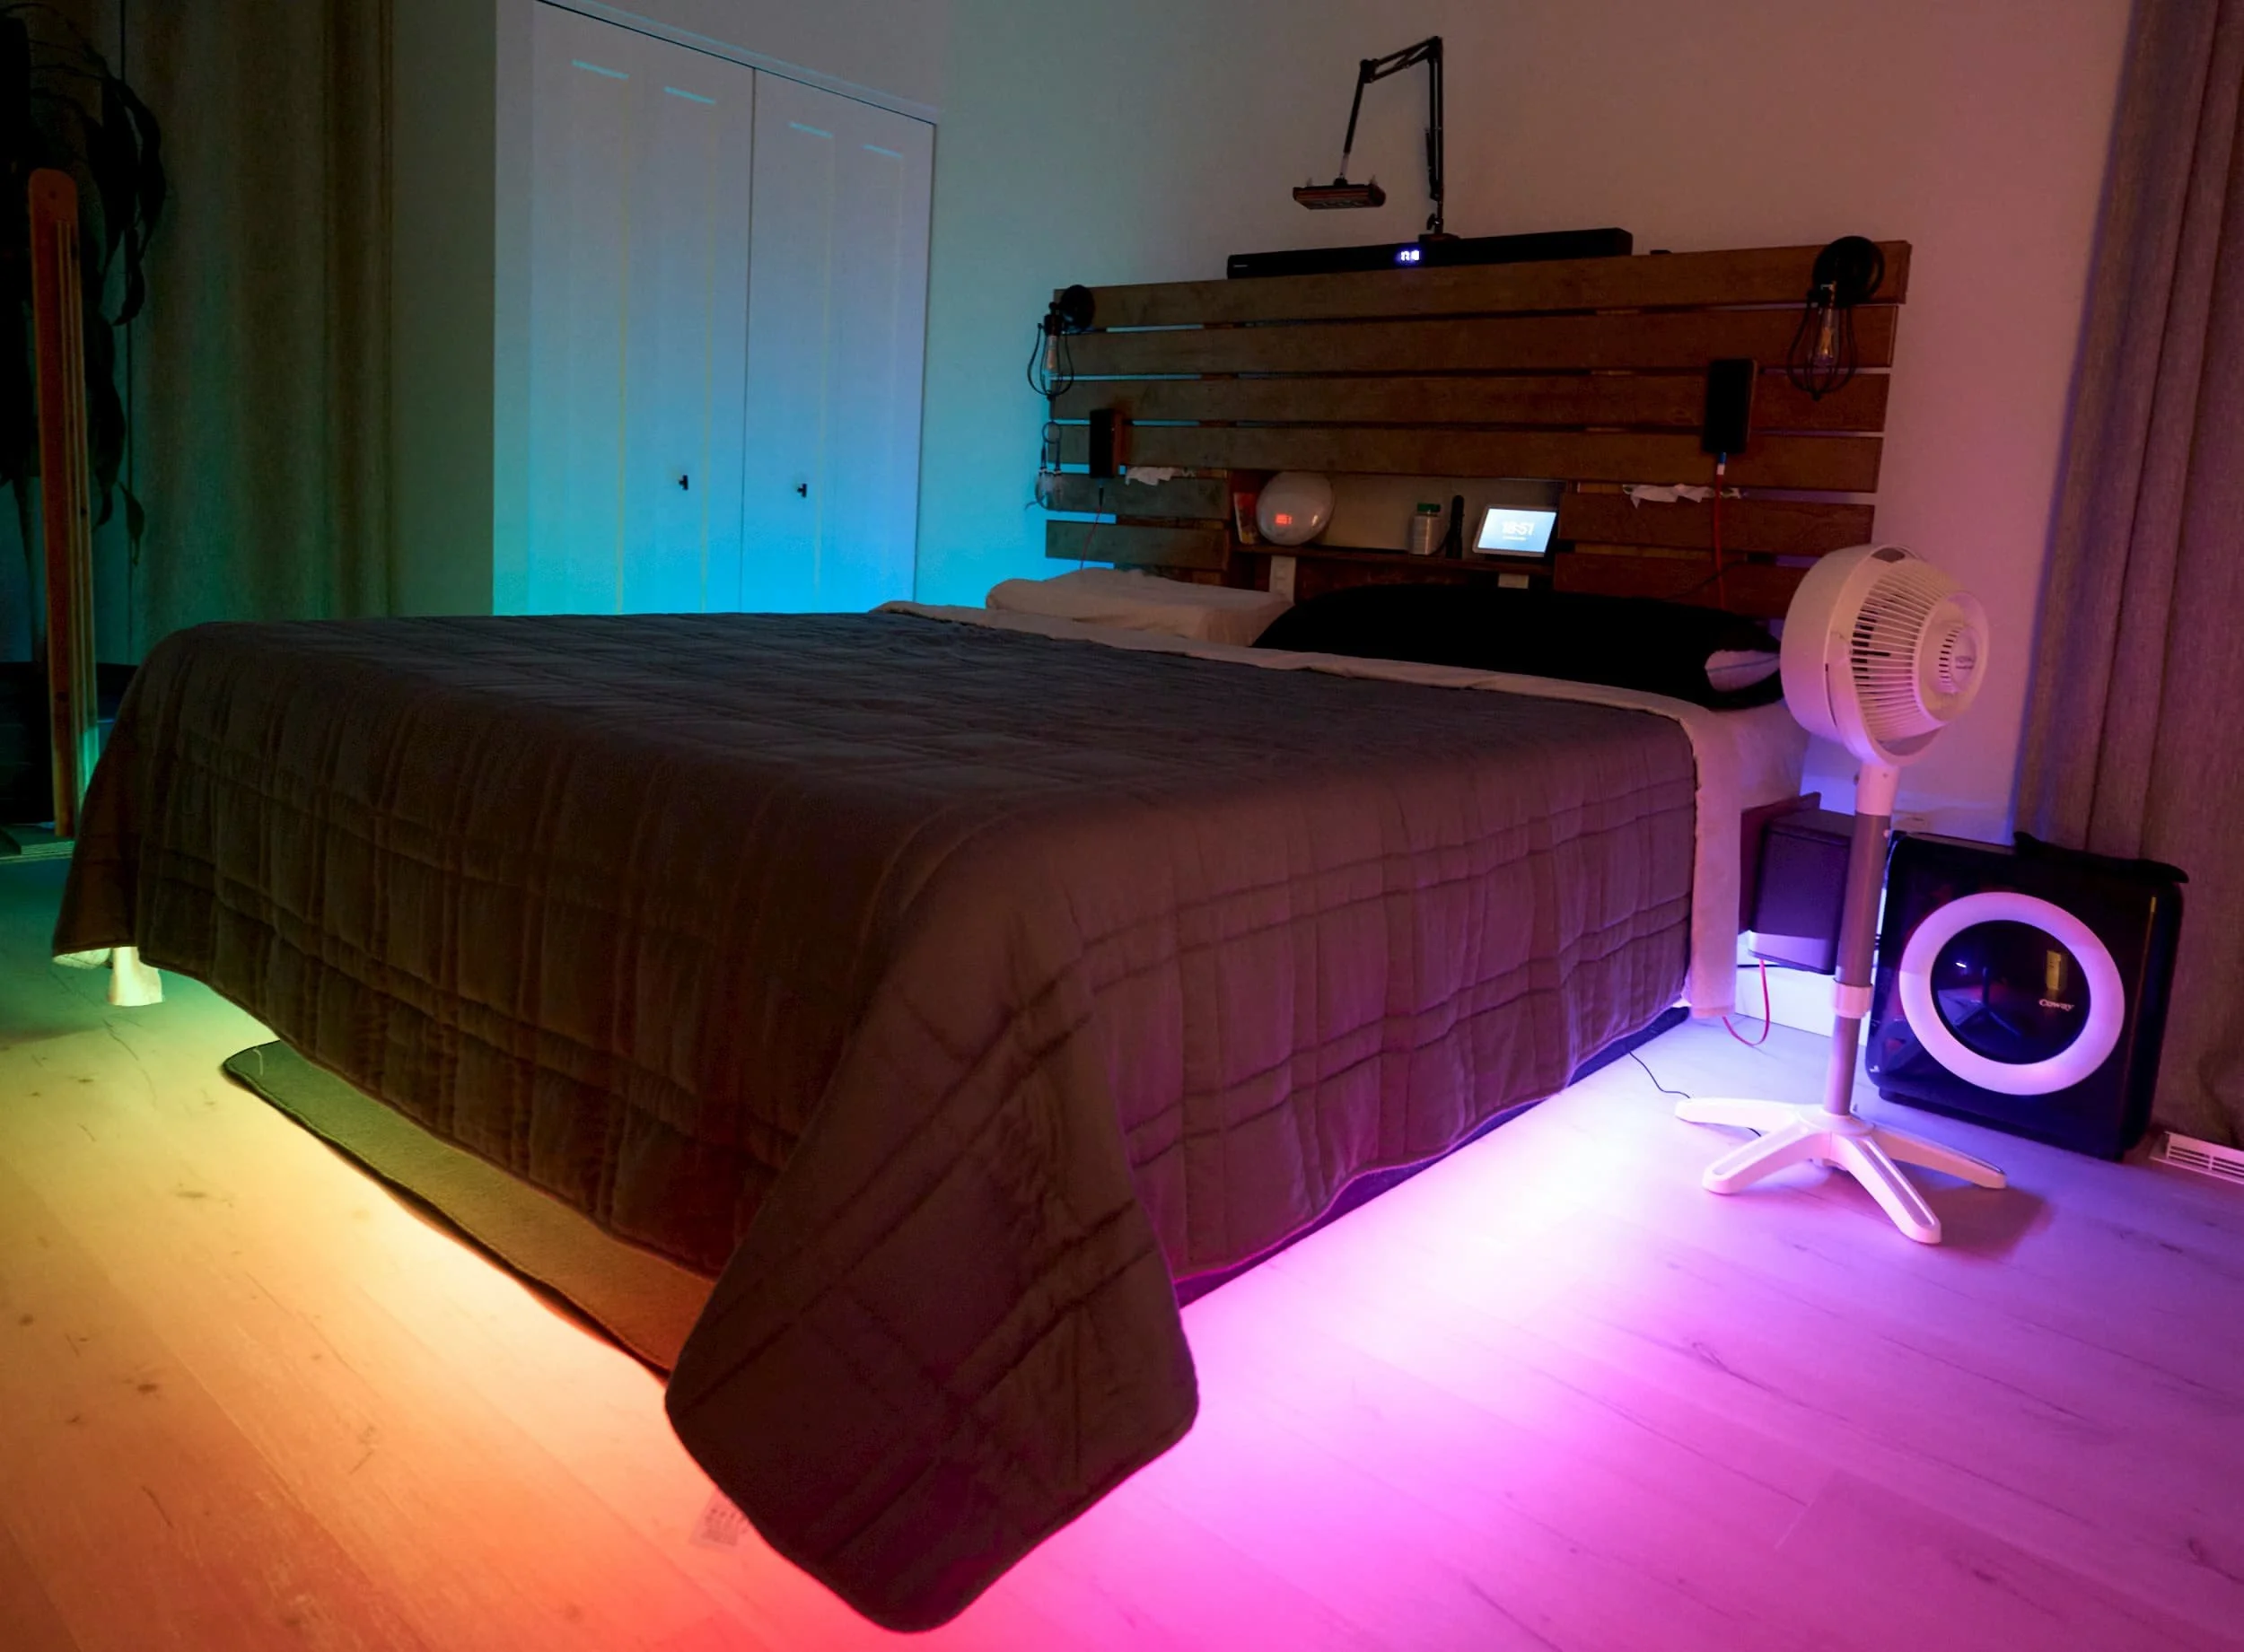
Lighting
Light Sconces: a basic industrial sconce; I went with some vintage dimmable bulbs I had handy; I may replace these with RGB bulbs down the road
Light Strip: Sieke 32’ RGBIC strip (discontinued/unavailable, try Govee 32’ H617C instead) - this works with Google Home via SmartLife/Tuya integration and was 32ft and had individually addressable lights; I used some cheapo clips to secure them; if you’re looking to build this for a queen-size bed, you can probably get the same light coverage with a 16ft strip
Bed Enhancements
After living with this bedframe for a few years, I made some enhancements!
Product links may be affiliate links: MinMaxGeek may earn a commission on any purchases made via said links without any additional cost to you.