

Build Log: Basement Mega-pantry
Our house has a storage space in the basement. I’m reluctant to call it a crawl space since the joists hang down to 5’3” — it’s more of a “watch your head” space. Like almost every awkward basement space, this was presented as a storage space (read: dump your kids toys here). I want to use this as a storage space but I certainly want to make it a much nicer experience.
Quick Links
Starting Point
This space is naturally suited for being a dumping ground, so for the first year, that’s how we used it: as an overflow/staging/deal-with-it-later storage place while we tackled other areas of the house (notably, the shop). Now that the shop is in a much better place, I wanted to spend some time to get this space tidied up before it crossed a threshold of being too big of a task to tackle!
This project spanned multiple months as we did some small enhancements here and there: we needed to run through this space to get power and plumbing into the shop so there were some piecemeal upgrades done along the way. This last summer, I set aside some time to spend some dedicated time improving this space. I had a few loose things I wanted to tackle:
Clean up the cobwebs and crud in the joists, in the corners and crevices
See if there was something I could do to pretty up the space and brighten it up a bit more
Get some shelving into this space
Since this was a much bigger pantry space than we had before, I wanted to find a way to make better use of it for organizing sprawling foodstuffs
So all in all, some pretty broad objectives that simplify to ‘make it better’.
Step 1 - Let there be light
Most unfinished basements/storage areas are severely lacking in usable light and our storage area was no exception. There was a single light socket that the previous owner had put one of those adjustable-angle light bulbs that are all the rage. For what it was, the multi-angle bulb did a decent job of illuminating the space but I wouldn’t classify it as good lighting. Since I had bought all-new light fixtures for the shop, I was able to repurpose the old utility lights here in the basement. I happened to have a bunch of outlet boxes, receptacles and a spool of romex so it made the most sense to use what we had an install a bunch of ceiling receptacles so that I could hang the utility lights.


Getting the lights up in this space makes it infinitely more usable and inviting, and the outlets were configured to run off the existing switch. We left the existing light bulb socket in place (for no particular reason), but installed a bulb-socket adapter in it as a mean to close it off from accidental poking. We moved everything back into the space and this storage space went to the back of my mind for a few months as we tackled other things.
Step 2 - Clean out and prep
We didn’t really revisit this space for a few months (partially because our attention was elsewhere) but we also wanted to live with it as is (with the vastly improved lighting) to see what aspects needed improvement and optimization. At a high level, I was okay with using this space for storage but I wanted to create distinct areas to group certain things together - that’s a wordy way of saying that I wanted some shelving.
Before starting, I knew I wanted to pull everything out, give the place a thorough sweep, vacuum and possibly even a wipedown before building stuff. Of course, fully emptying out this space makes for a rare opportunity to look at the floor. I wasn’t planning on going epoxy (professional or DIY), but I wanted to do something to clean up the floor a bit. I figure that this space is so low-traffic that anything we do to clean it up, should (theoretically) last a fairly long time.


Once I got everything down to the bare walls, I swept and vacuumed twice. While I didn’t want to do epoxy, I had decided on a concrete floor paint so there was a bit of prep work:
Rinse/scrub with water and dry
Degrease/scrub, rinse and dry (I used TSP)
Etch/scrib, rinse and dry (I used muriatic acid)
I looked around on YouTube for ideas on how to prep the floor specifically for basements but I wasn’t able to find anything: every video on the subject I found focused on garages and porches where it was braindead easy to just bust out a garden hose and rinse everything away. I guess basements where you can’t just blast water everywhere is left as an exercise to the user? In any case, my technique for doing this indoors was to:
To rinse, I used a watering can allowing me to control how much water was dispensed and where
For the chemicals, I premixed everything upstairs into a 5-gallon bucket and used a dollar-store waste bin and a measuring cup as manageable dispensers
I would work in a small maganable area at a time and to cleanup, I would use a wet-dry vac
To accelerate the drying process, I ran some fans to blast the air out of this space
Make sure to wear a mask! The TSP & muriatic acid isn’t really fun to breathe in.


This took the better part of an afternoon and I was wiped - working in an enclosed space wearing a respirator and scrubbing when you can’t even stand up straight is hard work!
Step 3 - Paint
To actually coat the floor, I debated a few options: paint, plasti-dip, some kind of roll-on bedliner paint but ultimately went with a concrete paint. Specifically, I went with Rust-Oleum 1-coat concrete floor paint in Satin Armor Grey because that is what happened to be in the store when I was there. Again, the hardest part about working in this space is not being able to actually stand up. My wife helped by cutting in the edges while I worked the roller and we were able to do the entire space in a couple hours. We ended up doing two coats initially with the expectation that as I dragged shelving around on the floor, I would likely flake up some paint and have to do some touch-up later.


Aesthetically, I really like it: when I was at the store, I wasn’t looking too hard at colors - I just wanted grey (dark or light was fine). This product comes in a few different shades and colors if your taste varies.
Step 4 - Closing up the wall
We had an open frame wall on the right (primary) side of this space that I kind of wanted to close up purely for aesthetic reasons. This was also a good opportunity to play with insulation and vapor barriers although functionally, I don’t expect the application of insulation or the vapor barrier to make any functional difference as it’s still “exposed” on two other walls and it not air-sealed from the rest of the basement but I figured it can’t hurt to do it up ‘proper’.
The first part of this task, I spend a good hour thoroughly vacuuming out the nooks and crannies and also vacuuming out the joist-cavities in the ceiling - bye-bye cobwebs! I also took the time to remove a bunch of extra extra piping, brackets and general crap leftover on the ceiling from a previous renovation. I was really sad (and disgusted) when I discovered that the “empty” run of ABS pipe (that started from nowhere and went to nowhere) was in fact, not empty and full of nasty-water. I pulled nails, staples and dead-end wires stapled to the studs and joists to clean everything up. After all, I’m only ever going to do this once.


I debated using drywall as an opportunity to learn something new but I wasn’t too keen on dealing with drywall dust and more importantly - the awkward dance of getting sheets of drywall down into our basement. I went with a white hardboard instead which was great base it’s light, I already know how to cut and use it, it’s super cheap and easy to work with. I was just looking for something to cover up the wall so I didn’t need anything more substantial.
Getting the vapor barrier up, stapled and taped and then leveling and screwing the hardboard went by super quickly with my wife’s help. I found a very nice white tape that we used to cover the gaps between the panels and it works great. Overall, I don’t notice anything special about the wall unless I’m specifically looking out for which was exactly what I was going for.
Step 5 - Pantry shelf
After all the work so far, I can finally start working on the thing I actually set out to accomplish! There are a few high-level objectives I wanted to tackle with my pantry storage:
I wanted to build with flood/spills in mind. This means things are lifted off the ground where possible, and if possible, stored in plastic totes
The floor is quite sloped, so I needed to make the shelving adjustable height
I have a few different types of bins and totes and I wanted the shelving to be able to work with the lot of them
I wanted it to be built with a ‘build it once and don’t think about it again” mindset
I was making using of preexisting material (the shelves we had from the previous house so some of the dimensions and starting sizes were predetermined.


I went with hockey-puck feet because that’s just what I’m familiar with (for adjustable height). The rubber pucks also damped any vibration, are less likely to chip the floor paint and are cost-effective as far as shelving feet go. Something I wanted to add to this was some kind of a canned goods organizer: a means to automatically queue cans from oldest to newest. I kind of free-form built this, figuring out things as I went and just worked with the materials I had on hand.


![Leftover pieces of [thicker] hardboard](https://images.squarespace-cdn.com/content/v1/6020ac0b21a9b86f0577e29e/1664219793543-R50SPK00CSNEXVVWCJA3/DPN01414_squooshed.jpg)


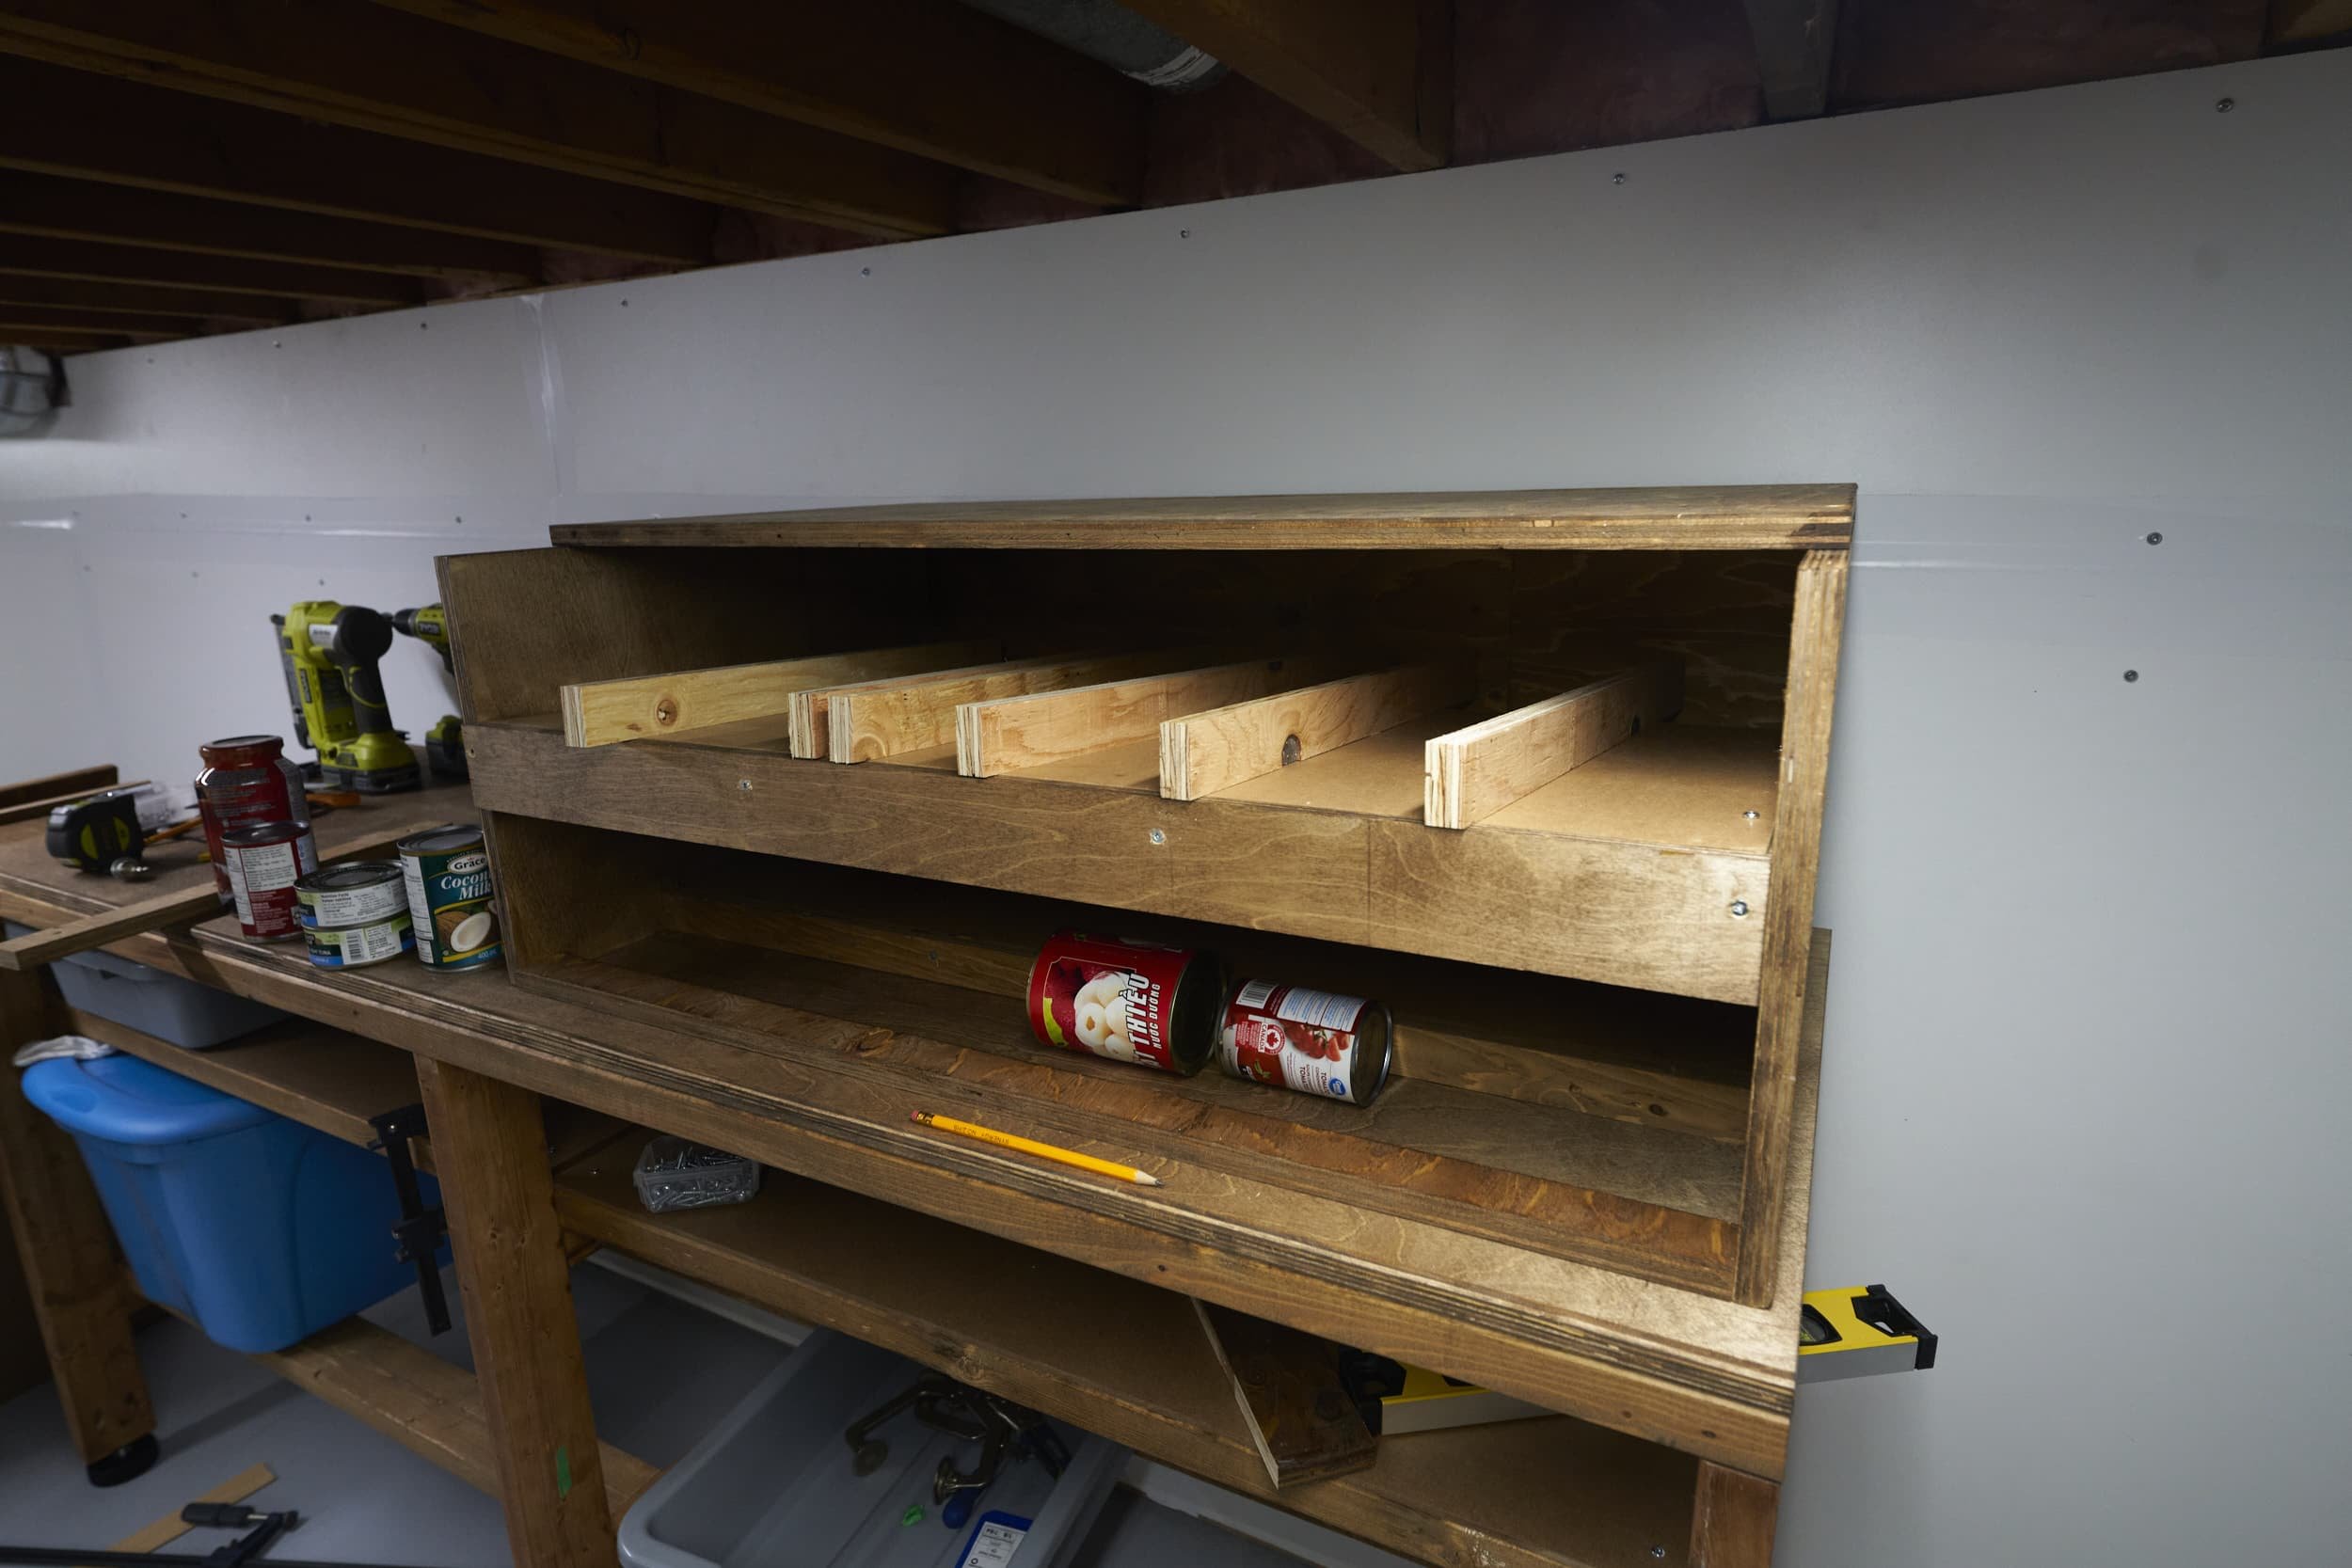


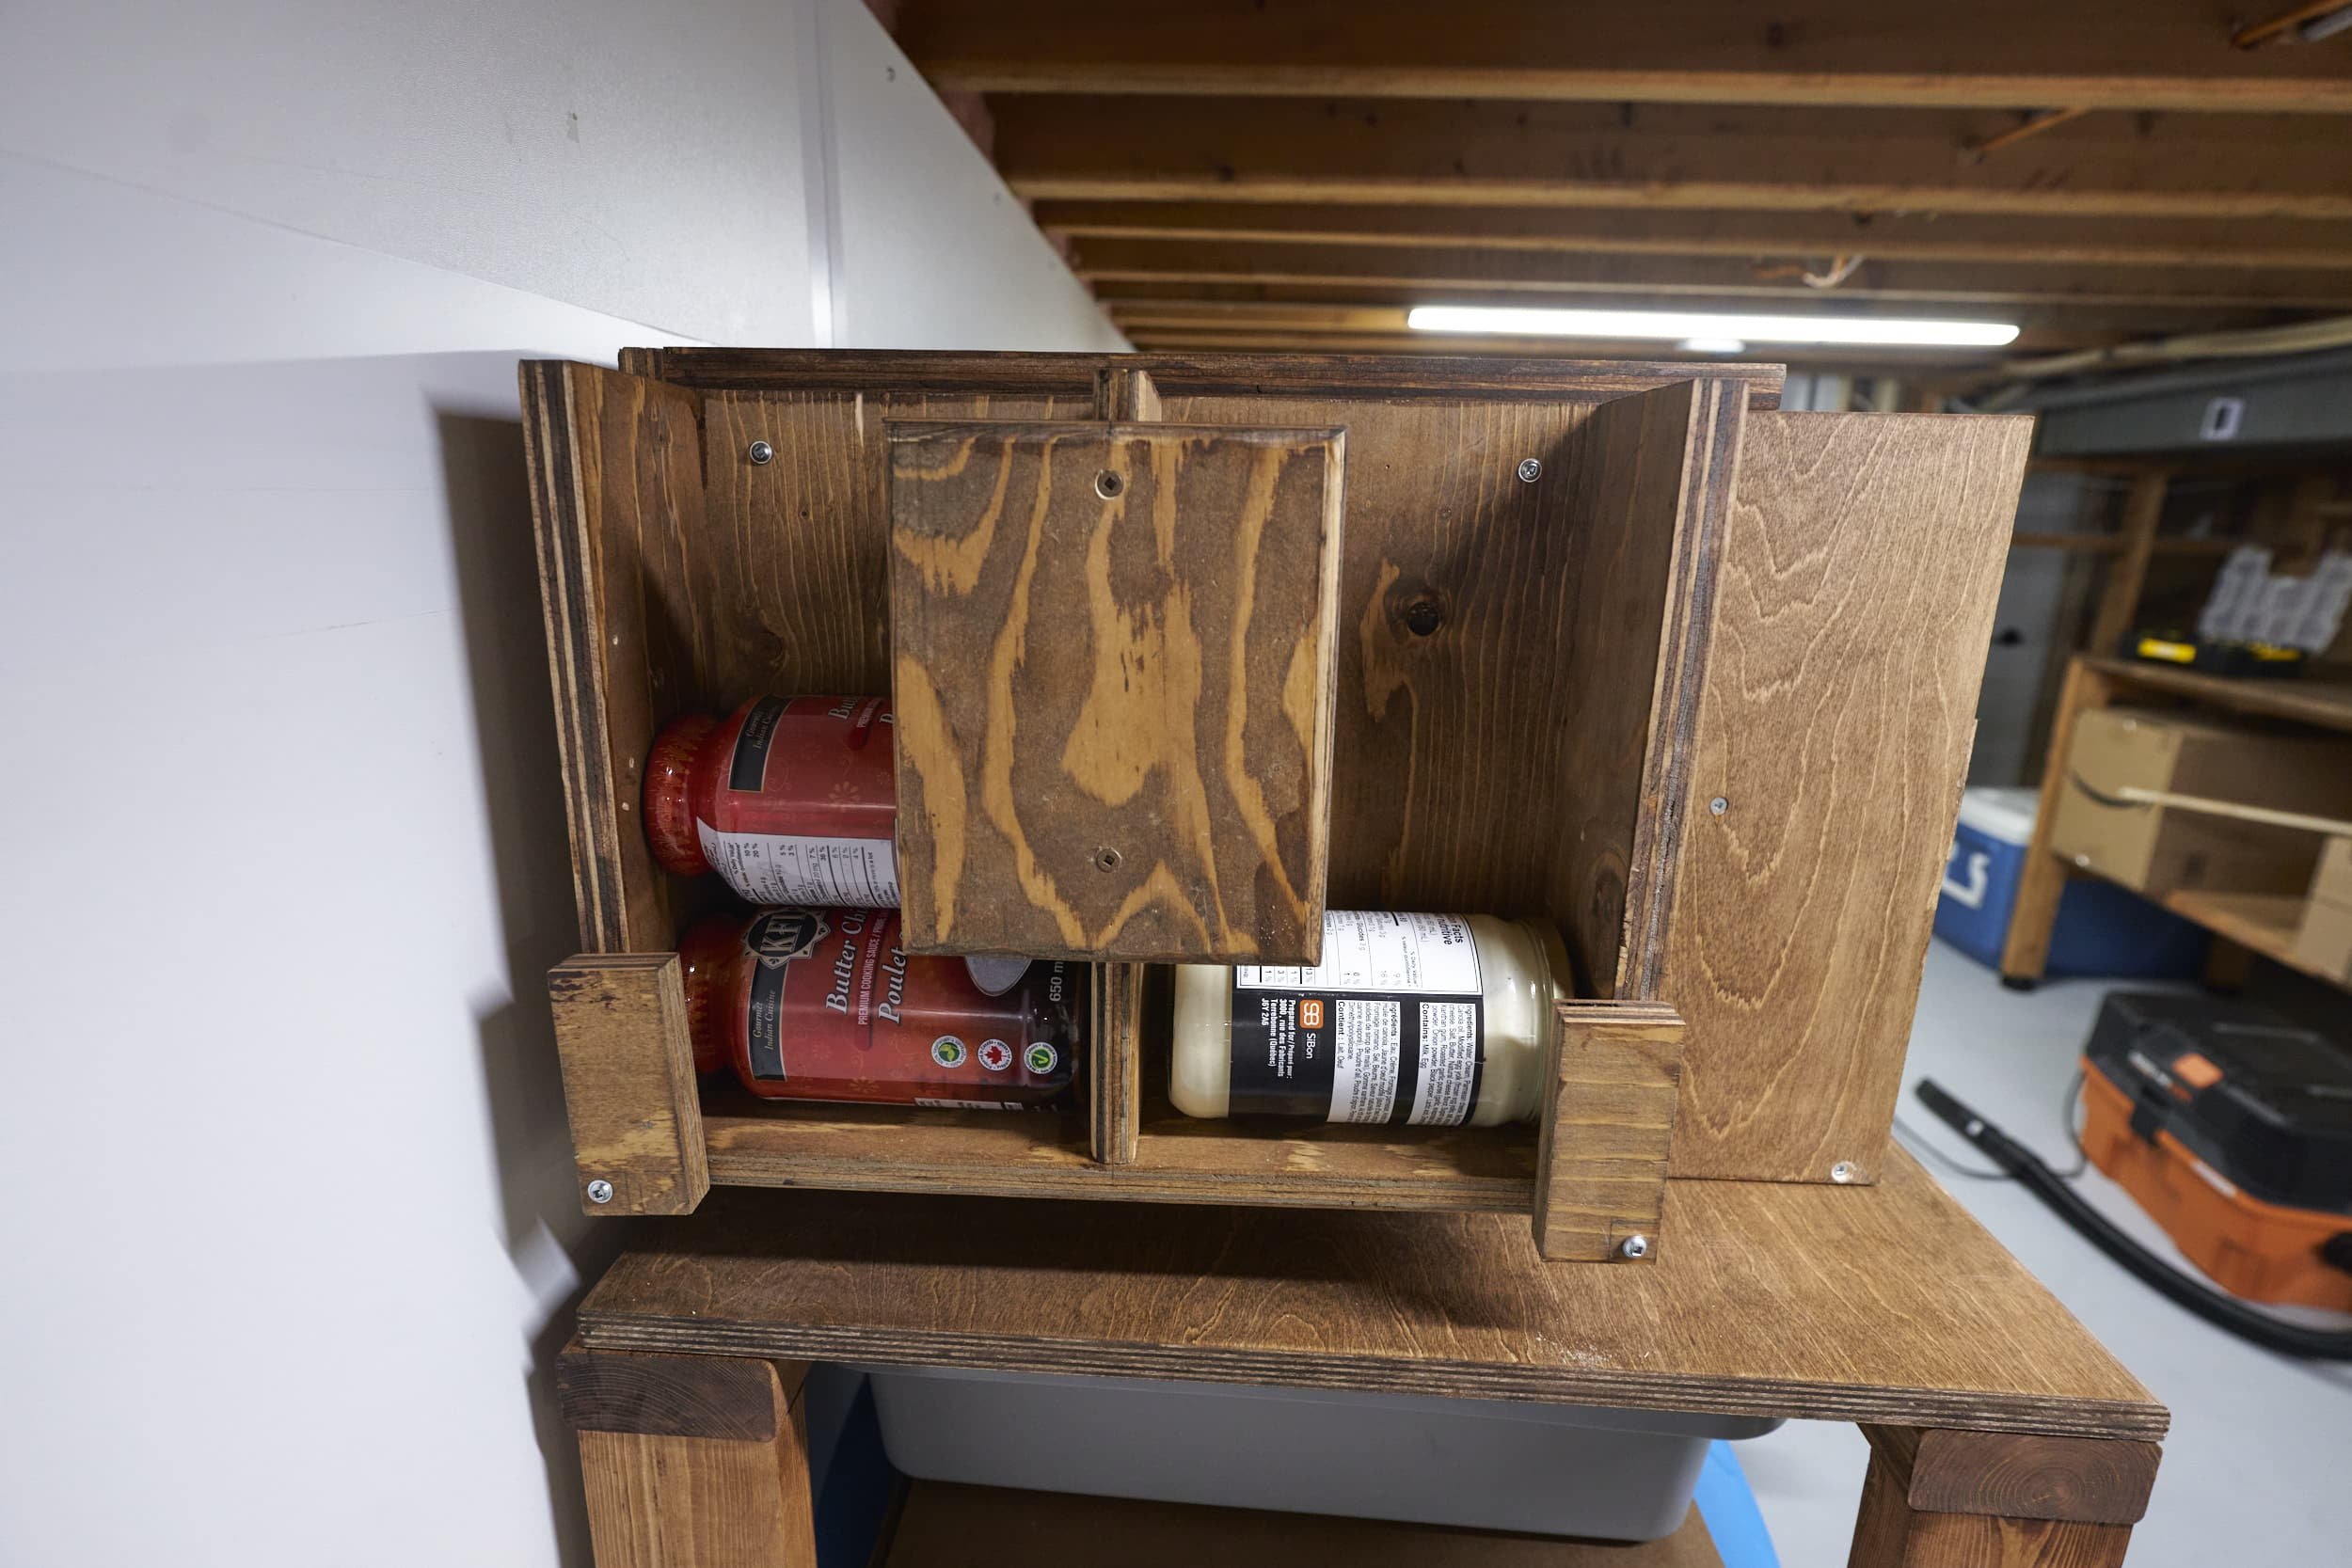
For a ‘design it as you go’ organizer, I’m okay with it, but I think I will ultimately come back and revisit this - especially the jar rotator.
Step 6 - Camping shelf
The camping shelf mostly follows the same design as the pantry shelf but just inset deeper to accommodate the larger totes I use for camping. Using hardboard to sheath the shelf, there is an out-of-sight cubby on the backside where I can store the tent and popup shelter. After I got it leveled, I ended up attaching this to the studs. Due to the additional depth of this shelf, I ended up getting some plywood to make the top flushed to the back but otherwise, all the materials, again were just reusing what I had broken down from other shelves previously.


Step 7 - Storage shelving
Now that the special storage benches are done, I wanted to make some generic shelves that targeted storing storage totes. For these shelves, I was mostly using up materials I had on hand and focused on keeping the shelves super strong; anchoring the shelves to the wall essentially eliminated racking.


The individual shelves I had bought many years back from a store-closing sale - it’s essentially laminated particle board so the skeletal bracing under the shelf and anchoring to the wall goes a long way to make it much stiffer. I made two of these shelves, to go on each side of the plumbing bits and made sure to leave plenty of room around that area in case we ever had to do work there.
Step 8 - Paint shelving
One awkward space in this are is underneath the stairs: it’s awkward to get into that space and get stuff in and out and there isn’t a whole lot that can fit in that space! One thing we can keep there though, are paint supplies and such.


Two things to note:
I cut a notch on the right hand side so that I can get my finger in there to pop the drawer slide off, if needed. I had considered putting the drawer slide on the top surface of the floor member: that would solve the gap problem and would be prettier (no need for a notch) but, there’s no way to reach under there to disengage the slides if I ever needed to get the shelf out.
The top shelf is not screwed down, this lets me just lift the panel off if I ever need to get back there. The supports on the sides are anchored into the studs and the wall respectively
Step 9 - Finishing touches
There are a few small finishing touches I added:

Motion triggered lighting
The light switch for this space is around a blind corner so it’s not a great candidate for a motion trigger and one of the challenges with motion-switches is figuring out how to turn off the lights. Generally speaking, they turn off after not detecting motion for a specific period of time. Due to the shape of the room and position of the outlet, it’s quite possible to be legitimately in that space and out of sight of the motion sensor which would result in being plunged into darkness. Many motion lights can be configured to automatically turn-on but to only turn -off manually. This would solve that problem — except my wife is used to lights automatically turning off everywhere else in the house..
In the end, I went with a cheap trouble-light that I connected to a motion controlled outlet: when the door is opened, there is a kick of light that is enough to grab something quick from the pantry and all without firing up the big lights. If we’re in there for a longer period of time, then we can suffer the horrifying thought of turning the lights on manually.

Battery powered lighting
This basement space is very well lit and has the convenience of having a splash of motion activated lighting, but what if there is a power outage (and we happen to be working in there with stuff sprawled all over the floor)? We’ve actually had a few power outages in this area so it’s actually a possibility.
I mounted a few battery powered motion lights along the wall to handle provide lighting independent of the main (and entrance light). Instead of using the ‘permanent’ double-sided tape, I opted to hang these lights using picture command hooks which allow me to cleanly reposition them if I change my mind down the road.


Additional fill lighting
This is a fairly large space and I probably could have used a few more 4-foot utility lights to even out the light but I wanted to minimize lighting purchases because the existing lighting in this space is 4000K rather than the more common (and in my opinion, superior) 5000K. I definitely didn’t want to mix different color temperatures because - gah.
I was able to find a few inexpensive and small light bars to provide some fill lighting: in particular the paint storage area under the stairs and the camping supplies station.

Better late than never…
After suffering through clearing out the space, scrubbing the floor multiple times, building shelving and loading everything back into this space — partially hunched over, I caved and got around to buying a rolling stool.
It is not a great stool at all. Full. stop. This one pictured was actually my second copy — the receiver in the base where you install the piston was so bent out of shape, I just couldn’t ignore it so I had to return it. My second copy is okay and even though it’s supposed to be a cheap little rolling stool, part of me feels like I’d be so much happier if I just swapped out for a Dewalt rolling stool…
That being said, it’s a stool that doesn’t see much use, let alone extended use so it’s just fine for this space.
Step 10 - Future improvements
This project went through a bit of a rollercoaster of progress: I actually got the majority of this done in the summer but then it languished for a few months with no progress: I lost motivation to work on it and/or buy stuff for the it. There are a few loose ends I’d like to tie up and some improvements, both big and small I’d like to revisit in a few months as I get to know this space and get a feel for it’s quirks:
I originally planned for the food station to use four 10-gallon Rubbermaid Roughneck totes on the ground level but currently only have one tote allocated. For the time being, we don’t need any additional totes here but that may change as the food station gets ‘lived in’ more
Near the back left of the storage space, we have ducting that drops down to a depressing 39” of clearance — I bump into that almost every damn time I work back there so I’d like to build a carousel or shelf or something that acts as a visual obstruction so that psychologically encourages me to walk around it. Right now, I intentionally pile some totes on the floor there as an obstacle
I don’t really like my can rotator at all — it’s okay but it feels needlessly bulky. I may revisit it or alternatively, I might look at a more flexible rotator (which supports tomato cans) or perhaps a system that only stores small cans and then I can figure out something else for the big cans
I have some bins in the back that are truly long term archive and I don’t need easy access to them (meaning each bin doesn’t need to be on its own dedicated shelf) but at the same time, I’d like to make it somewhat easy to roll in and out. My plan is to build a larger custom rolling platform to stack all of these bins on so I can pull them in and out from the corner a bit more easily
Of course, like every ‘dumping ground’ basement, we have a corner dedicated to “stuff to deal with later” so at some point, I’d like to deal with that too. There are some additional ‘stations’ I would like to add to this space (i.e., disaster prep) so I’ll definitely revisit this space in the future.
Closing thoughts
This project has been a success: I’ve been living in this space so the incremental changes have all blurred together, but after stepping back to look at the before and after photos, the whole space is a lot nicer all around. Everything is well lit, there are the beginnings of organization and most things have a home and most importantly, I’m definitely not tripping over things! As a bonus, I was able to make use of the disassembled shelves I had built previously, making it worth the extra effort to disassemble them and move them to this place.
For the time being, I just need to live with this space for a bit to see what additional tweaks I need to make to the space.


How much did this all cost?
This is tricky because I already had almost all of the materials that I had bought long time ago; given the price of building materials now - for example, all of the 2x4s I bought for $2.30 per stick (!!). Out of curiosity, I did keep the receipts for this project and
Walls: $283
4 sheets of hardboard @ $77 (I happened to get white-hardboard for the price of regular hardboard)
2 bundles of insulation @ $138 (although I didn’t end up using both bundles)
Vapor barrier @ $33 (barely used this but the roll I bought was the cheapest I could get)
Blue sheathing tape @ $13
White tape that I used to clean up the seams @ $22
Floor: $143
Scrub brush, TSP, muriatic acid @ $48 (didn’t use all of this)
Concrete paint @ $95
Additional stuff: $223
3 fill lights @ $65
1 rolling stool @ $30
A whole bunch of black totes (I didn’t use all of the ones I bought) @ $26
1 sheet of 3/4 plywood @ $76
3x battery powered motion lights @ $26
Grand total: $649 of ‘new expenses’
I already had almost all of the materials, tools and supplies to do this project: the existing 2x4s, hardboard, shelving, lighting, etc. so this project was a LOT cheaper than it would have been if I had to buy everything from scratch. I had hired an electrician to get power out to my shop and as a prerequisite to do that work, he ran some outlets for me to in this space as well - I already had the lights and materials needed for that so I didn’t really think to include his time into this.
Product links may be affiliate links: MinMaxGeek may earn a commission on any purchases made via said links without any additional cost to you.